Configure Databricks SQL Integration (Public Preview)
Audience: System Administrators
Content Summary: This page provides a tutorial for enabling the native Databricks SQL integration in Immuta. For an overview of the integration, see the Databricks SQL Overview documentation. Native SQL with Databricks SQL is currently in Public Preview. Please provide feedback on any issues you encounter, as well as insight regarding how you would like this feature to evolve in the future.
Prerequisites
- A functional Databricks SQL environment: For guidance in setting up and using a Databricks SQL environment, see the Get started with Databricks SQL guide in the Databricks documentation.
- Databricks personal access token: Your organization's SQL Analytics administrator must generate a Databricks personal access token that will allow users to authenticate to the Databricks REST API and Immuta to connect to SQL endpoints. Databricks will only display this personal access token once, so be sure to copy and save it. If an administrator does not generate the token, it will not carry appropriate privileges to allow Immuta to create the Immuta database inside Databricks SQL when the integration is enabled and an error will be displayed in the Immuta UI.
1 - Enable Databricks SQL in Immuta
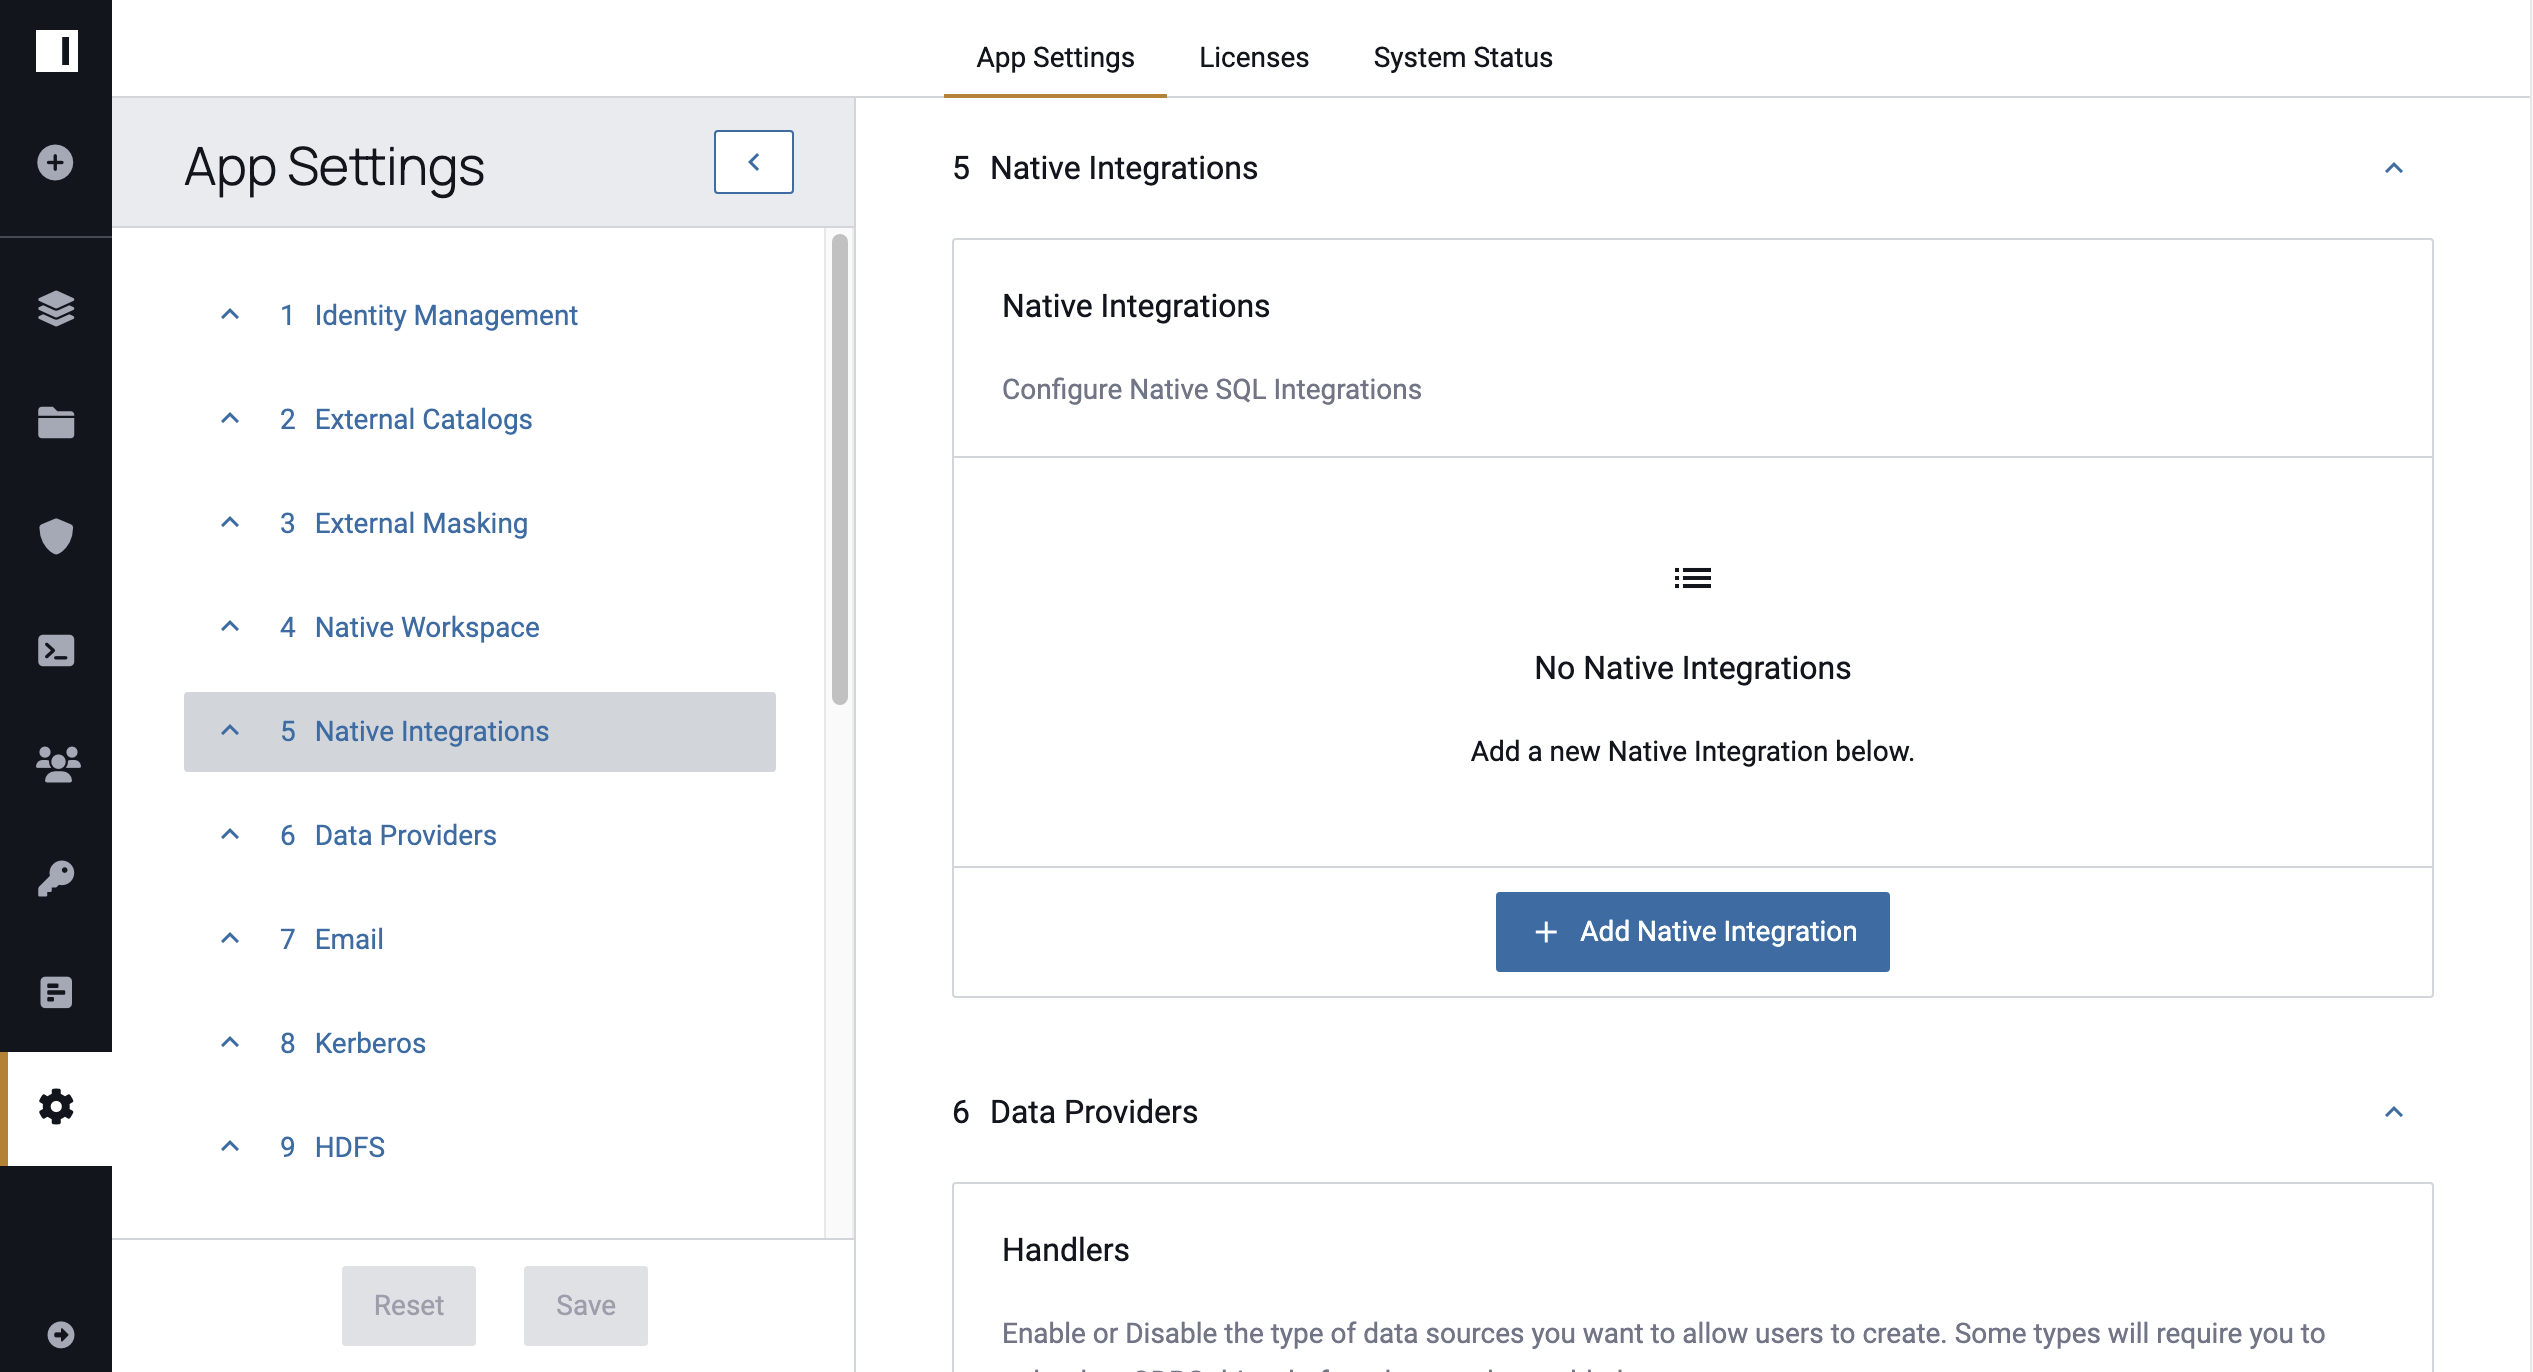
- Log in to Immuta and click the App Settings icon in the left sidebar.
-
Click Native Integrations in the Configuration panel on the left.
-
Click + Add Native Integration and select Databricks SQL (Public Preview) from the dropdown menu.

-
In Databricks, navigate to the Databricks SQL page in your Databricks workspace, click Endpoints, and then click the name of the SQL Analytics endpoint you want to configure in Immuta.
-
Use the information on the Connection Details page to fill in the following information in the Immuta UI:
- Host: Use the Server Hostname from Databricks (e.g.,
https://company.cloud.databricks.com) - HTTP Path: Use the HTTP Path from Databricks (e.g.,
/sq/1.0/endpoints/fff6d6eb3a9718cf9)
- Host: Use the Server Hostname from Databricks (e.g.,
-
The value in the Immuta Database field will be the name of the database that Immuta creates in Databricks SQL Analytics. Opt to change the default name, provided it doesn’t introduce a naming collision in your Databricks environment.
-
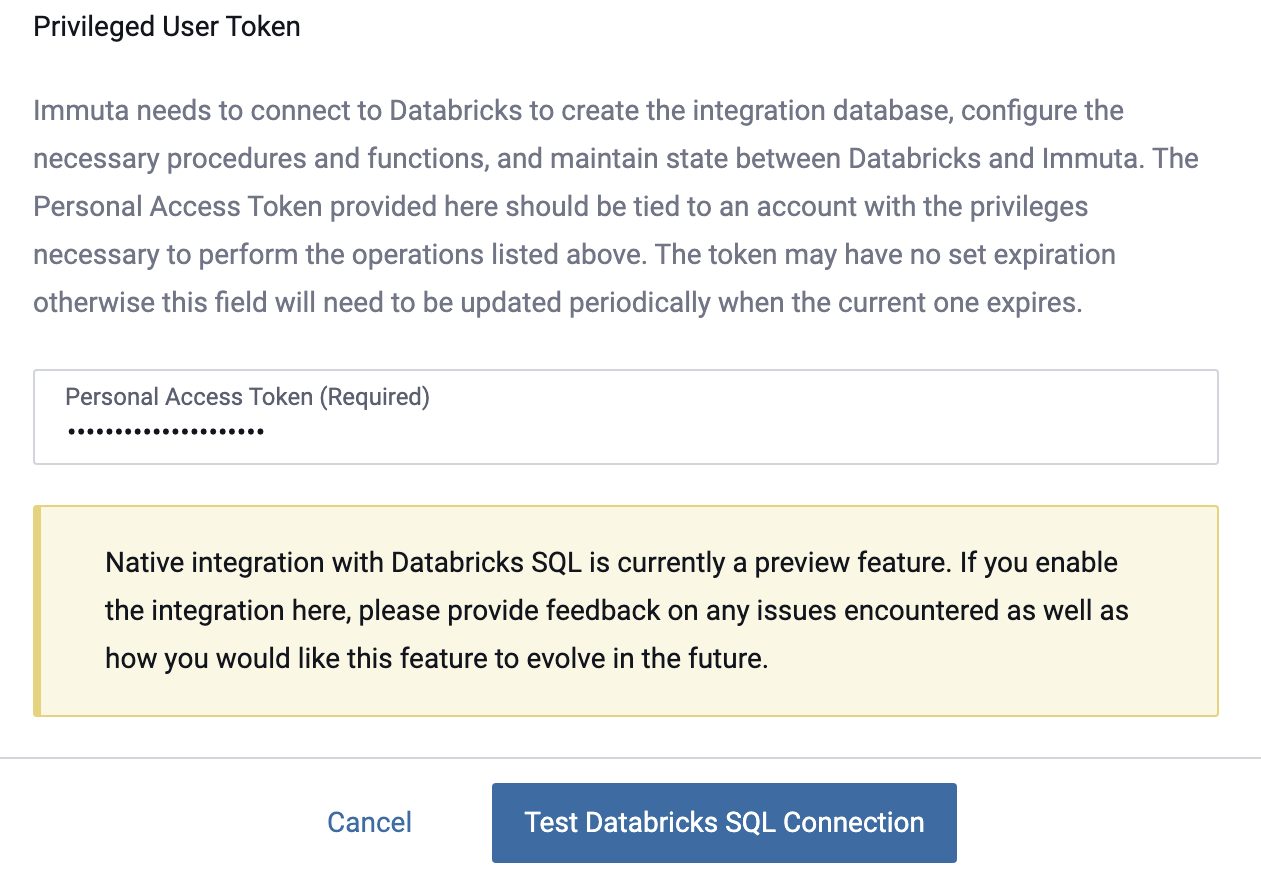
Enter the personal access token that was generated by a SQL Analytics administrator (not a user), and then click Test Databricks SQL Connection.
-
Click Save. Note that if you enter a personal access token that was generated by a SQL Analytics user, you won't be able to save the configuration successfully.
- In Databricks SQL, revoke all privileges from users on databases that contain the backing tables in your SQL Endpoint. This will force users to go through the protected Immuta database to access data.
Once Databricks SQL has been successfully enabled in Immuta, Immuta will perform the following automated tasks:
- Create an Immuta database.
- Grant usage and select privileges to users on the Immuta database.
- Create a system table on the Immuta database called
<immuta_database_name>.__immuta_profiles. - Deny SELECT on
<immuta_database_name>.__immuta_profilesto users. - Create a view called
<immuta_database_name>.__immuta_user, which is equivalent toSELECT * FROM <immuta_database_name>.__immuta_profiles WHERE immuta__userid = current_user.
2 - Add Databricks SQL Users
Add your SQL Analytics user accounts in Databricks SQL and give them access to the SQL Analytics endpoint as you normally would in Databricks.
3 - Add a Databricks Data Source in Immuta
Warning
Immuta requires an underlying data source in SQL Analytics to have an owner. To test if an object has an owner,
run SHOW GRANT ON <object-name>. If you do not see an entry with ActionType OWN, the object does not have
an owner. When table access control is disabled on a cluster or SQL endpoint, owners are not registered when a
database, table, or view is created. You must either enable table access control on your cluster and SQL endpoint,
or an admin must assign an owner to the object.
To assign an owner to the object, run the following command:
ALTER TABLE <object-name> OWNER TO `<user-name>@<user-domain>.com`;
Edit a Databricks SQL Integration
- Click the App Settings icon in the left sidebar.
- Navigate to the Native Integrations section and click the down arrow next to the Databricks SQL Integration.
- Edit the field you want to change. Note any field shadowed is not editable, and the integration must be disabled and re-installed to change it.
- Click Validate Credentials.
- Click Save.
- Click Confirm.
Remove a Databricks SQL Integration
- Click the App Settings icon in the left sidebar.
- Navigate to the Native Integrations section and click the down arrow next to the Databricks SQL Integration.
- Click the checkbox to disable the integration.
- Enter the username and password that were used to initially configure the integration and click Validate Credentials.
- Click Save.
- Click Confirm.
To add Databricks data sources in Immuta, follow this tutorial.