Snowflake Lineage Tag Propagation
Private preview
This feature is only available to select accounts. Reach out to your Immuta representative to enable this feature.
Snowflake column lineage specifies how data flows from source tables or columns to the target tables in write operations. When Snowflake lineage tag propagation is enabled in Immuta, Immuta automatically applies tags added to a Snowflake table to its descendant data source columns in Immuta so you can build policies using those tags to restrict access to sensitive data.
Snowflake Access History tracks user read and write operations. Snowflake column lineage extends this Access History to specify how data flows from source columns to the target columns in write operations, allowing data stewards to understand how sensitive data moves from ancestor tables to target tables so that they can
- trace data back to its source to validate the integrity of dashboards and reports,
- identify who performed write operations to meet compliance requirements,
- evaluate data quality and pinpoint points of failure, and
- tag sensitive data on source tables without having tag columns on their descendant tables.
However, tagging sensitive data doesn’t innately protect that data in Snowflake; users need Immuta to disseminate these lineage tags automatically to descendant tables registered in Immuta so data stewards can build policies using the semantic and business context captured by those tags to restrict access to sensitive data. When Snowflake lineage tag propagation is enabled, Immuta propagates tags applied to a data source to its descendant data source columns in Immuta, which keeps your data inventory in Immuta up-to-date and allows you to protect your data with policies without having to manually tag every new Snowflake data source you register in Immuta.
Data flow
- An application administrator enables the feature on the Immuta app settings page.
- Snowflake lineage metadata (column names and tags) for the Snowflake tables is stored in the metadata database.
- A data owner creates a new data source (or adds a new column to a Snowflake table) that initiates a job that applies all tags for each column from its ancestor columns.
- A data owner or governor adds a tag to a column in Immuta that has descendants, which initiates a job that propagates the tag to all descendants.
- An audit record is created that includes which tags were applied and from which columns those tags originated.
Snowflake access history view and Immuta lineage job
The Snowflake Account Usage ACCESS_HISTORY view contains column lineage information.
To appropriately propagate tags to descendant data sources, Immuta fetches Access History metadata to determine what column tags have been updated, stores this metadata in the Immuta metadata database, and then applies those tags to relevant descendant columns of tables registered in Immuta.
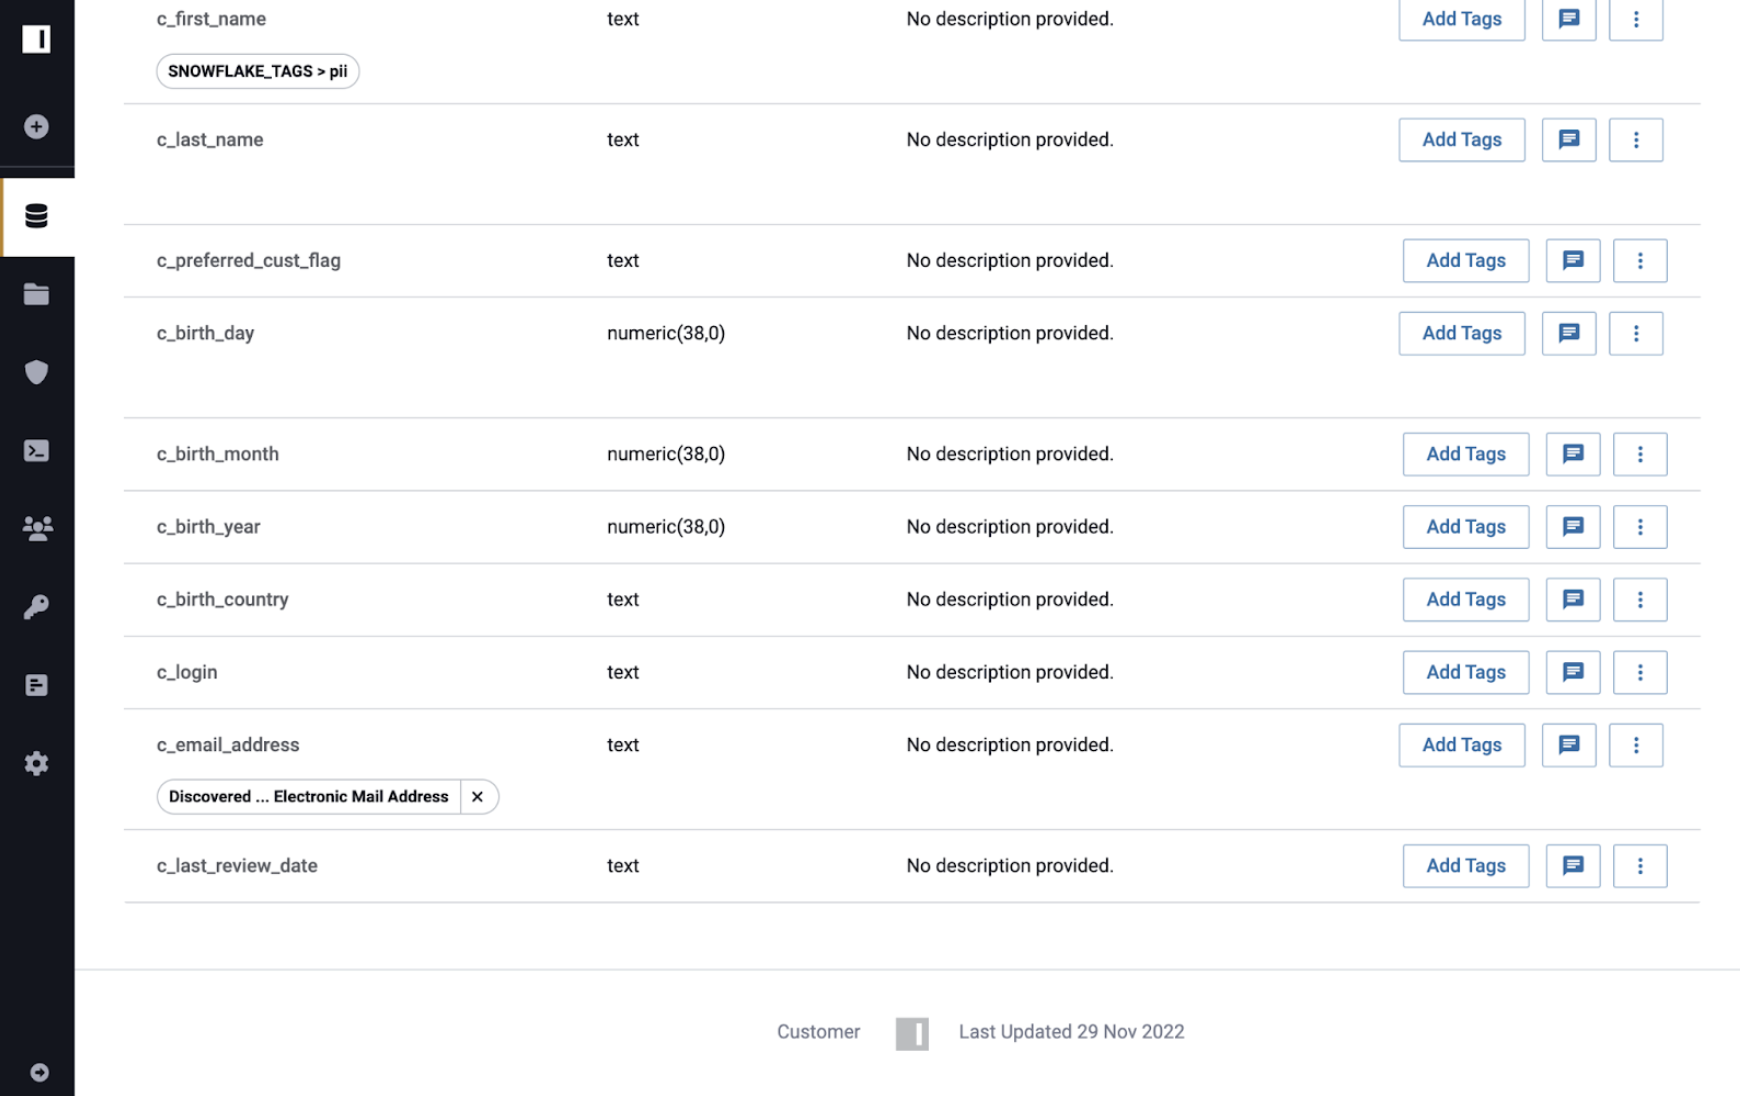
Consider the following example using the Customer, Customer 2, and Customer 3 tables that were all registered in Immuta as data sources.
- Customer: source table
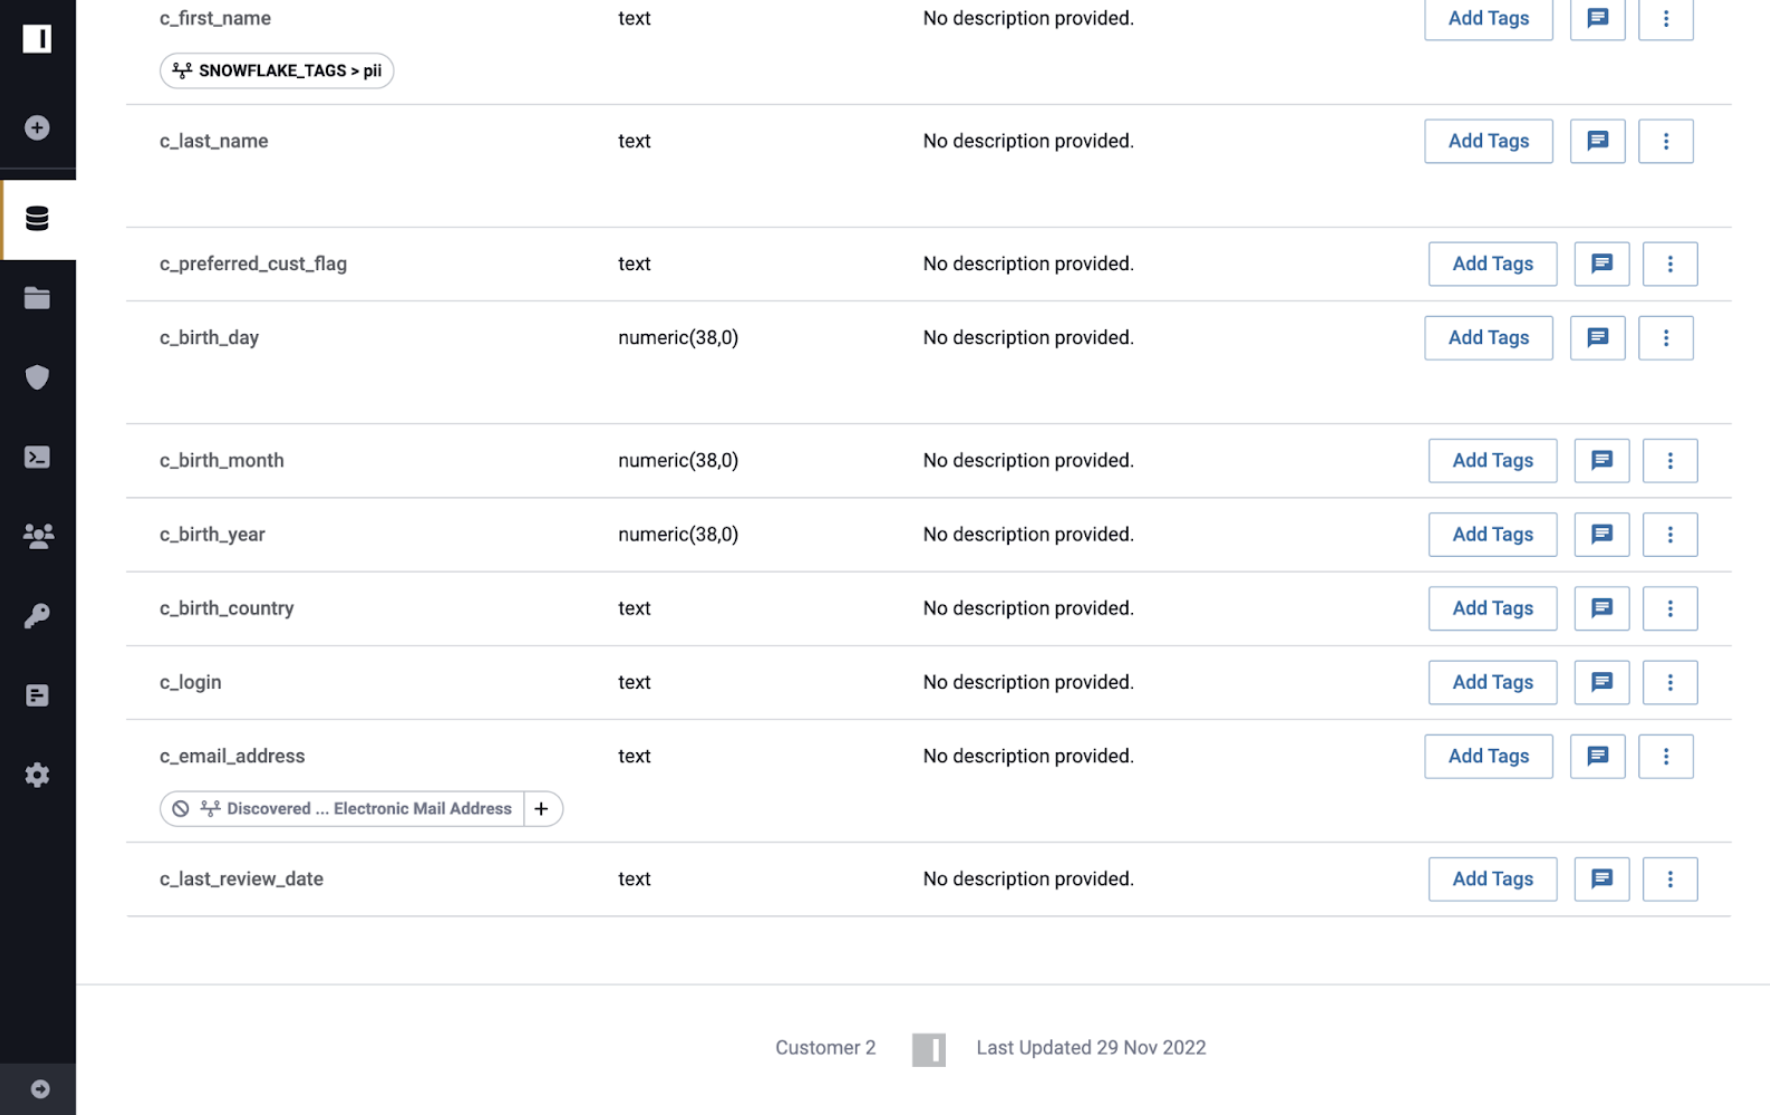
- Customer 2: descendant of Customer
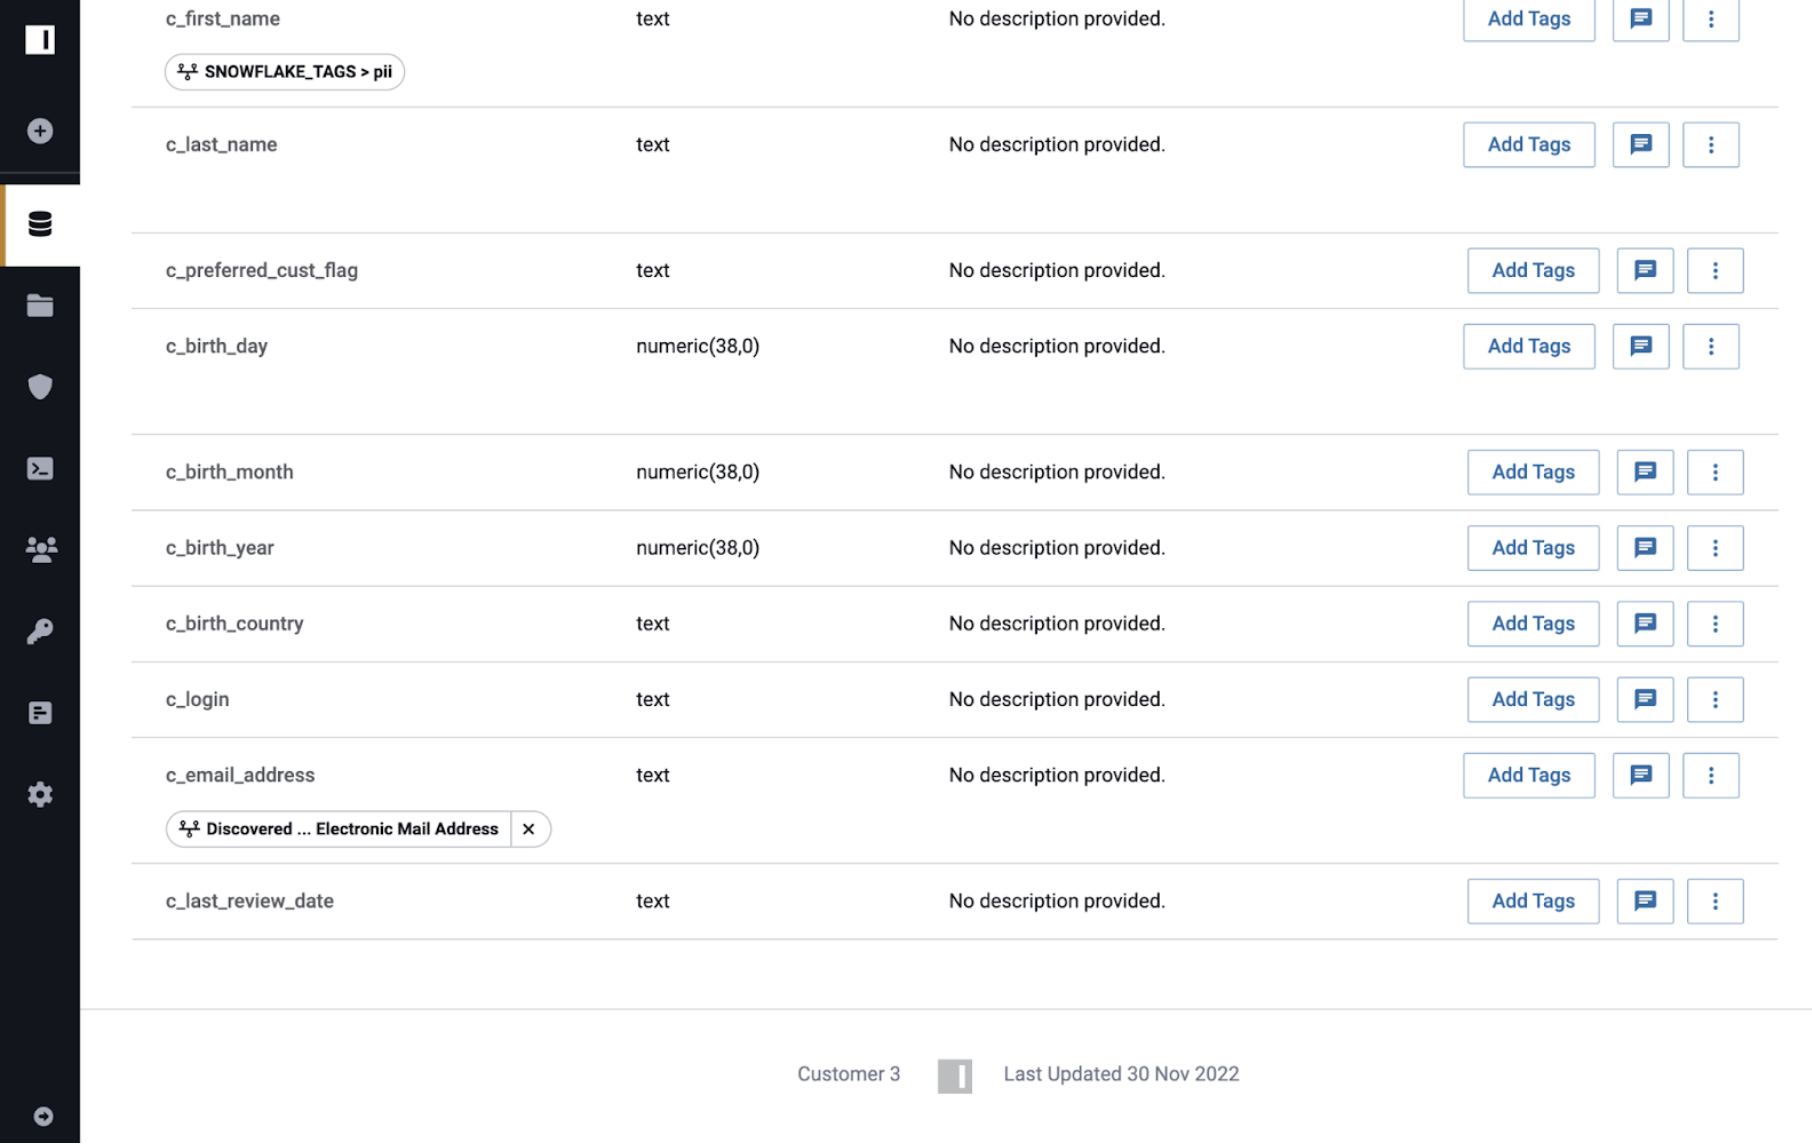
- Customer 3: descendant of Customer 2
If the Discovered.Electronic Mail Address tag is added to the Customer data source in Immuta,
that tag will propagate through lineage to the Customer 2 and Customer 3 data sources.
Data source registration
After an application administrator has enabled Snowflake lineage tag propagation, data owners can register data in Immuta and have tags in Snowflake propagated from ancestor tables to descendant data sources. Whenever new tags are added to those tables in Immuta, those upstream tags will propagate to descendant data sources.
By default all tags are propagated, but these tags can be filtered on the app settings page or using the Immuta API.
Managing tags
Lineage tag propagation works with any tag added to the data dictionary. Tags can be manually added, synced from an external catalog, or discovered by SDD. Consider the following example using the Customer, Customer 2, and Customer 3 tables that were all registered in Immuta as data sources.
- Customer: source table
- Customer 2: descendant of Customer
- Customer 3: descendant of Customer 2
Immuta added the Discovered.Electronic Mail Address tag to the Customer data source,
and that tag propagated through lineage to the Customer 2 and Customer 3 data sources.
Removing the tag from the Customer 2 table soft deletes it from the Customer 2 data source. When a tag is deleted, downstream lineage tags are removed, unless another parent data source still has that tag. The tag remains visible, but it will not be re-added if a future propagation event specifies the same tag again. Immuta prevents you from removing Snowflake object tags from data sources. You can only remove Immuta-managed tags. To remove Snowflake object tags from tables, you must remove them in Snowflake.
However the Discovered.Electronic Mail Address tag still applies to the Customer 3 data source because
Customer still has the tag applied. The only way a tag will be removed from descendant data sources
is if no other ancestor of the descendant still prescribes the tag.
If the Snowflake lineage tag propagation feature is disabled, tags will remain on Immuta data sources.
Sensitive data discovery
Sensitive data discovery will still run on data sources and can be manually triggered. Tags applied through sensitive data discovery will propagate as tags added through lineage to descendant Immuta data sources.
Snowflake lineage audit
Immuta audit records include Snowflake lineage tag events when a tag is added or removed.
The example audit record below illustrates the SNOWFLAKE_TAGS.pii tag successfully propagating
from the Customer table to Customer 2:
{
  "id": "c8e020cb-232c-4ba9-a0d8-f3a84ba6808d",
  "dateTime": "1670355170336",
  "month": 1475,
  "profileId": 1,
  "userId": "immuta_system_account",
  "dataSourceId": 2,
  "dataSourceName": "Customer 2",
  "count": 1,
  "recordType": "nativeLineageDataSourceTagUpdate",
  "success": true,
  "component": "dataSource",
  "extra": {
    "sourceColumn": {
      "nativeColumnName": "\"MY_DATABASE\".\"PUBLIC\".\"CUSTOMER\".\"C_FIRST_NAME\"",
      "dataSourceId": 1,
      "columnName": "c_first_name"
    },
    "dataSourceId": 2,
    "columnName": "c_first_name",
    "tagPropagationDirection": "downstream",
    "tags": [
      {
        "name": "SNOWFLAKE_TAGS.pii",
        "source": "immuta-us-east-1"
      }
    ]
  },
  "newAuditServiceFields": {
    "actorIp": null,
    "sessionId": null
  },
  "createdAt": "2022-12-06T19:32:50.372Z",
  "updatedAt": "2022-12-06T19:32:50.372Z"
}
Limitations
- Without
tableFilterset, Immuta will ingest lineage for every table on the Snowflake instance. - Tag propagation based on lineage is not retroactive. For example, if you add a table, add tags to that table, and then run the lineage ingestion job, tags will not get propagated. However, if you add a table, run the lineage ingestion job, and then add tags to the table, the tags will get propagated.
- The native lineage job needs to pull in lineage data before any tag is applied in Immuta. When Immuta gets new lineage information from Snowflake, Immuta does not update existing tags in Immuta.
- There can be up to a 3-hour delay in Snowflake for a lineage event to make it into the
ACCESS_HISTORYview. - Immuta does not ingest lineage information for views.
- Snowflake only captures lineage events for
CTAS,CLONE,MERGE, andINSERTwrite operations. Snowflake does not capture lineage events forDROP,RENAME,ADD, orSWAP. Instead of using these latter operations, you need to recreate a table with the same name if you need to make changes. - Immuta cannot enforce coherence of your Snowflake lineage. If a column, table, or schema in the middle of the lineage graph gets dropped, Immuta will not do anything unless a table with that same name gets recreated. This means a table that gets dropped but not recreated could live in Immuta’s system indefinitely.
Configure Snowflake lineage tag propagation
Prerequisite
Contact your Immuta representative to enable this feature in your Immuta tenant.
Configure the Snowflake integration
- Navigate to the App Setting page and scroll to the Native Integration section.
- Click +Add Native Integration and select Snowflake from the dropdown menu.
- Complete the Host, Port, and Default Warehouse fields.
- Enable Native Query Audit.
- Enable Native Lineage and complete the following fields:
- Ingest Batch Sizes: This setting configures the number of rows Immuta ingests per batch when streaming Access History data from your Snowflake instance.
- Table Filter: This filter determines which tables Immuta will ingest lineage for. Enter a regular
expression that excludes
/from the beginning and end to filter tables. Without this filter, Immuta will attempt to ingest lineage for every table on your Snowflake instance. - Tag Filter: This filter determines which tags to propagate using lineage. Enter a regular expression
that excludes
/from the beginning and end to filter tags. Without this filter, Immuta will ingest lineage for every tag on your Snowflake instance.
- Opt to enable Automatically ingest Snowflake object tags.
- Select Manual or Automatic Setup and follow the steps in this guide to configure the Snowflake integration
Trigger Snowflake lineage sync job
Prerequisite
Authenticate with the Immuta API.
Trigger the lineage job
The Snowflake lineage sync endpoint triggers the native lineage ingestion job that allows Immuta to propagate Snowflake tags added through lineage to Immuta data sources.
- Copy the example and replace the Immuta URL and API key with your own.
-
Change the payload attribute values to your own, where
tableFilter(string): This regular expression determines which tables Immuta will ingest lineage for. Enter a regular expression that excludes/from the beginning and end to filter tables. Without this filter, Immuta will attempt to ingest lineage for every table on your Snowflake instance.batchSize(integer): This parameter configures the number of rows Immuta ingests per batch when streaming Access History data from your Snowflake instance. Minimum 1.lastTimestamp(string): Setting this parameter will only return lineage events later than the value provided. Use a format like 2022-06-29T09:47:06.012-07:00.
curl -X 'POST' \
    'https://www.organization.immuta.com/lineage/ingest/snowflake' \
    -H 'accept: application/json' \
    -H 'Content-Type: application/json' \
    -H 'Authorization: 846e9e43c86a4ct1be14290d95127d13f' \
    -d '{
    "tableFilter": "MY_DATABASE\\MY_SCHEMA\\..*",
    "batchSize": 1,
    "lastTimestamp": "2022-06-29T09:47:06.012-07:00"
    }'
Next steps
Once the sync job is complete, you can complete the following steps: