Configure an External Catalog
Audience: Application Admins
Content Summary: This page outlines how to connect an external catalog from the App Settings page.
For details on prerequisites and external catalogs with Immuta, see the External Catalog Pre-Configuration Checklist.
Link an Alation Catalog
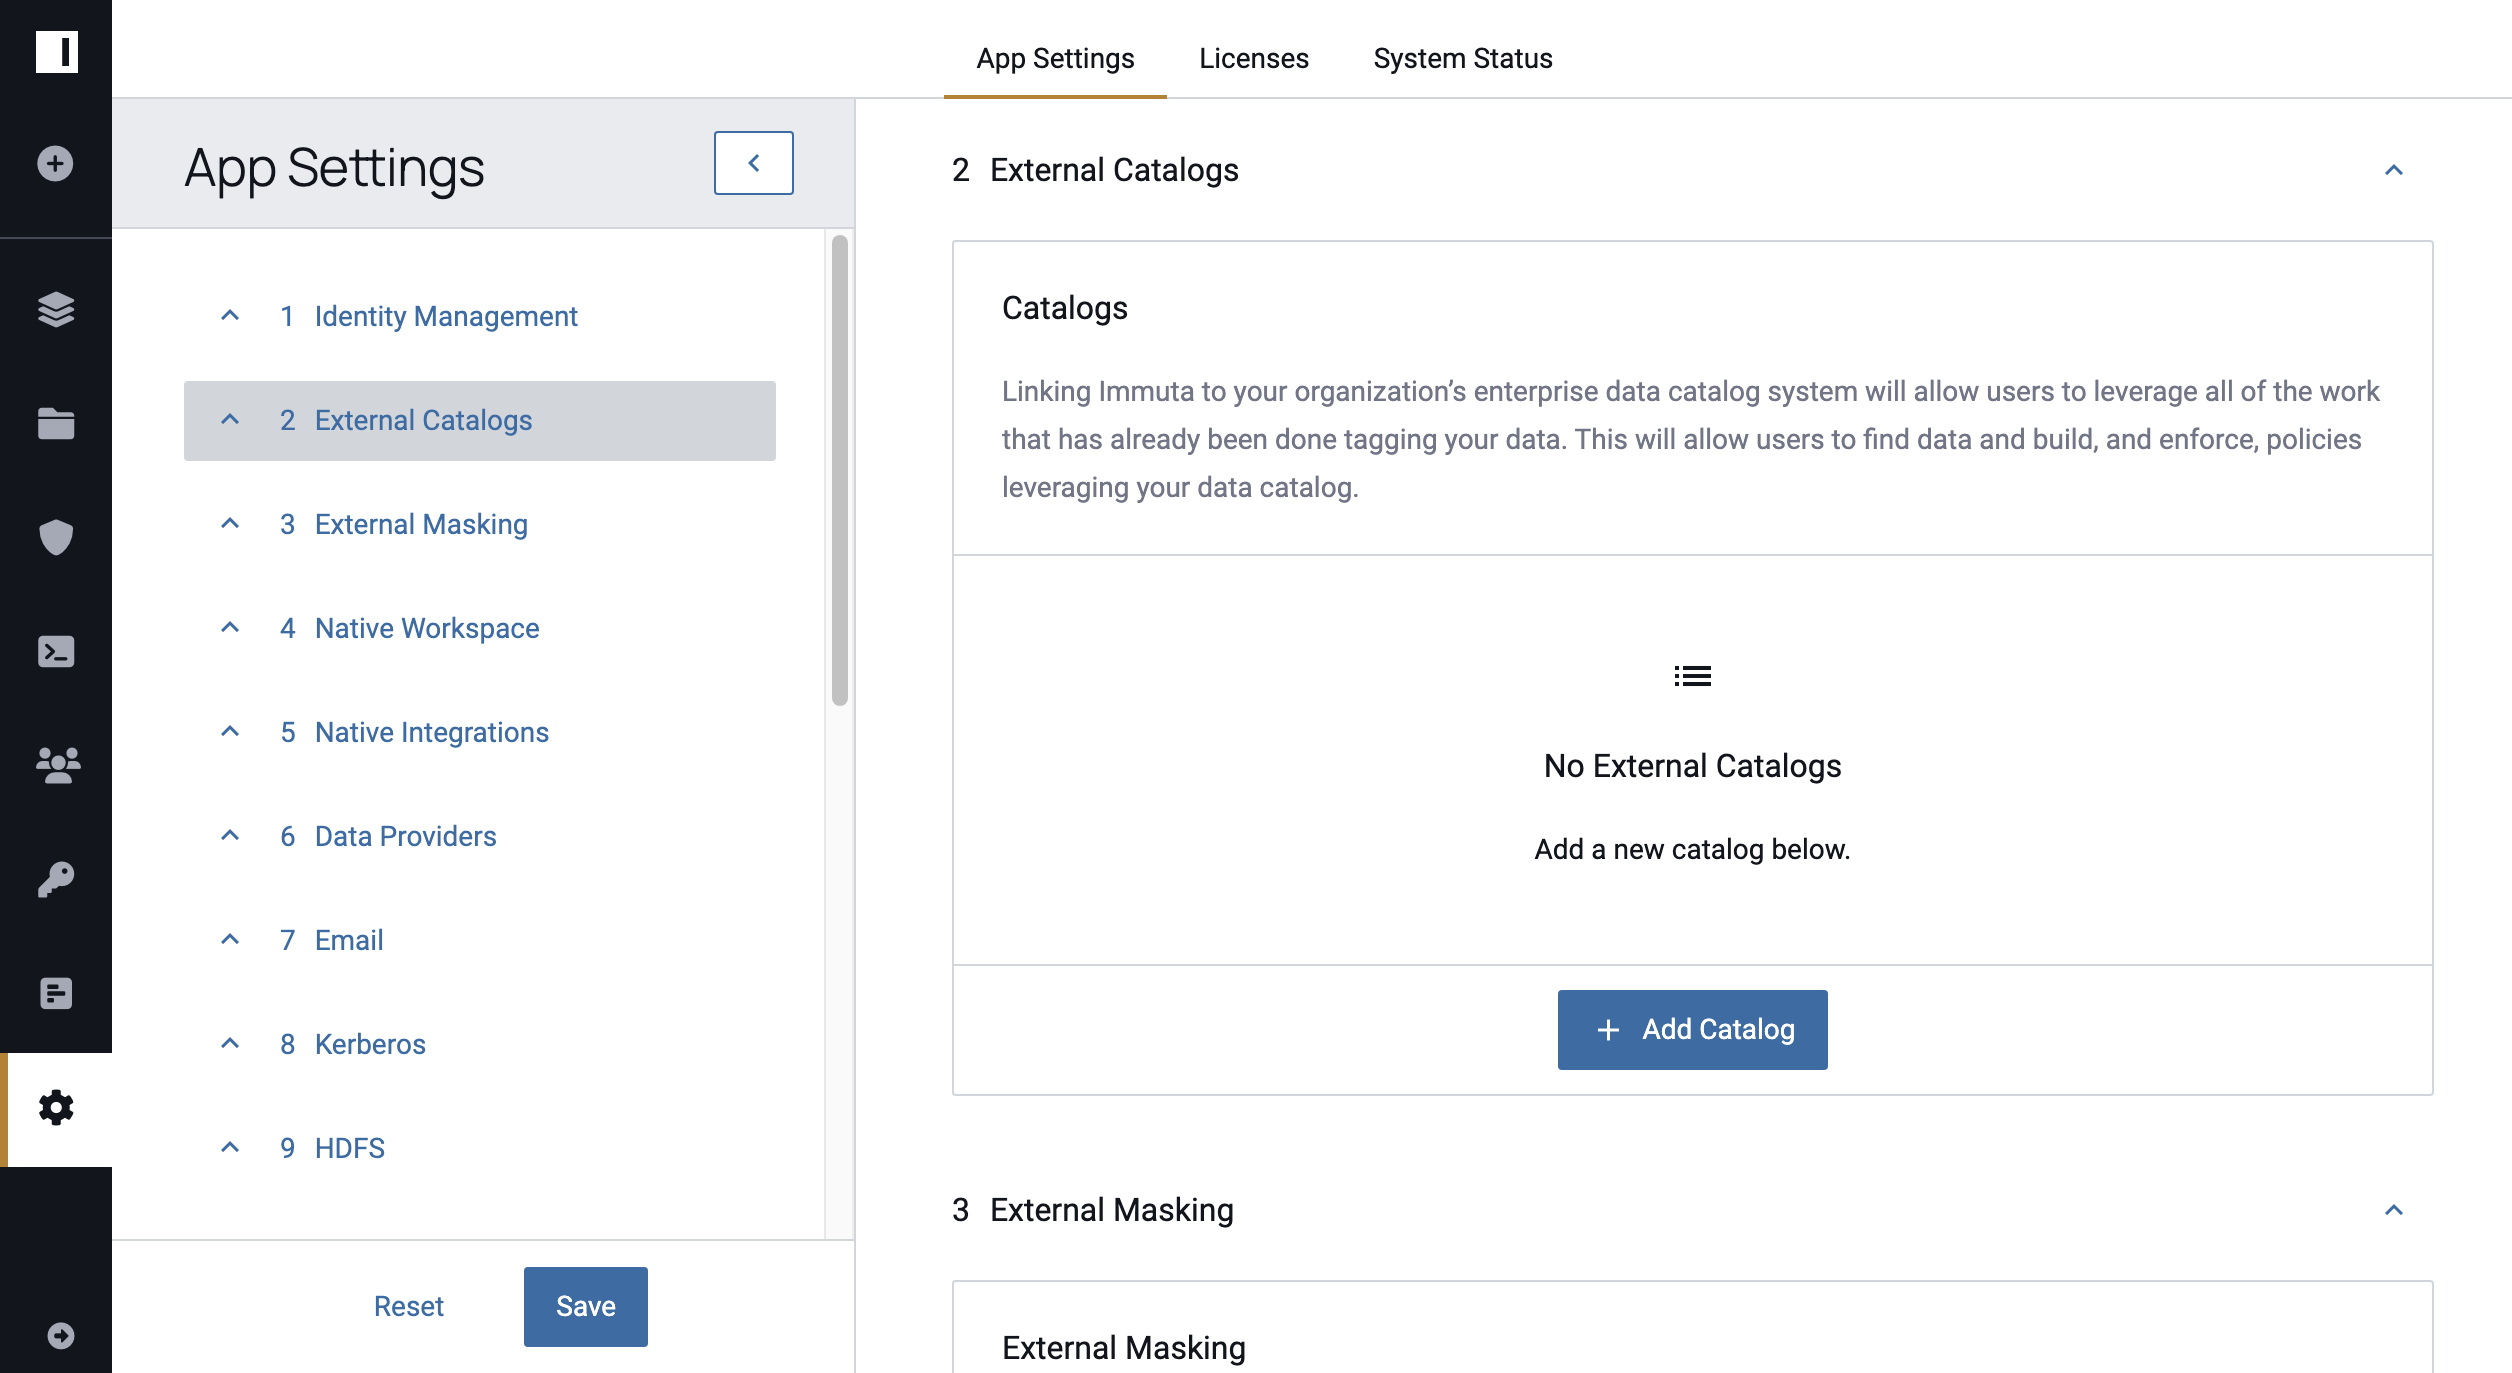
- Navigate to the App Settings page.
-
Scroll to 2 External Catalogs, and click Add Catalog.
-
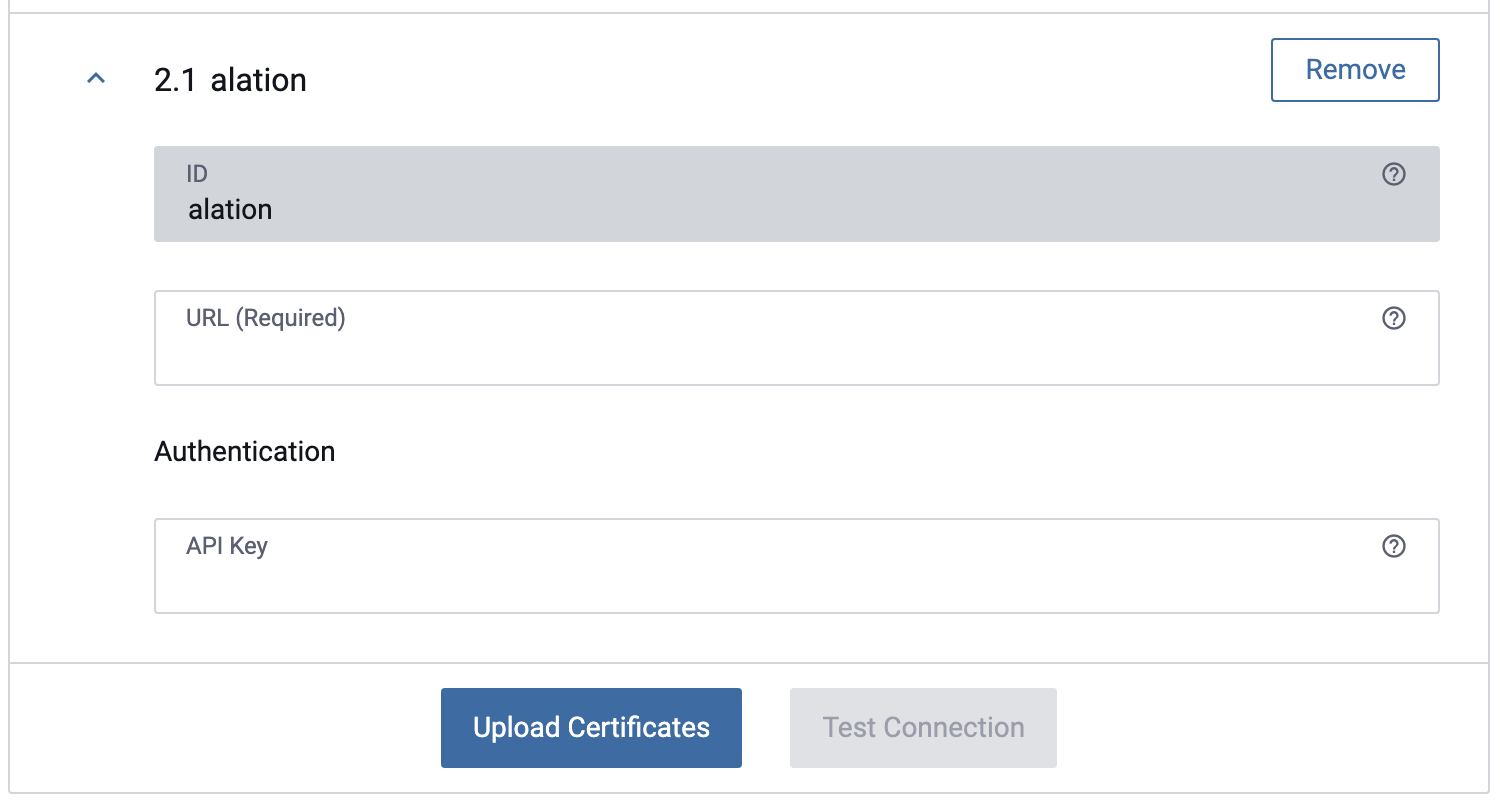
Enter a Display Name and select Alation from the dropdown menu.
-
Complete the URL and API fields.
-
Opt to select Upload Certificates.
- Upload the Certificate Authority, Certificate File, and Key File.
- Opt to enable Strict SSL by selecting the checkbox.
-
Click the Test Connection button.

-
Once the connection is successful, click Save.
Link a Collibra Catalog
- Navigate to the App Settings page.
-
Scroll to 2 External Catalogs, and click Add Catalog.
-
Enter the Display Name and select Collibra from the dropdown menu.
- Enter the HTTP endpoint of the catalog in the URL field.
-
Complete the Username and Password fields. Note: This is the username and the password that Immuta can use to connect to the external catalog.

-
Opt to Require the data source name in Collibra to contain both the schema and table name by selecting the checkbox.
- Complete the Asset Mappings modal to set which asset types in Collibra should align to Immuta's data sources and columns.
- Complete the Attributes as Tags modal to specify which Collibra attributes you would like to pull in as tags in Immuta.
- Opt to select Upload Certificates.
- Upload the Certificate Authority, Certificate File, and Key File.
- Opt to enable Strict SSL by selecting the checkbox.
-
Click the Test Connection button.
-
Once the connection is successful, click Save.
Link a Custom REST Catalog
Integrating a Custom REST Catalog service with Immuta requires implementing a REST interface. For details about the necessary endpoints that must be serviced, see the Custom REST Catalog Interface Endpoints page.
- Navigate to the App Settings page.
-
Scroll to 2 External Catalogs, and click Add Catalog.
-
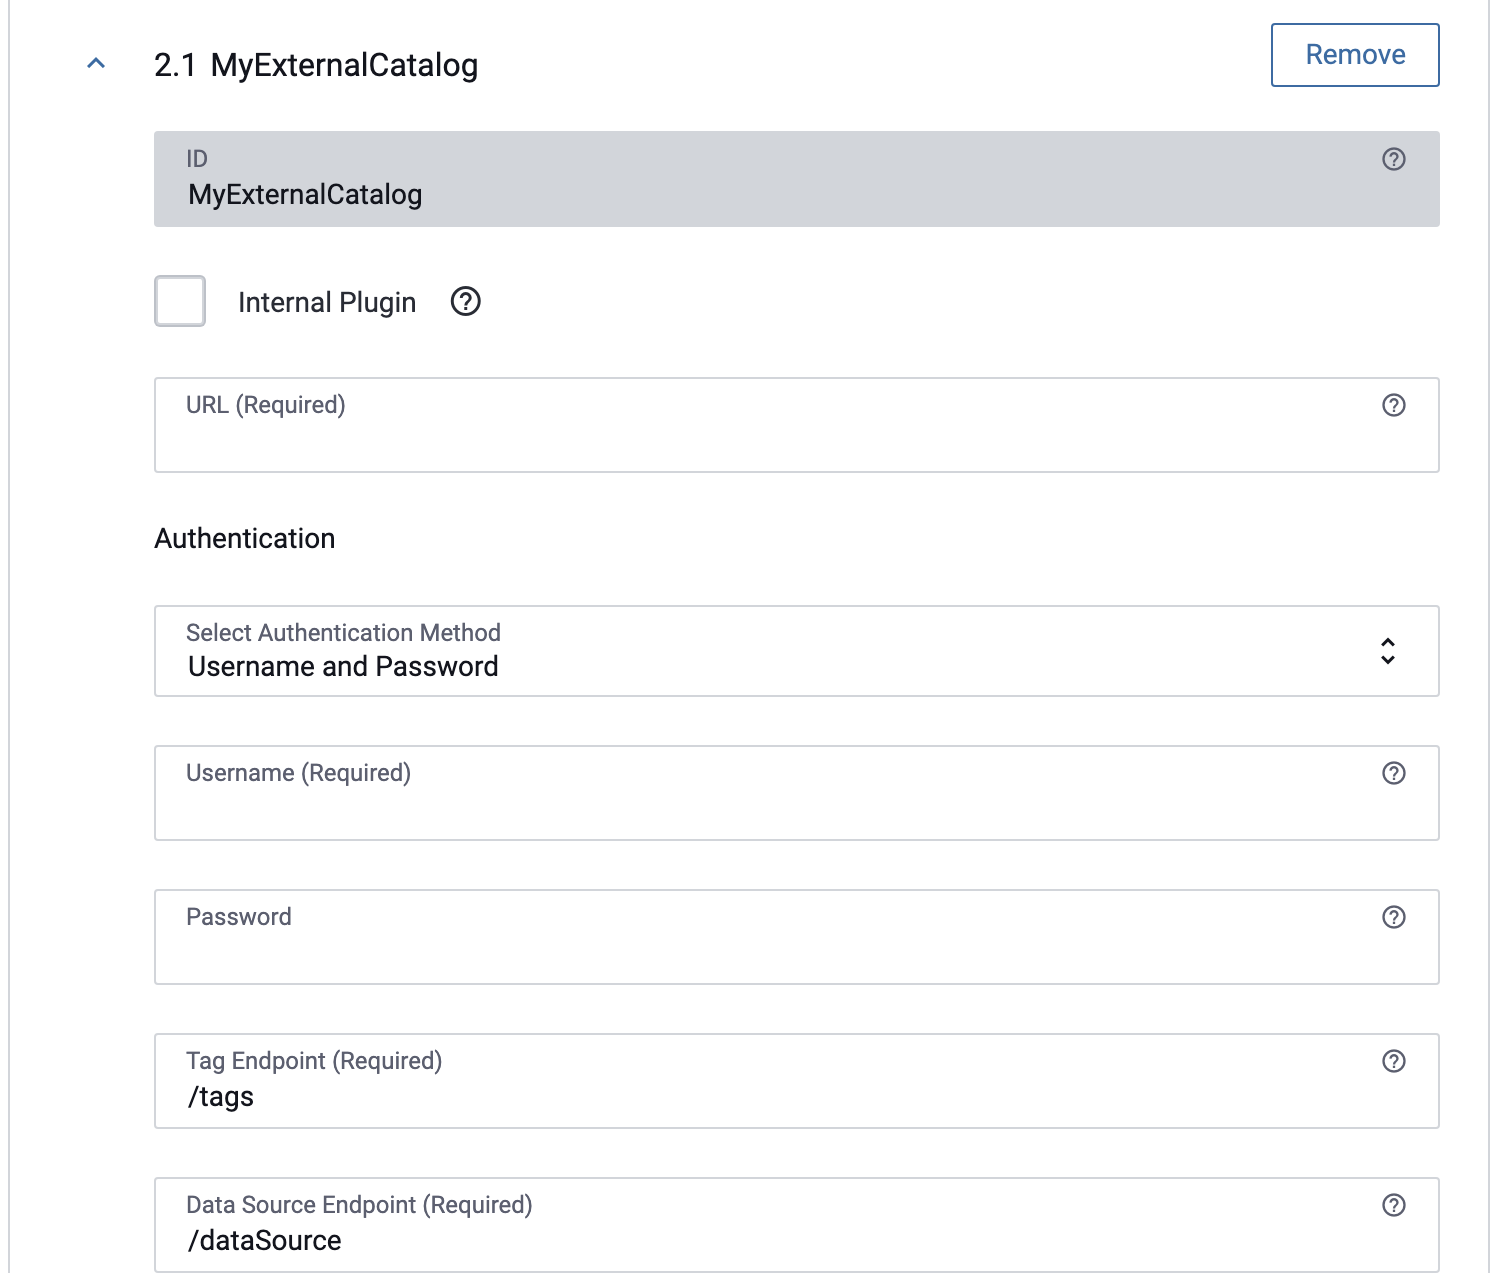
Enter the Display Name and select Rest from the dropdown menu.
-
Select the Internal Plugin checkbox if the catalog has been uploaded to Immuta as a custom server plugin.
-
Complete the following fields:
- Enter the HTTP endpoint of the catalog in the URL field.
- Complete the Username and Password fields.
- Enter the path of the Tags Endpoint.
- Enter the path of the Data Source Endpoint.
- Enter the path to the information page for a data source in the Data Source Link Template field.
- Opt to enter the path to the information page for a column in the Column Link Template field.
- Opt to upload a Catalog Image.
- Opt to select Upload Certificates.
- Upload the Certificate Authority, Certificate File, and Key File.
- Opt to enable Strict SSL by selecting the checkbox.
-
Click the Test Connection button.

-
Click the Test Data Source Link.
- Once both tests are successful, click Save.
Enable Snowflake Tag Ingestion
Enable Snowflake tag ingestion with Snowflake integration
Snowflake tag ingestion can be enabled when configuring a Snowflake integration from the App Settings page. This tutorial is intended for users who want Snowflake object tags to be ingested into Immuta but do not want users to query data sources natively in Snowflake.
- Navigate to the App Settings page.
-
Scroll to 2 External Catalogs, and click Add Catalog.
-
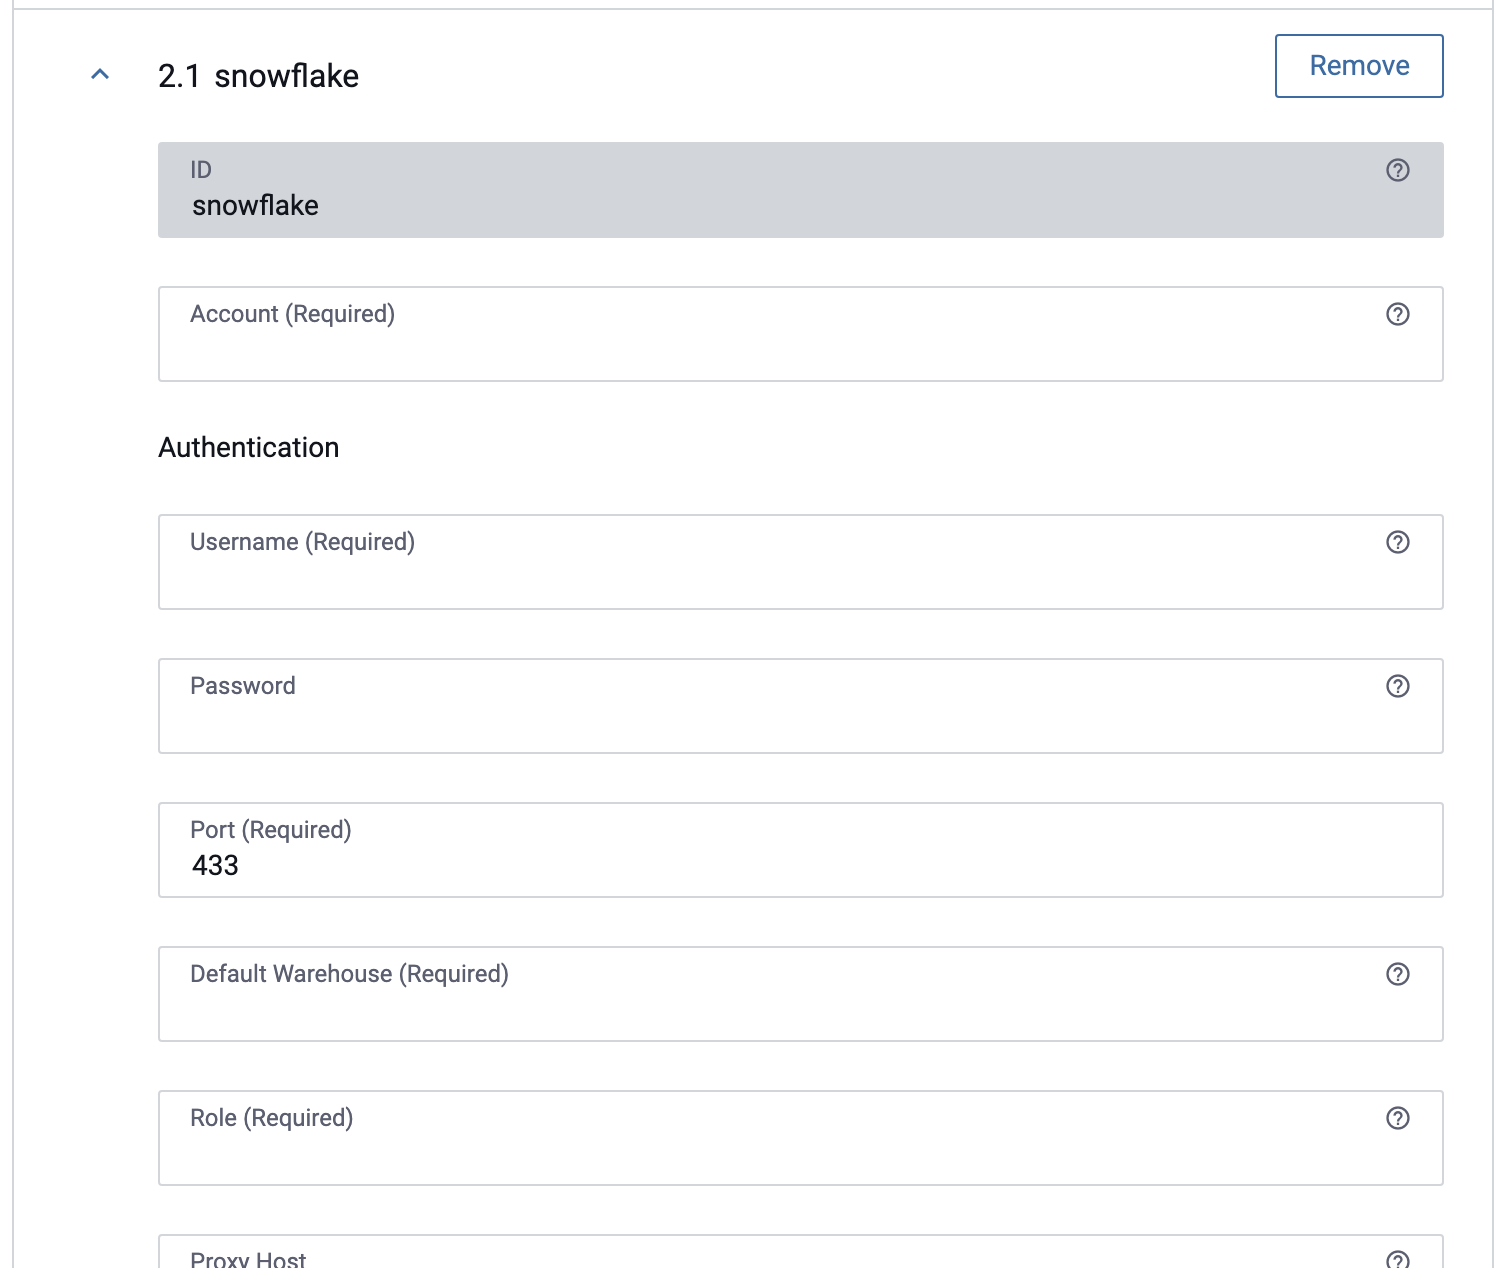
Enter a Display Name and select Snowflake from the dropdown menu.
-
Enter the Account.
-
Enter the Authentication information: Username, Password, Port, Default Warehouse, and Role.
Snowflake User Authentication
To configure Snowflake tag ingestion, which syncs Snowflake tags into Immuta, you must provide a Snowflake user who has, at minimum, the ability to set the following privileges:
GRANT IMPORTED PRIVILEGES ON DATABASE snowflakeGRANT APPLY TAG ON ACCOUNT
-
Opt to enter the Proxy Host, Proxy Port, and Encrypted Key File Passphrase.
- Opt to Upload Certificates.
-
Click the Test Connection button.
-
Click the Test Data Source Link.
- Once both tests are successful, click Save.
Manually Link Catalogs to Data Sources
For pre-existing data sources in Immuta, you can manually link them to external catalogs from the Data Source Overview tab.
-
Navigate to your data source and click Link in the Data Catalog section on the right side of the page.
-
Select your external catalog from the dropdown menu.
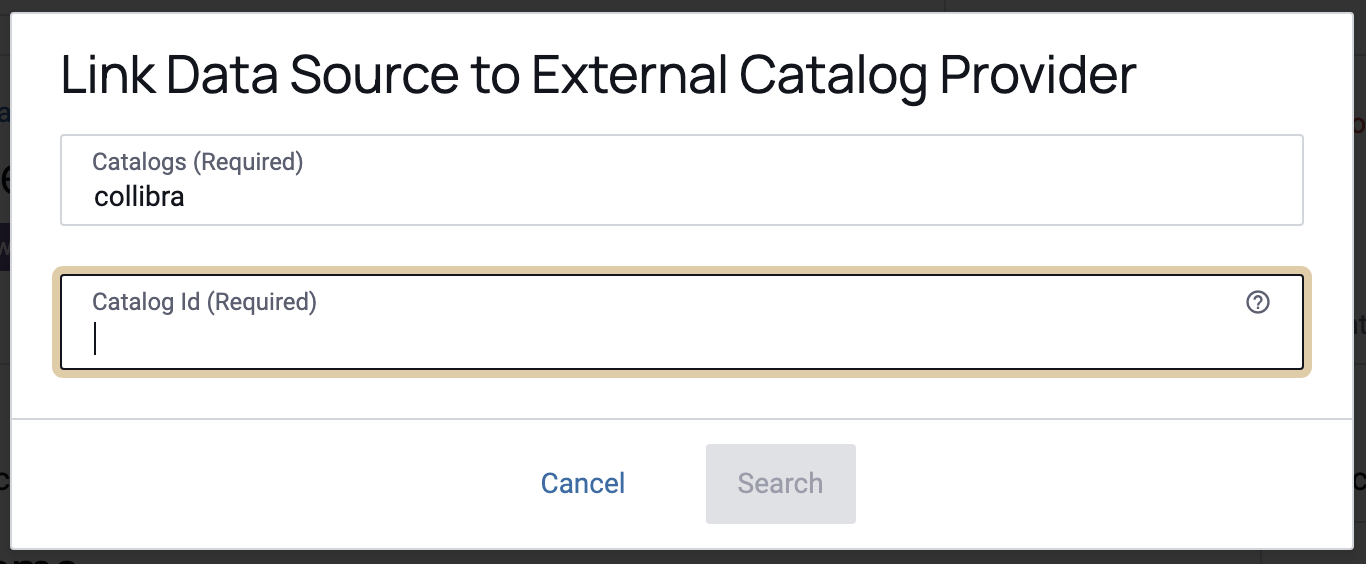
-
Click Link to confirm.