Manage Schema Monitoring
Edit Schema Project Connection
-
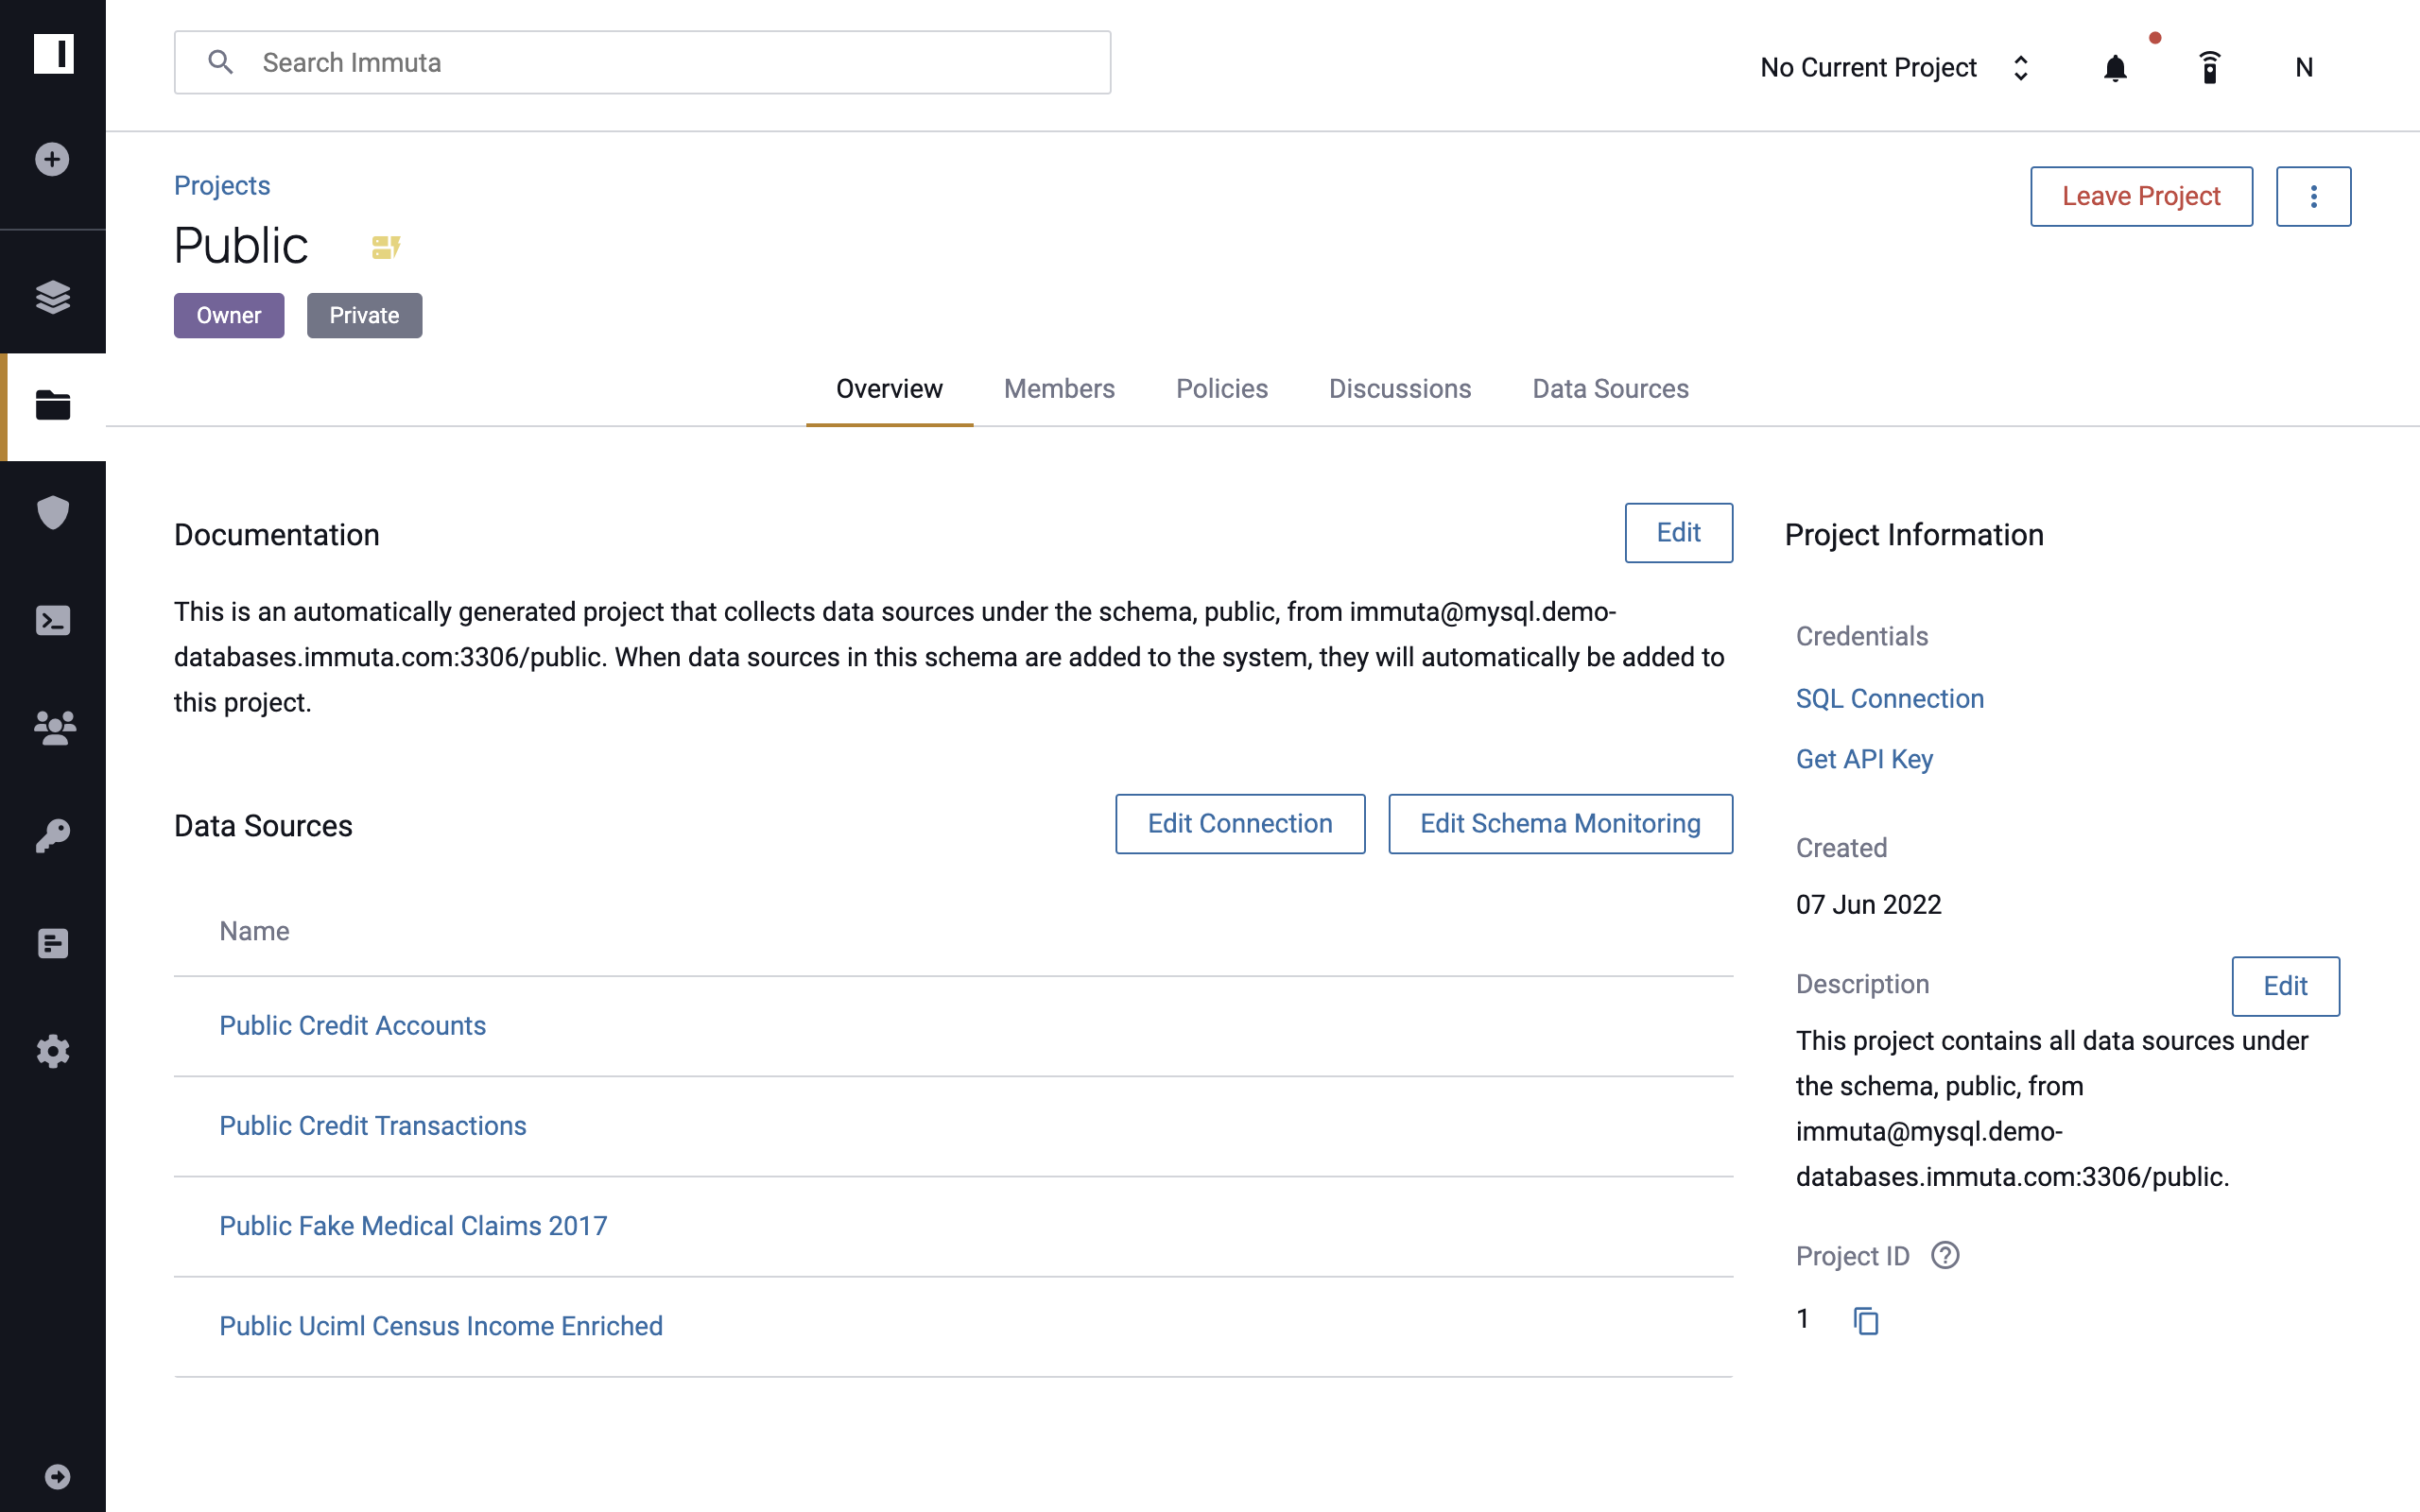
Navigate to the Project Overview tab.
-
Click Edit Connection.
- Use the Connection Information modal to make any necessary changes.
- Click Save.
Edit Schema Monitoring Naming Convention
-
Navigate to the Project Overview tab.
-
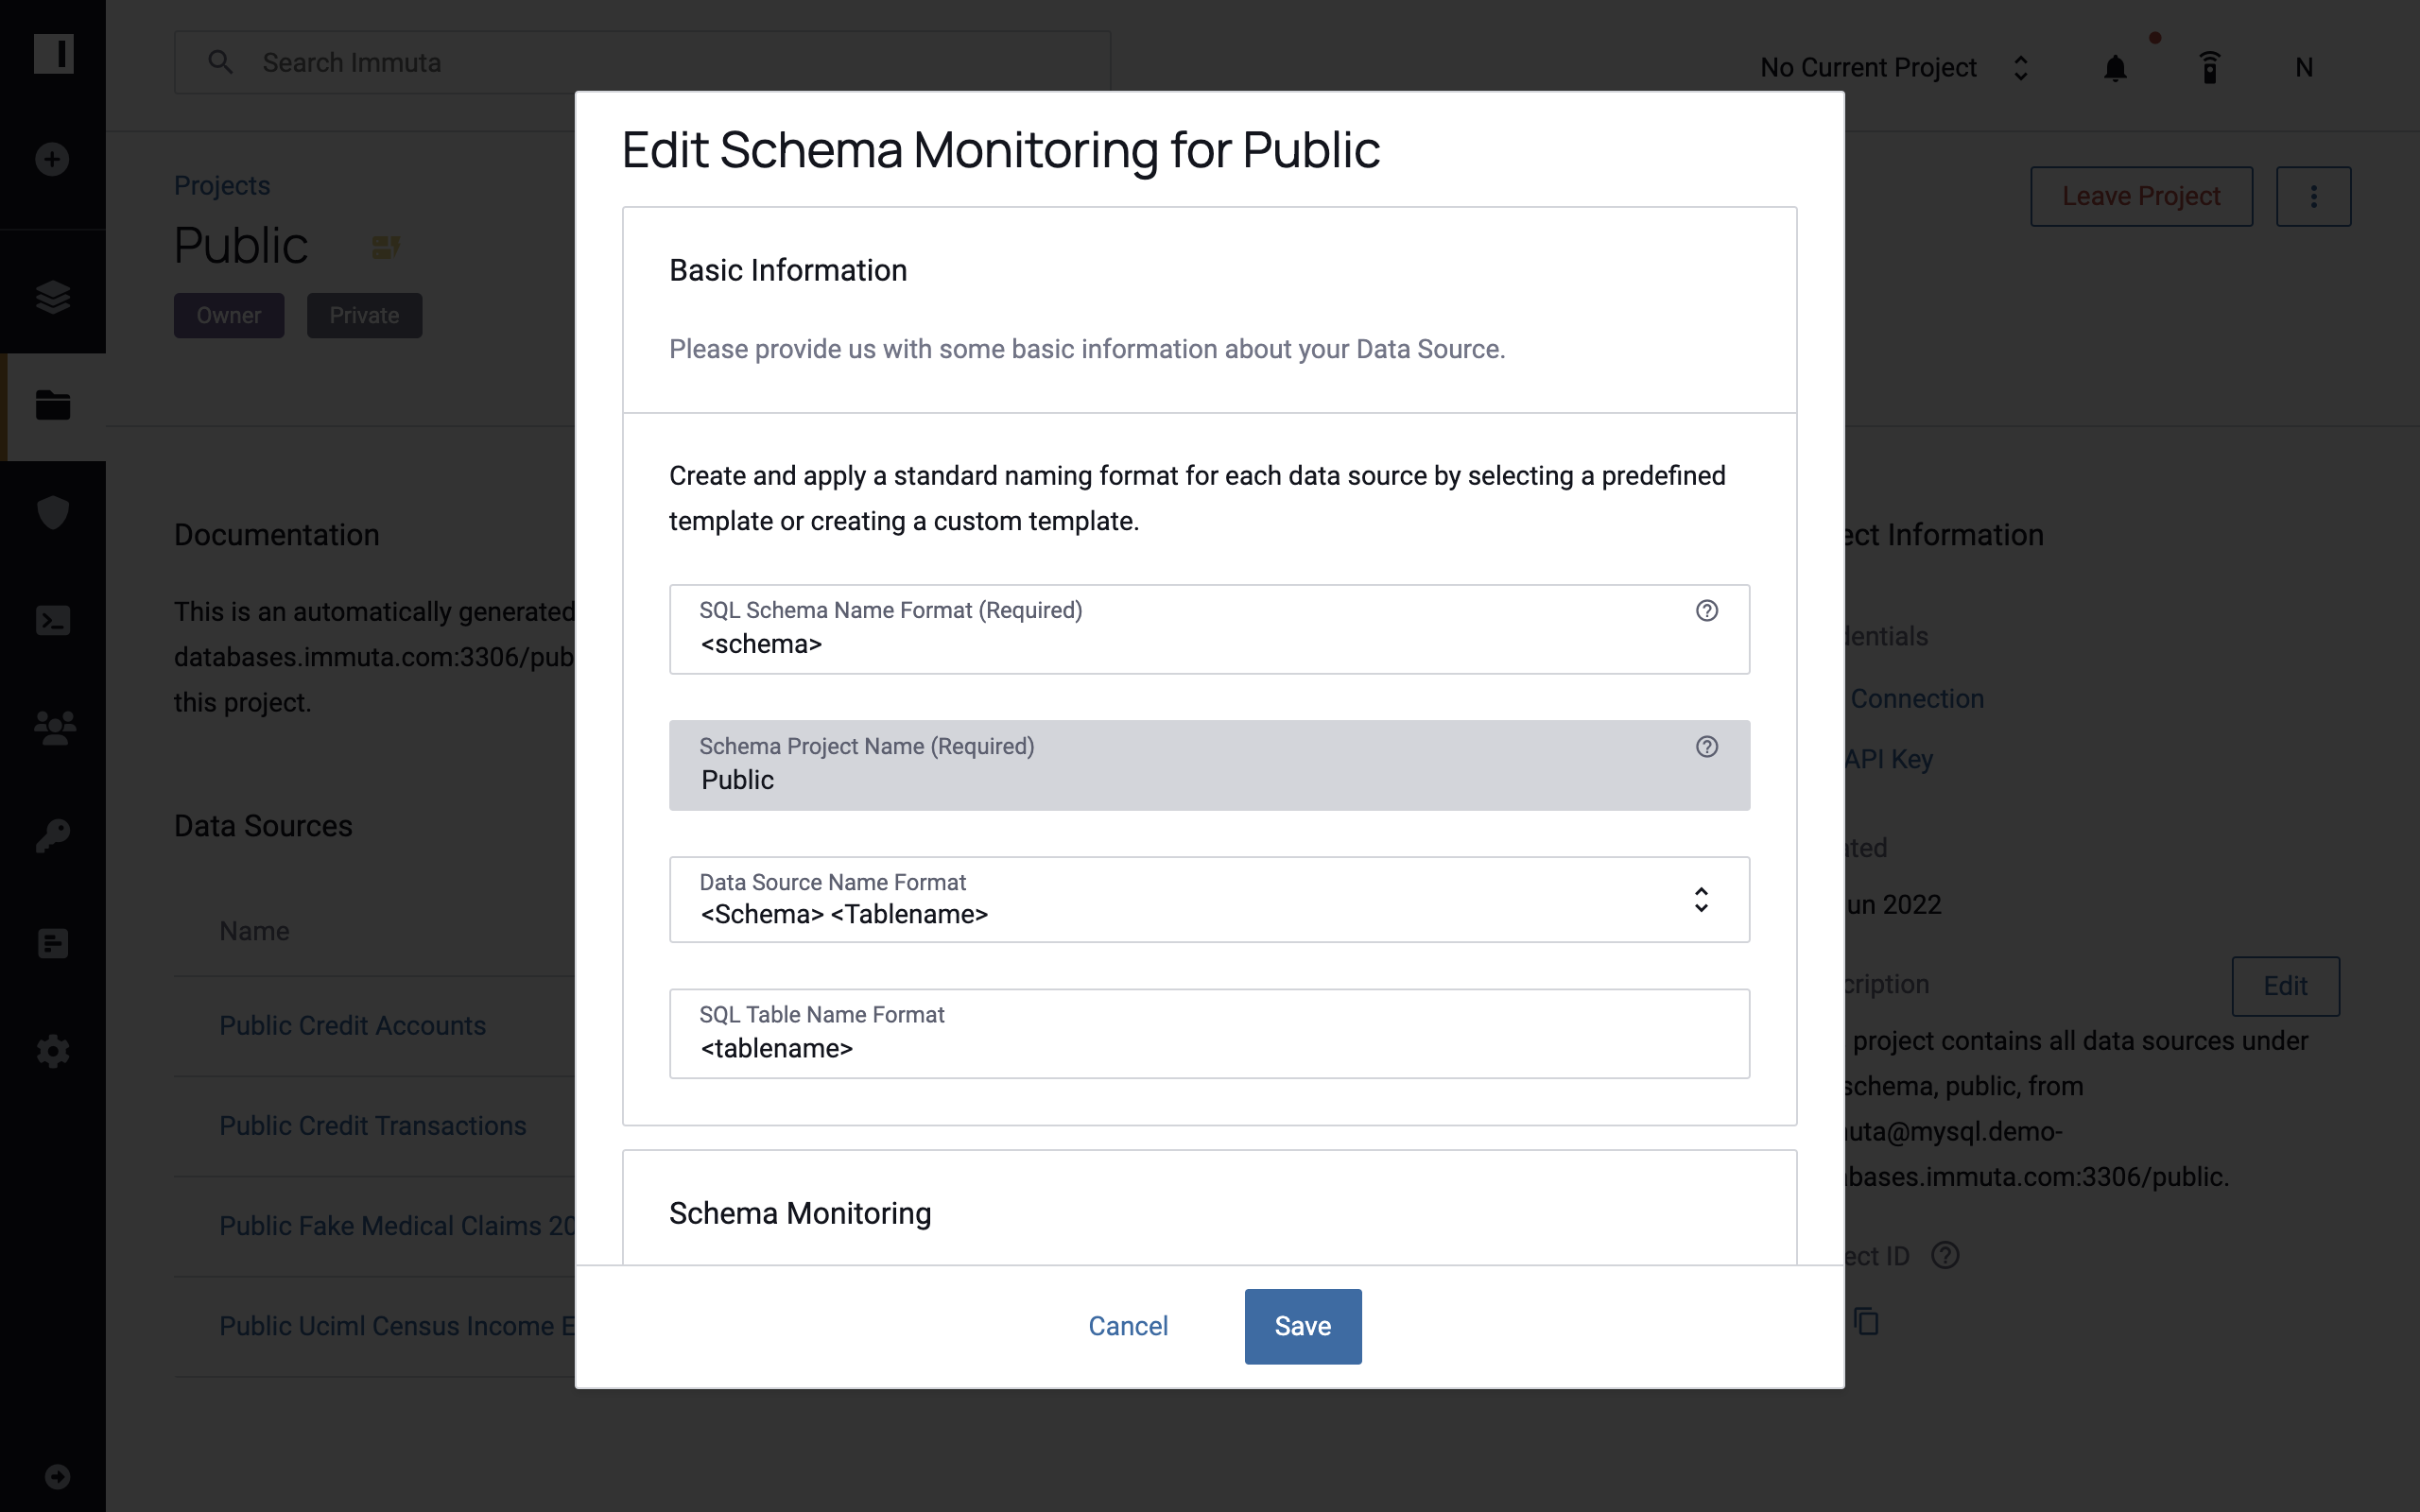
Click Edit Schema Monitoring.
-
Use the Basic Information modal to make any necessary changes to naming formats.
-
Click Save.
Add New Schema Detection Owner
-
Navigate to the Project Overview tab.
-
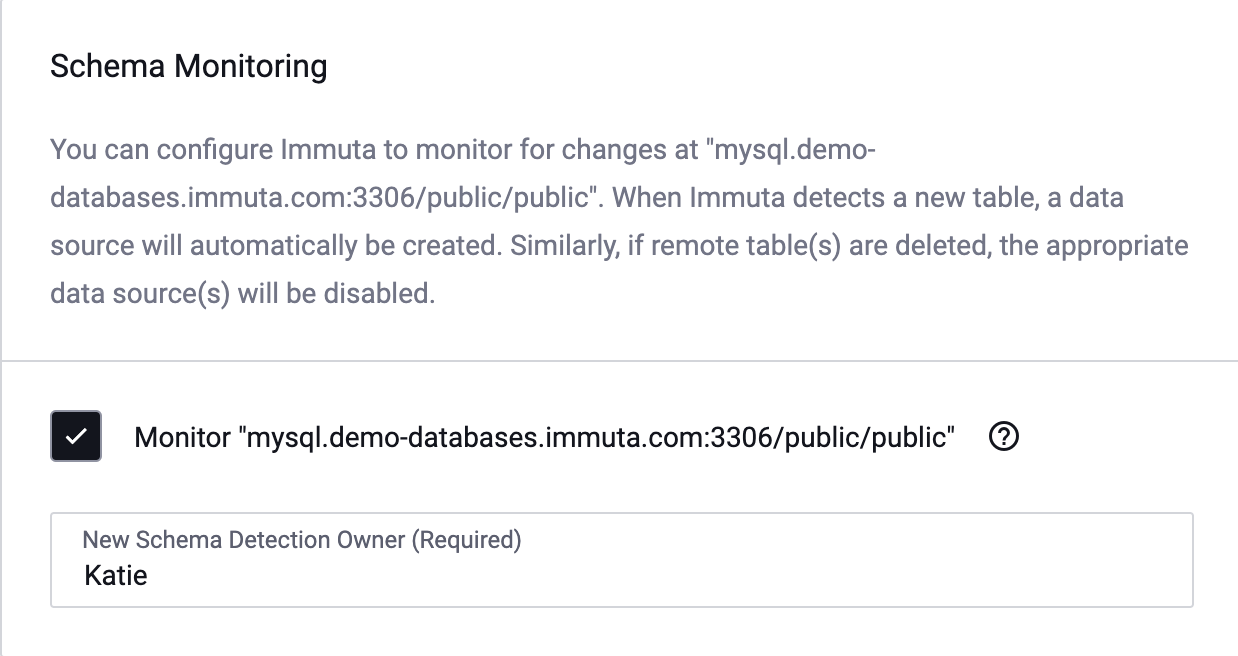
Click Edit Schema Monitoring.
-
Use the dropdown menu in the Schema Monitoring modal to select a new schema detection owner. The new owner must be an owner of one or more of the data sources belonging to that schema.
-
Click Save.
Change the Frequency of Schema Monitoring Jobs
- Navigate to the App Settings page and scroll down to the Advanced Configuration.
-
Copy and paste this YAML into the text box:
schedule:
  schemaEvolutionCheck: 'your-new-frequency'
Replace
your-new-frequencywith the time you would like between schema jobs. For example use*/30 * * * *for the queries to run every 30 minutes. -
Click Save.
Change the Frequency of Column Detection Jobs
- Navigate to the App Settings page and scroll down to the Advanced Configuration.
-
Copy and paste this YAML into the text box:
schedule:
  columnEvolutionCheck: 'your-new-frequency'
Replace
your-new-frequencywith the time you would like between column detection jobs. For example use*/30 * * * *for the queries to run every 30 minutes. -
Click Save.