Subscribe to a Data Source
Audience: Data Users
Content Summary: Immuta provides a one-stop shop for all data across an organization through data sources, which are virtual exposures of data. This data is protected by policy rules written and applied to the data sources by Data Owners, so Data Users can view details about, comment on, and subscribe to these data sources without violating privacy regulations.
This guide delineates the processes of accessing and using data source features in the Immuta UI.
View My Data Sources
Immuta provides the My Data Sources view for users to quickly view data sources they are affiliated with.
-
Click on the Data Source icon in the panel on the left.
-
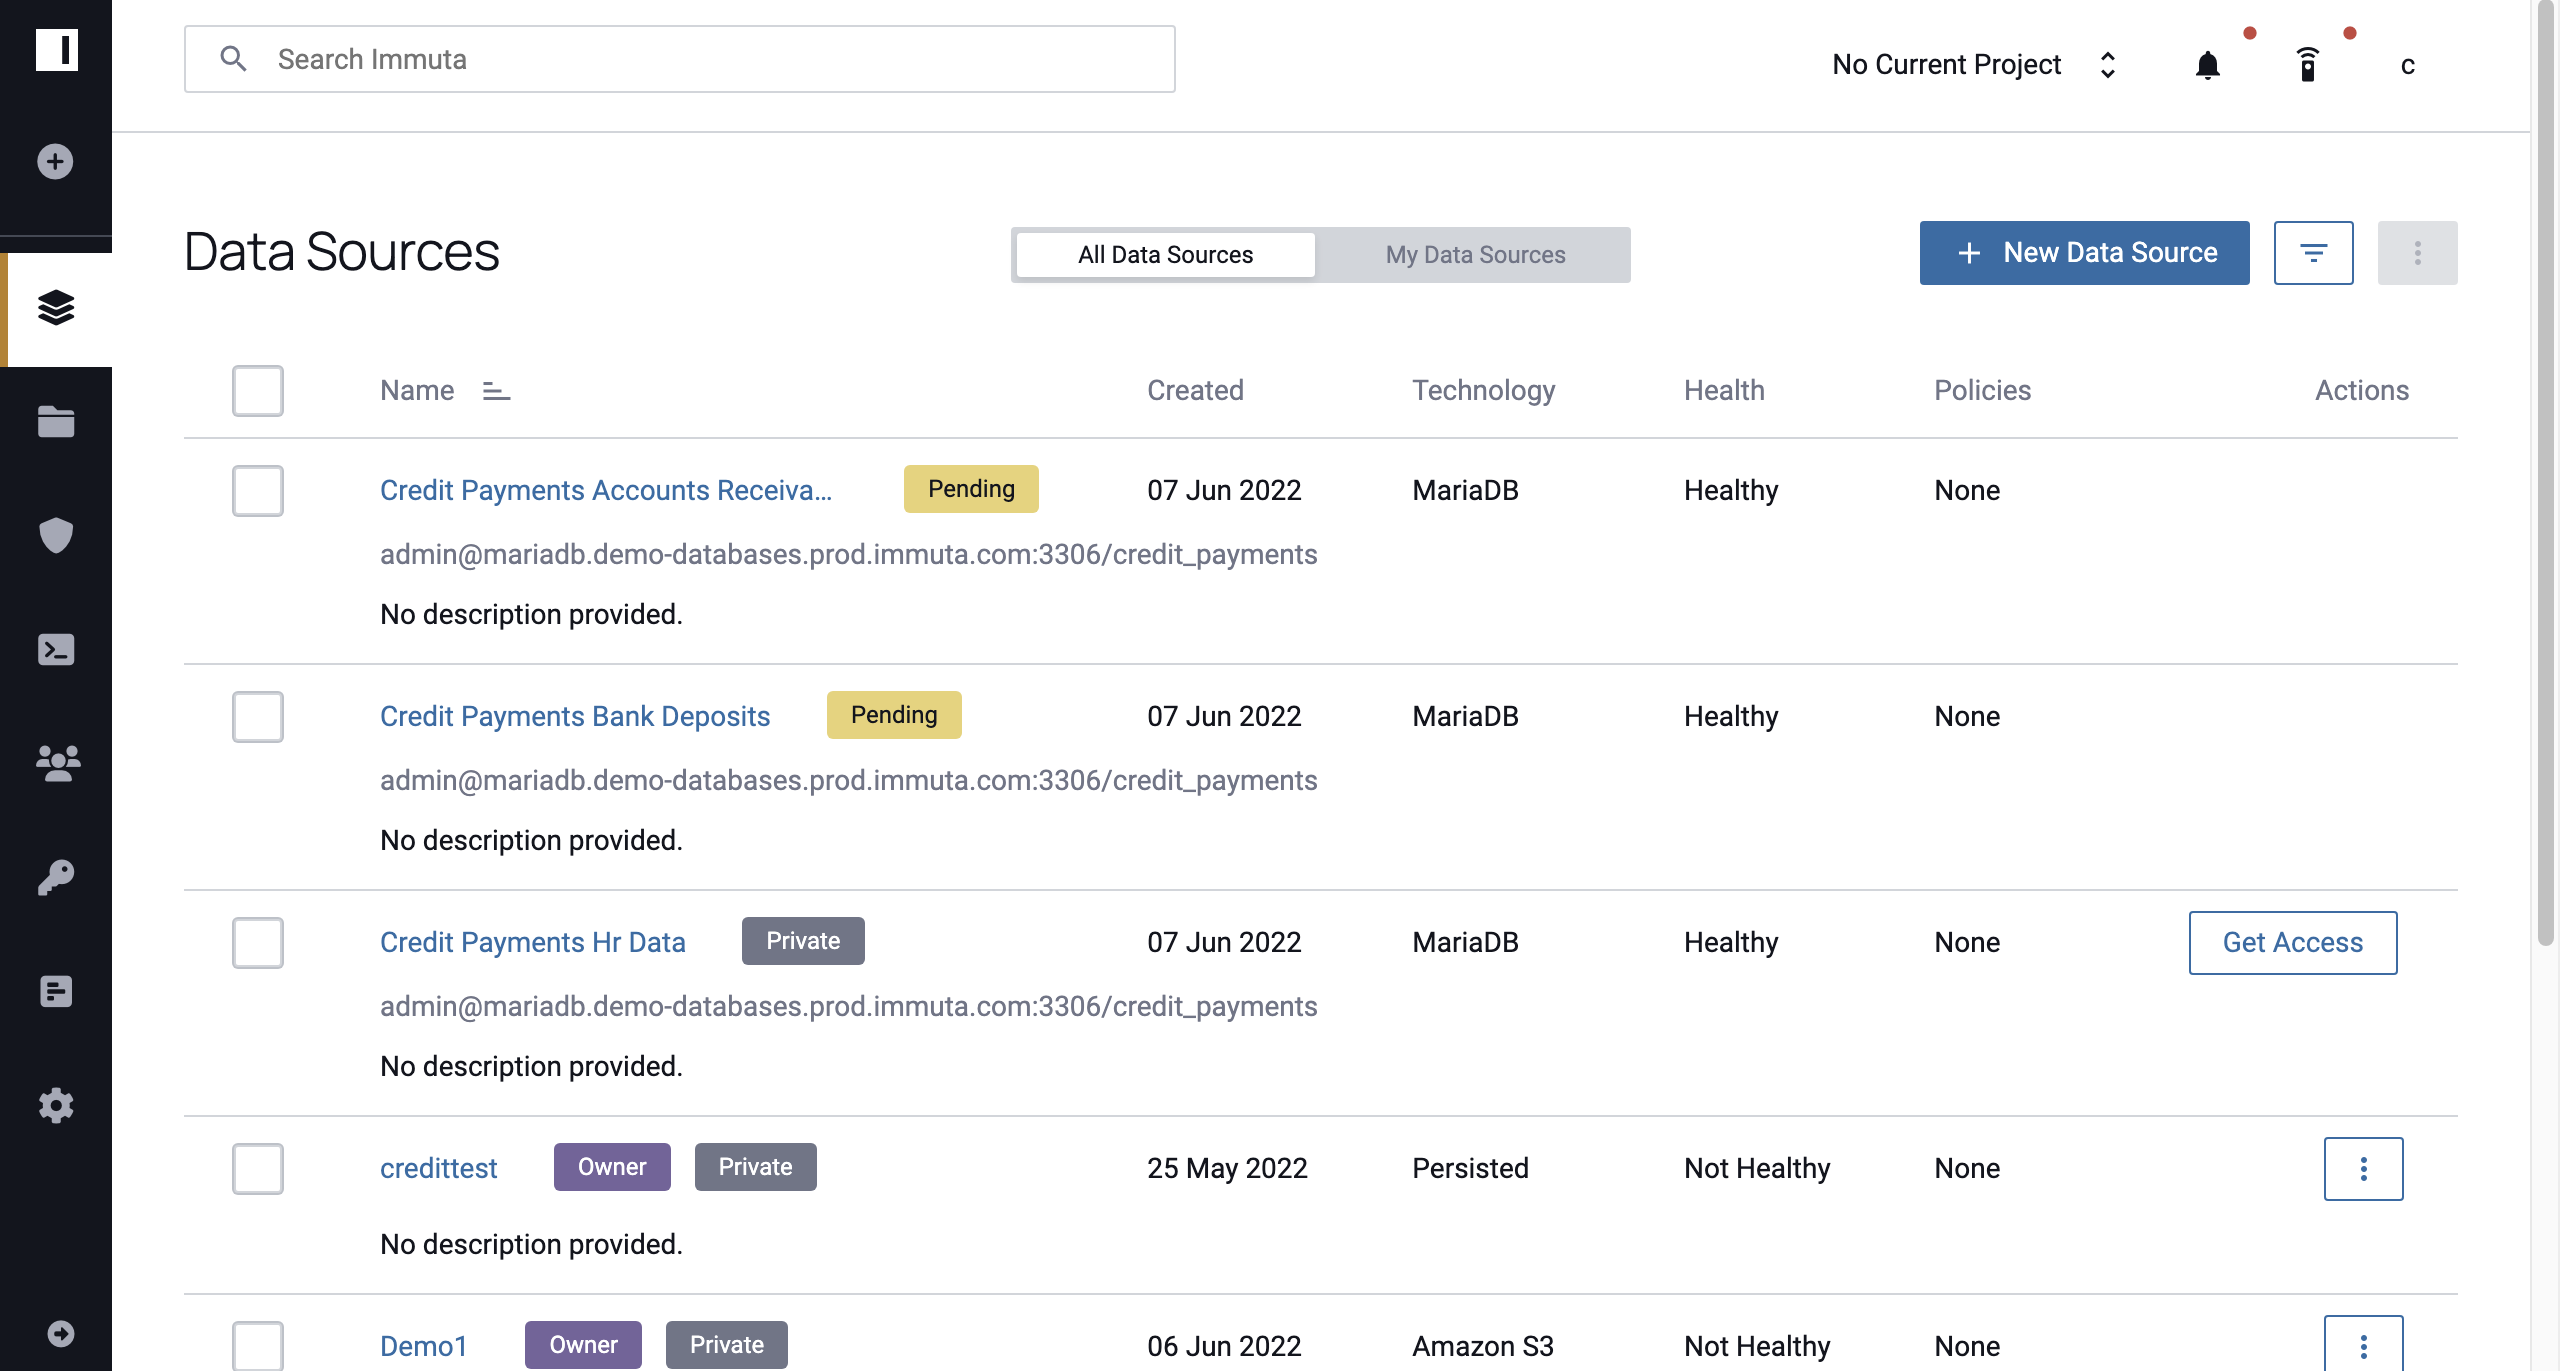
By default, all data sources will be displayed.
-
To view only data sources you have access to, click on the My Data Sources tab.
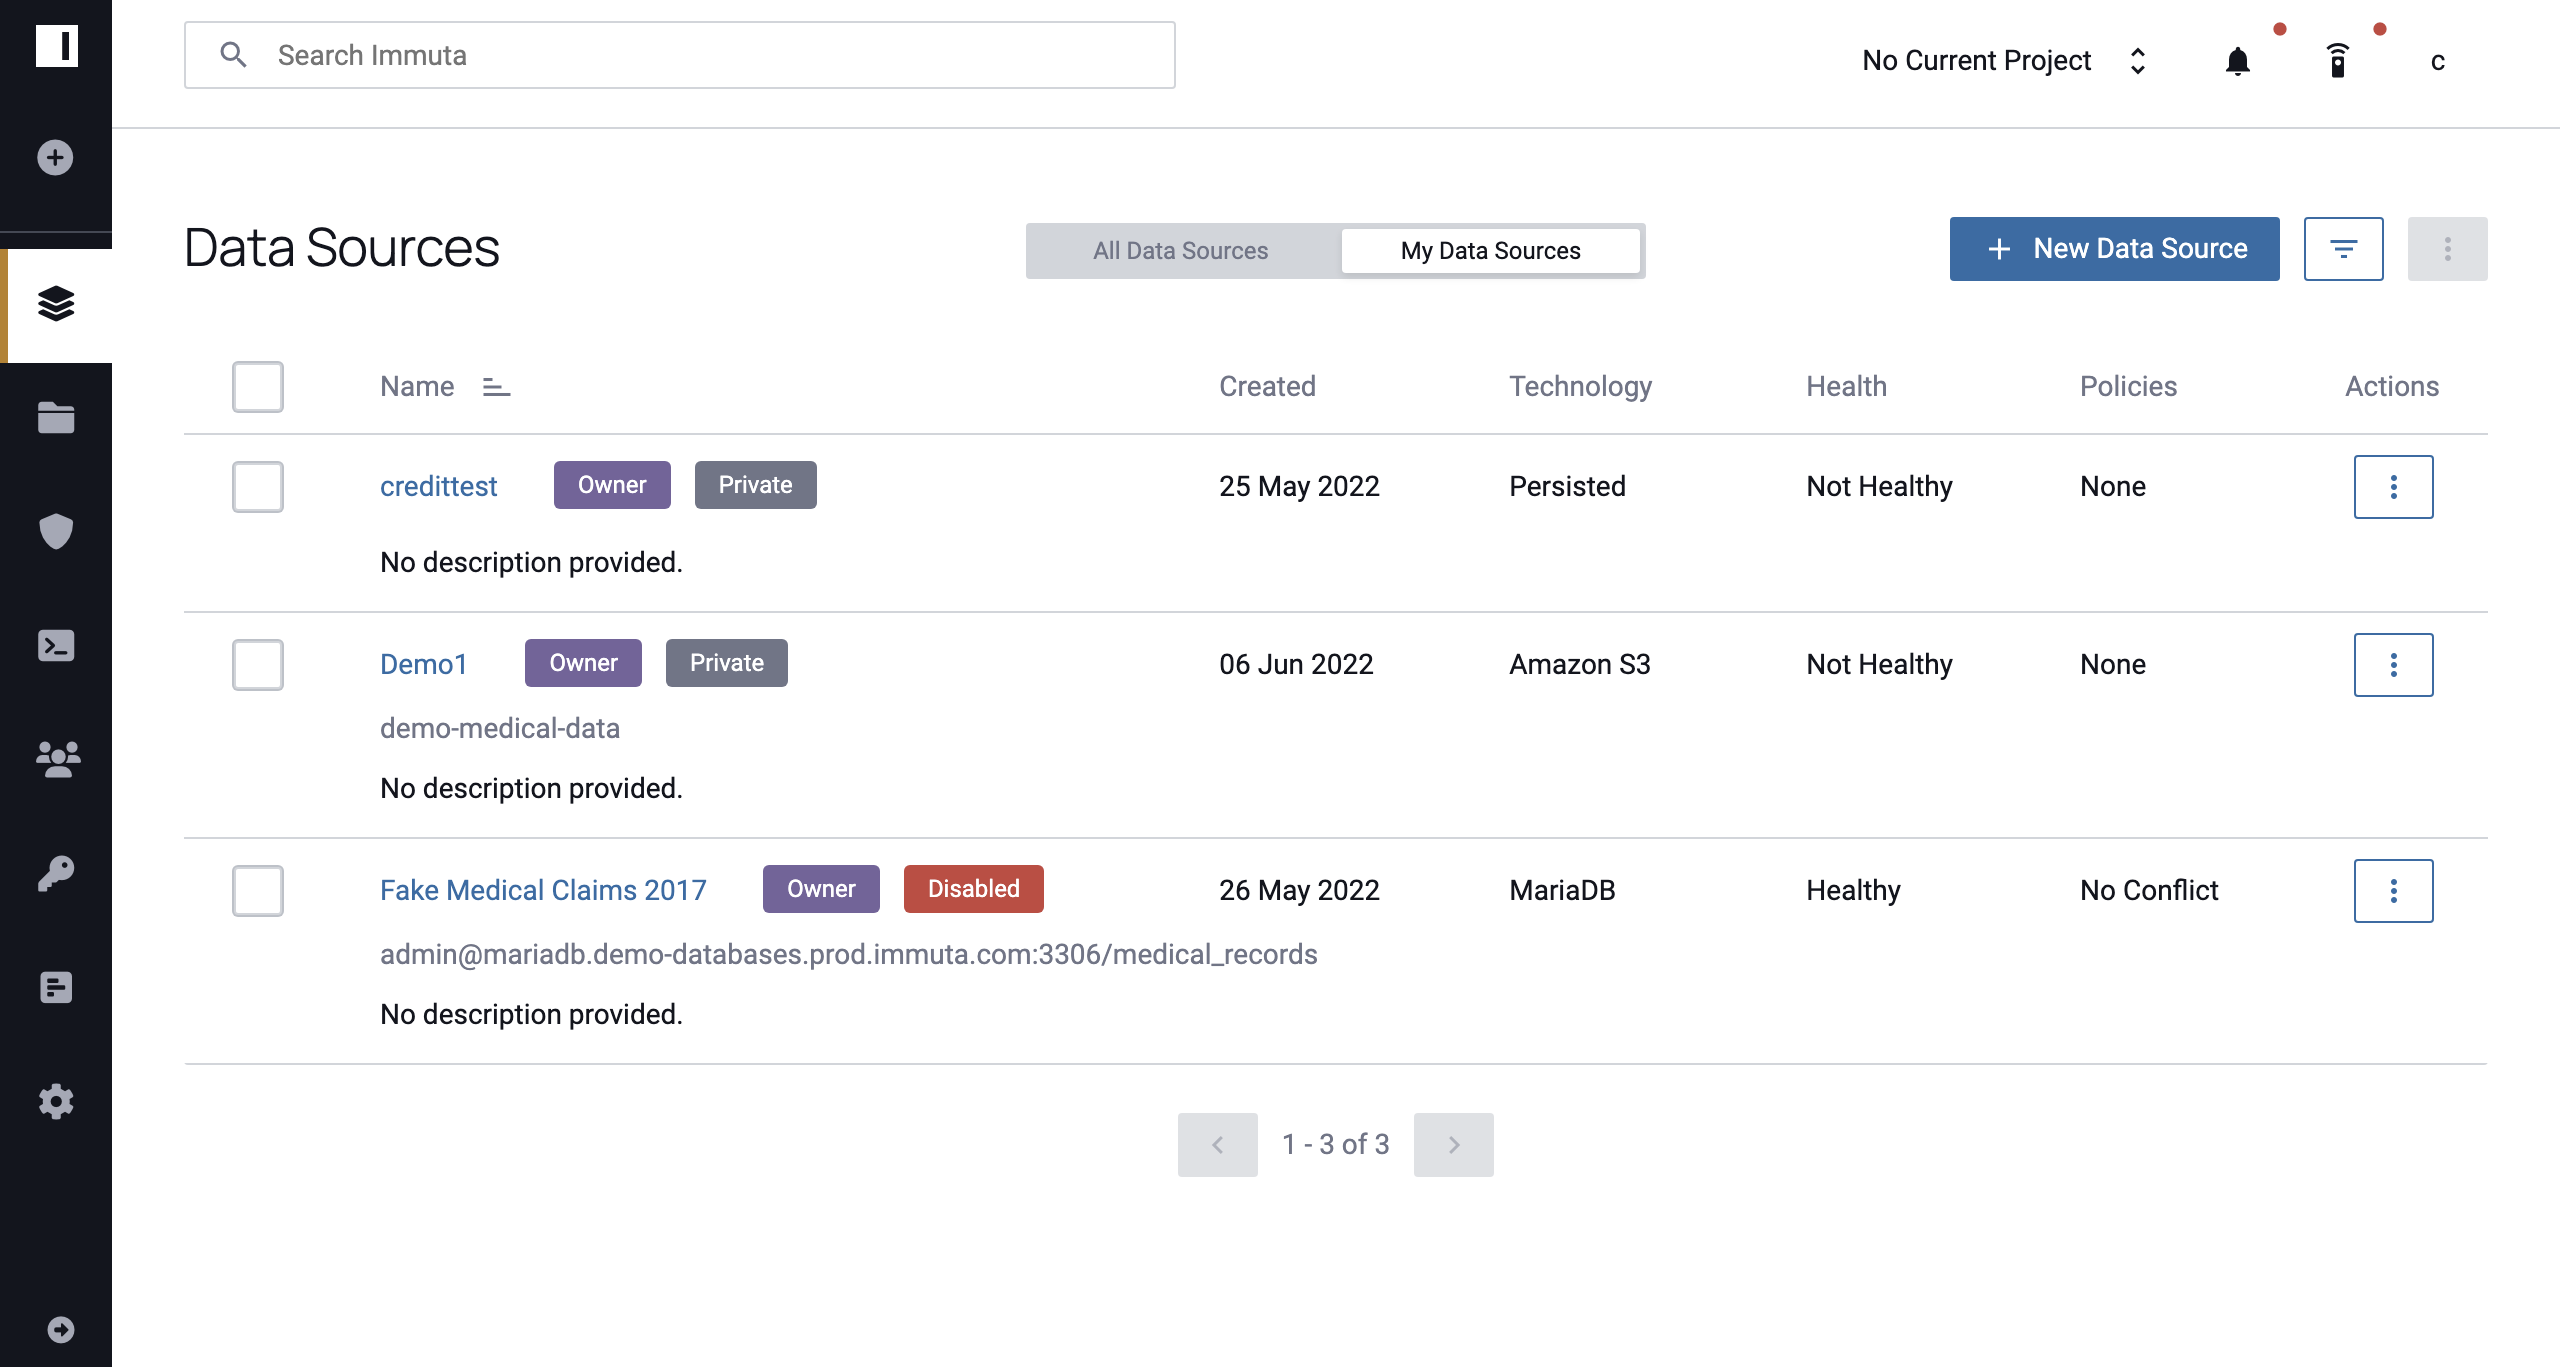
Note: If no data sources are displayed, you are not subscribed to, an expert of, or an owner of any data sources.
-
To view the details of a data source, simply click on the Data Source.
Subscribe to a Data Source
-
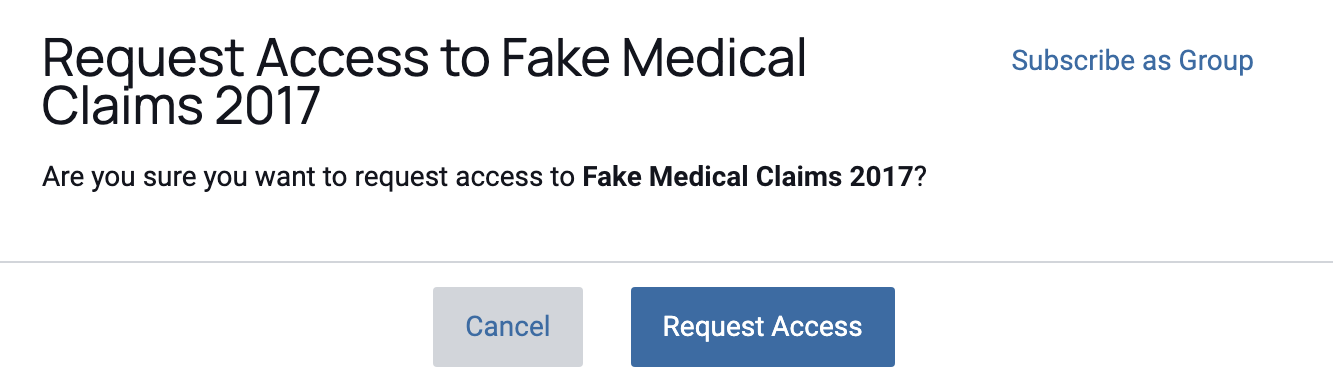
Click the Get Access button from either this data sources view or the Data Source Overview tab, which can be accessed by clicking on the Data Source.

-
If prompted, fill out the custom request form set up by the system admin and click Request Access.
-
A notification will be sent to the Data Owner(s) informing them of your request.
- Once reviewed, you will receive a notification with a response indicating if your request was accepted or denied.
- If accepted, the status displayed next to that data source will be updated to "Subscribed" and you will have access to the data source via your personal SQL connection. If not accepted, a reason will be provided in the notification details.
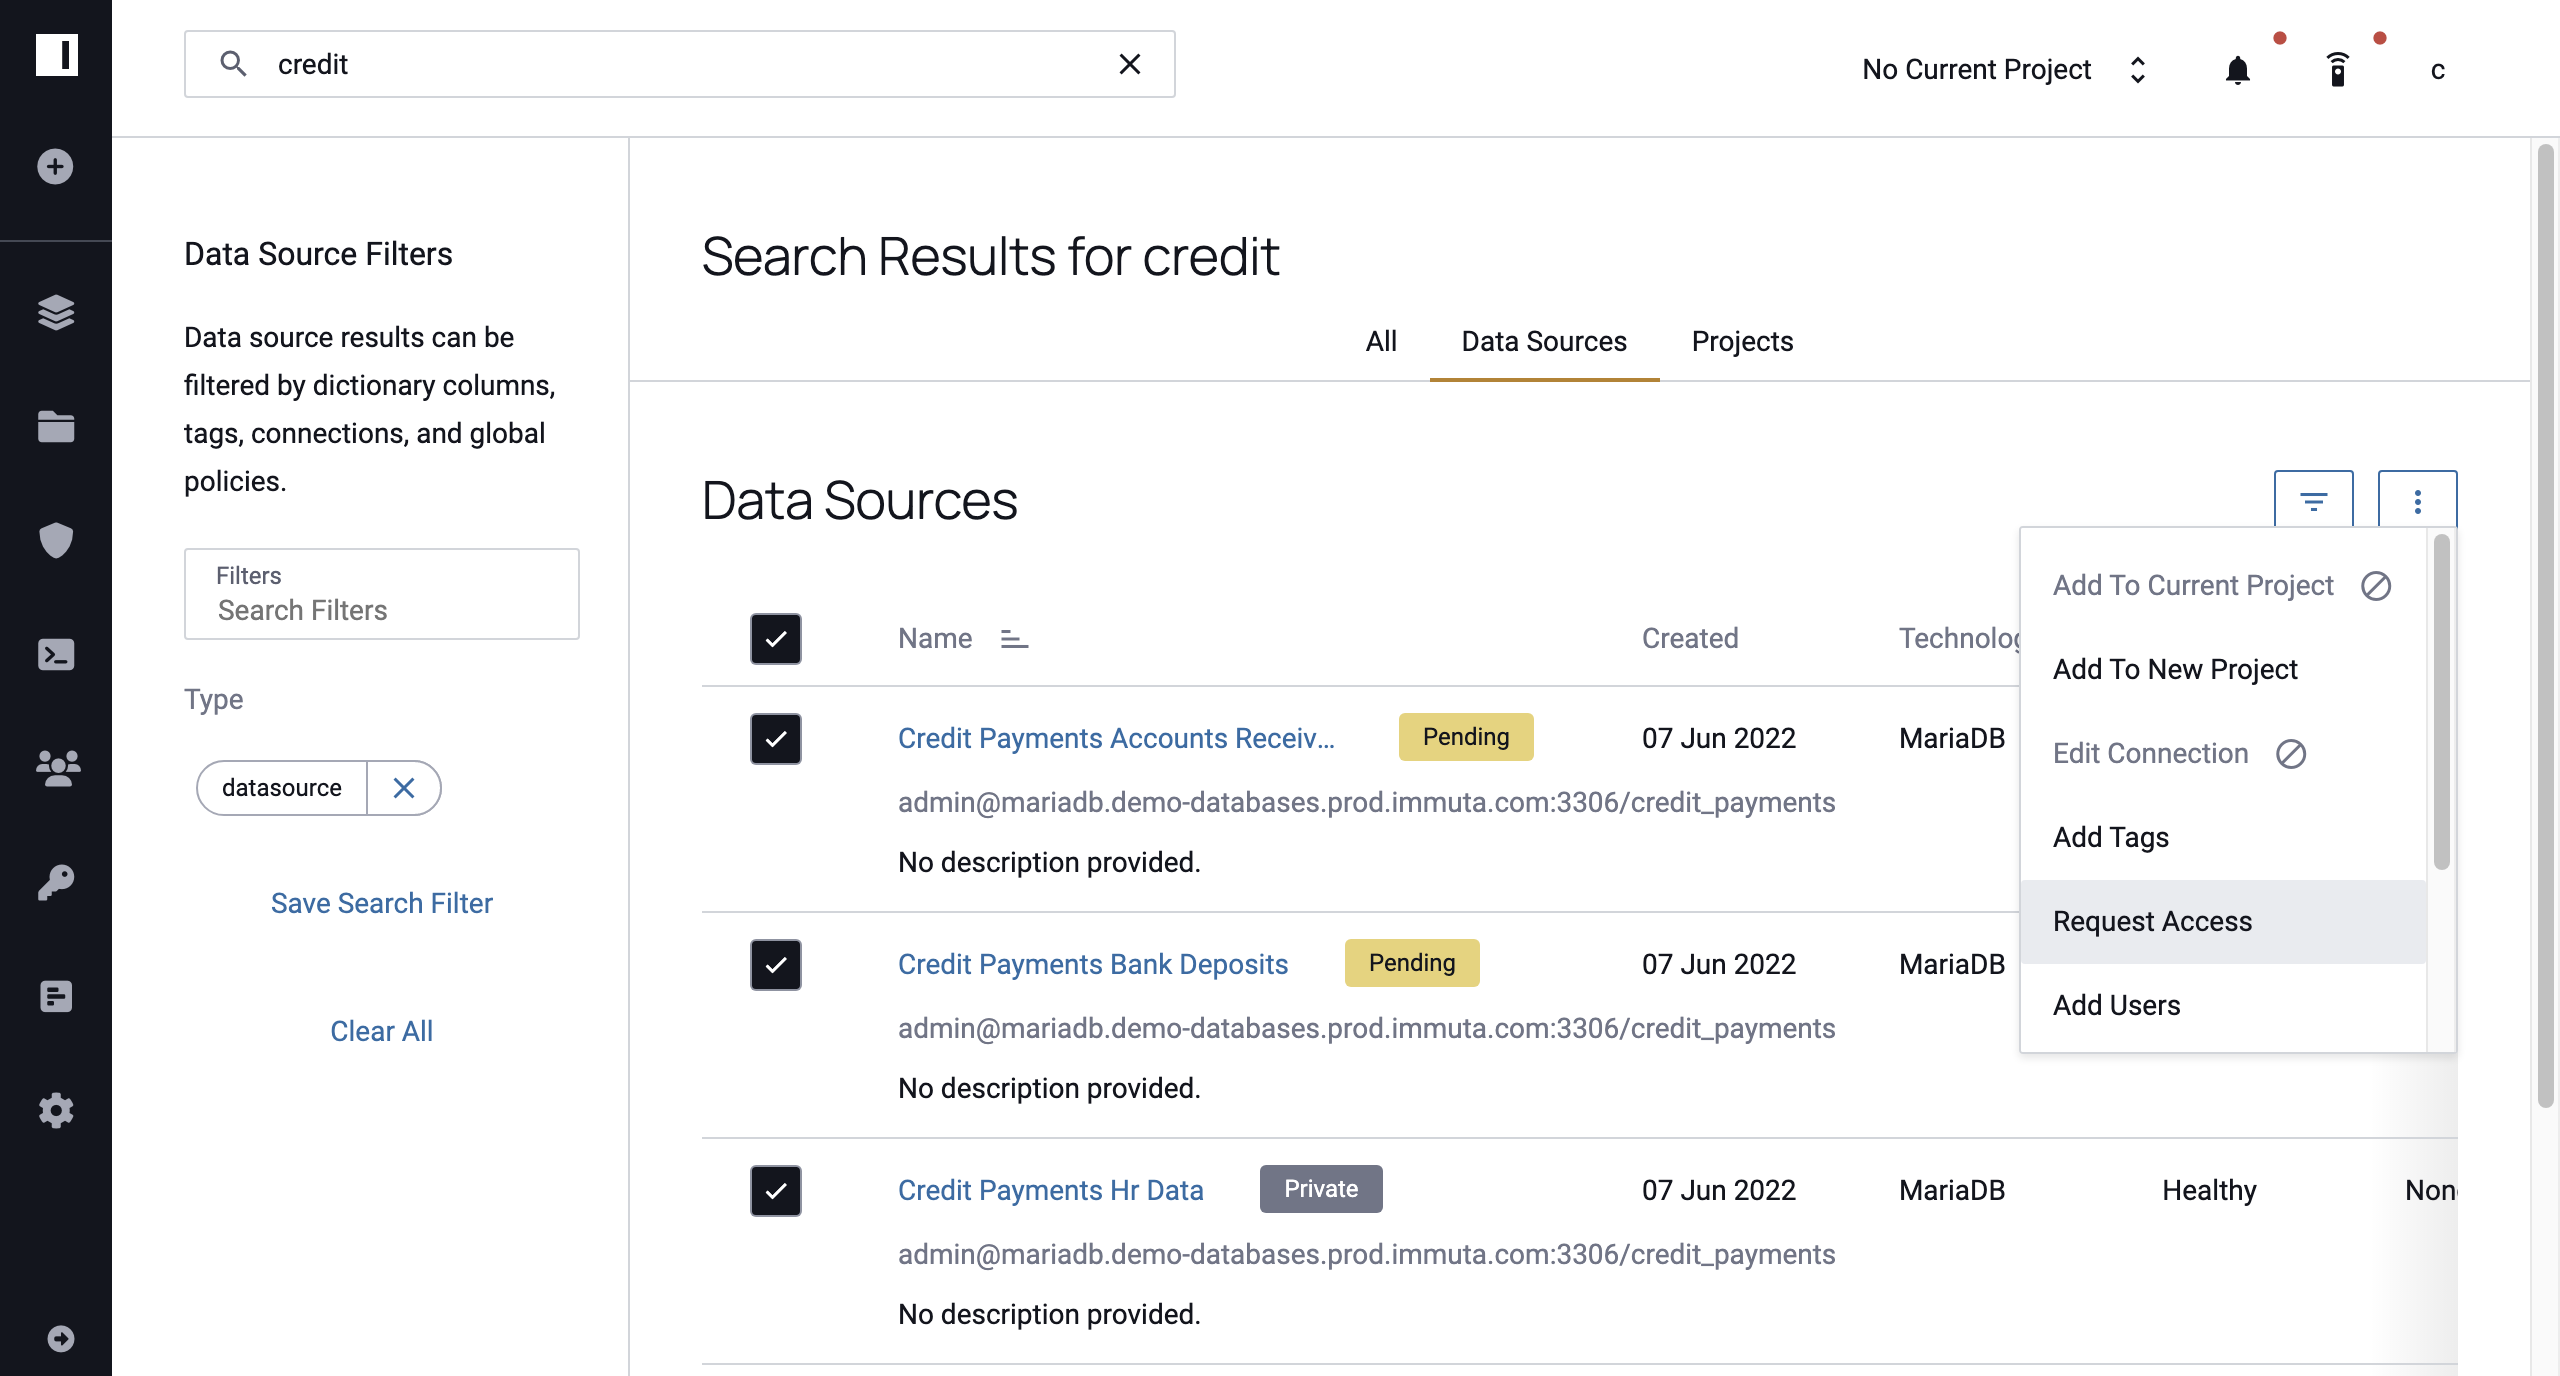
Bulk Access Requests
To request access to multiple data sources simultaneously,
- Filter data sources by connection string in the search bar.
- Click the connection string from the auto-completed results to navigate to the Search Results page.
-
Select the data sources you would like to subscribe to by clicking the checkbox next to each relevant data source.
-
Click the dropdown menu button in the top right corner of the page, and then select Request Access.
-
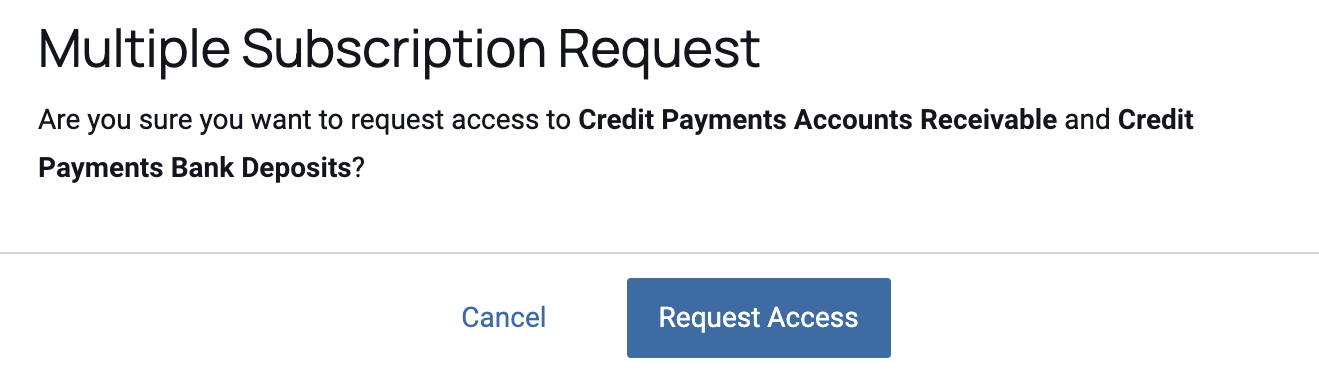
Describe how you plan to use the data in the dialog box that appears, and then click Subscribe.
Unsubscribe from a Data Source
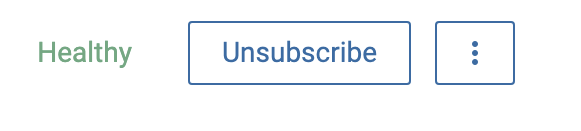
If you no longer need access to a data source, click Unsubscribe in the upper right corner of the Data Source Overview tab.
Manually Run Health Jobs
If the data source is unhealthy or needs to have a fingerprint generated,
- Click the health indicator in the upper right-hand corner.
-
Select Re-run on the job you want to run.
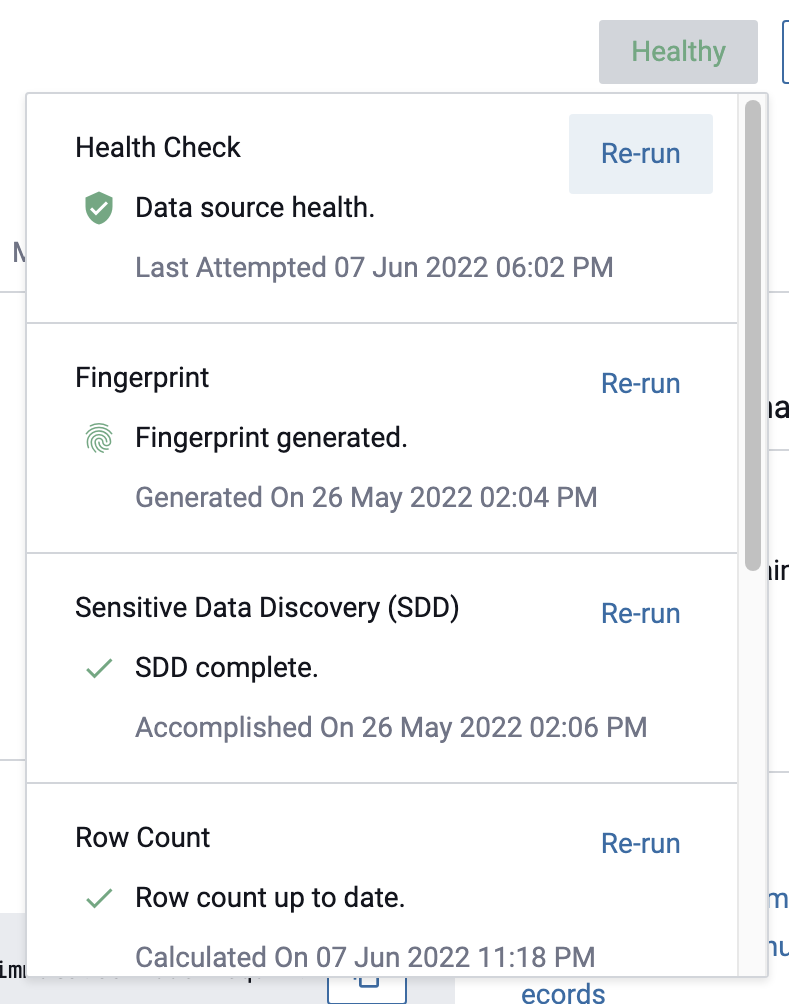
Note: To generate a fingerprint, the row count must be up-to-date.
View the Data Dictionary
To view the Data Dictionary,
-
Navigate to the Data Dictionary tab.
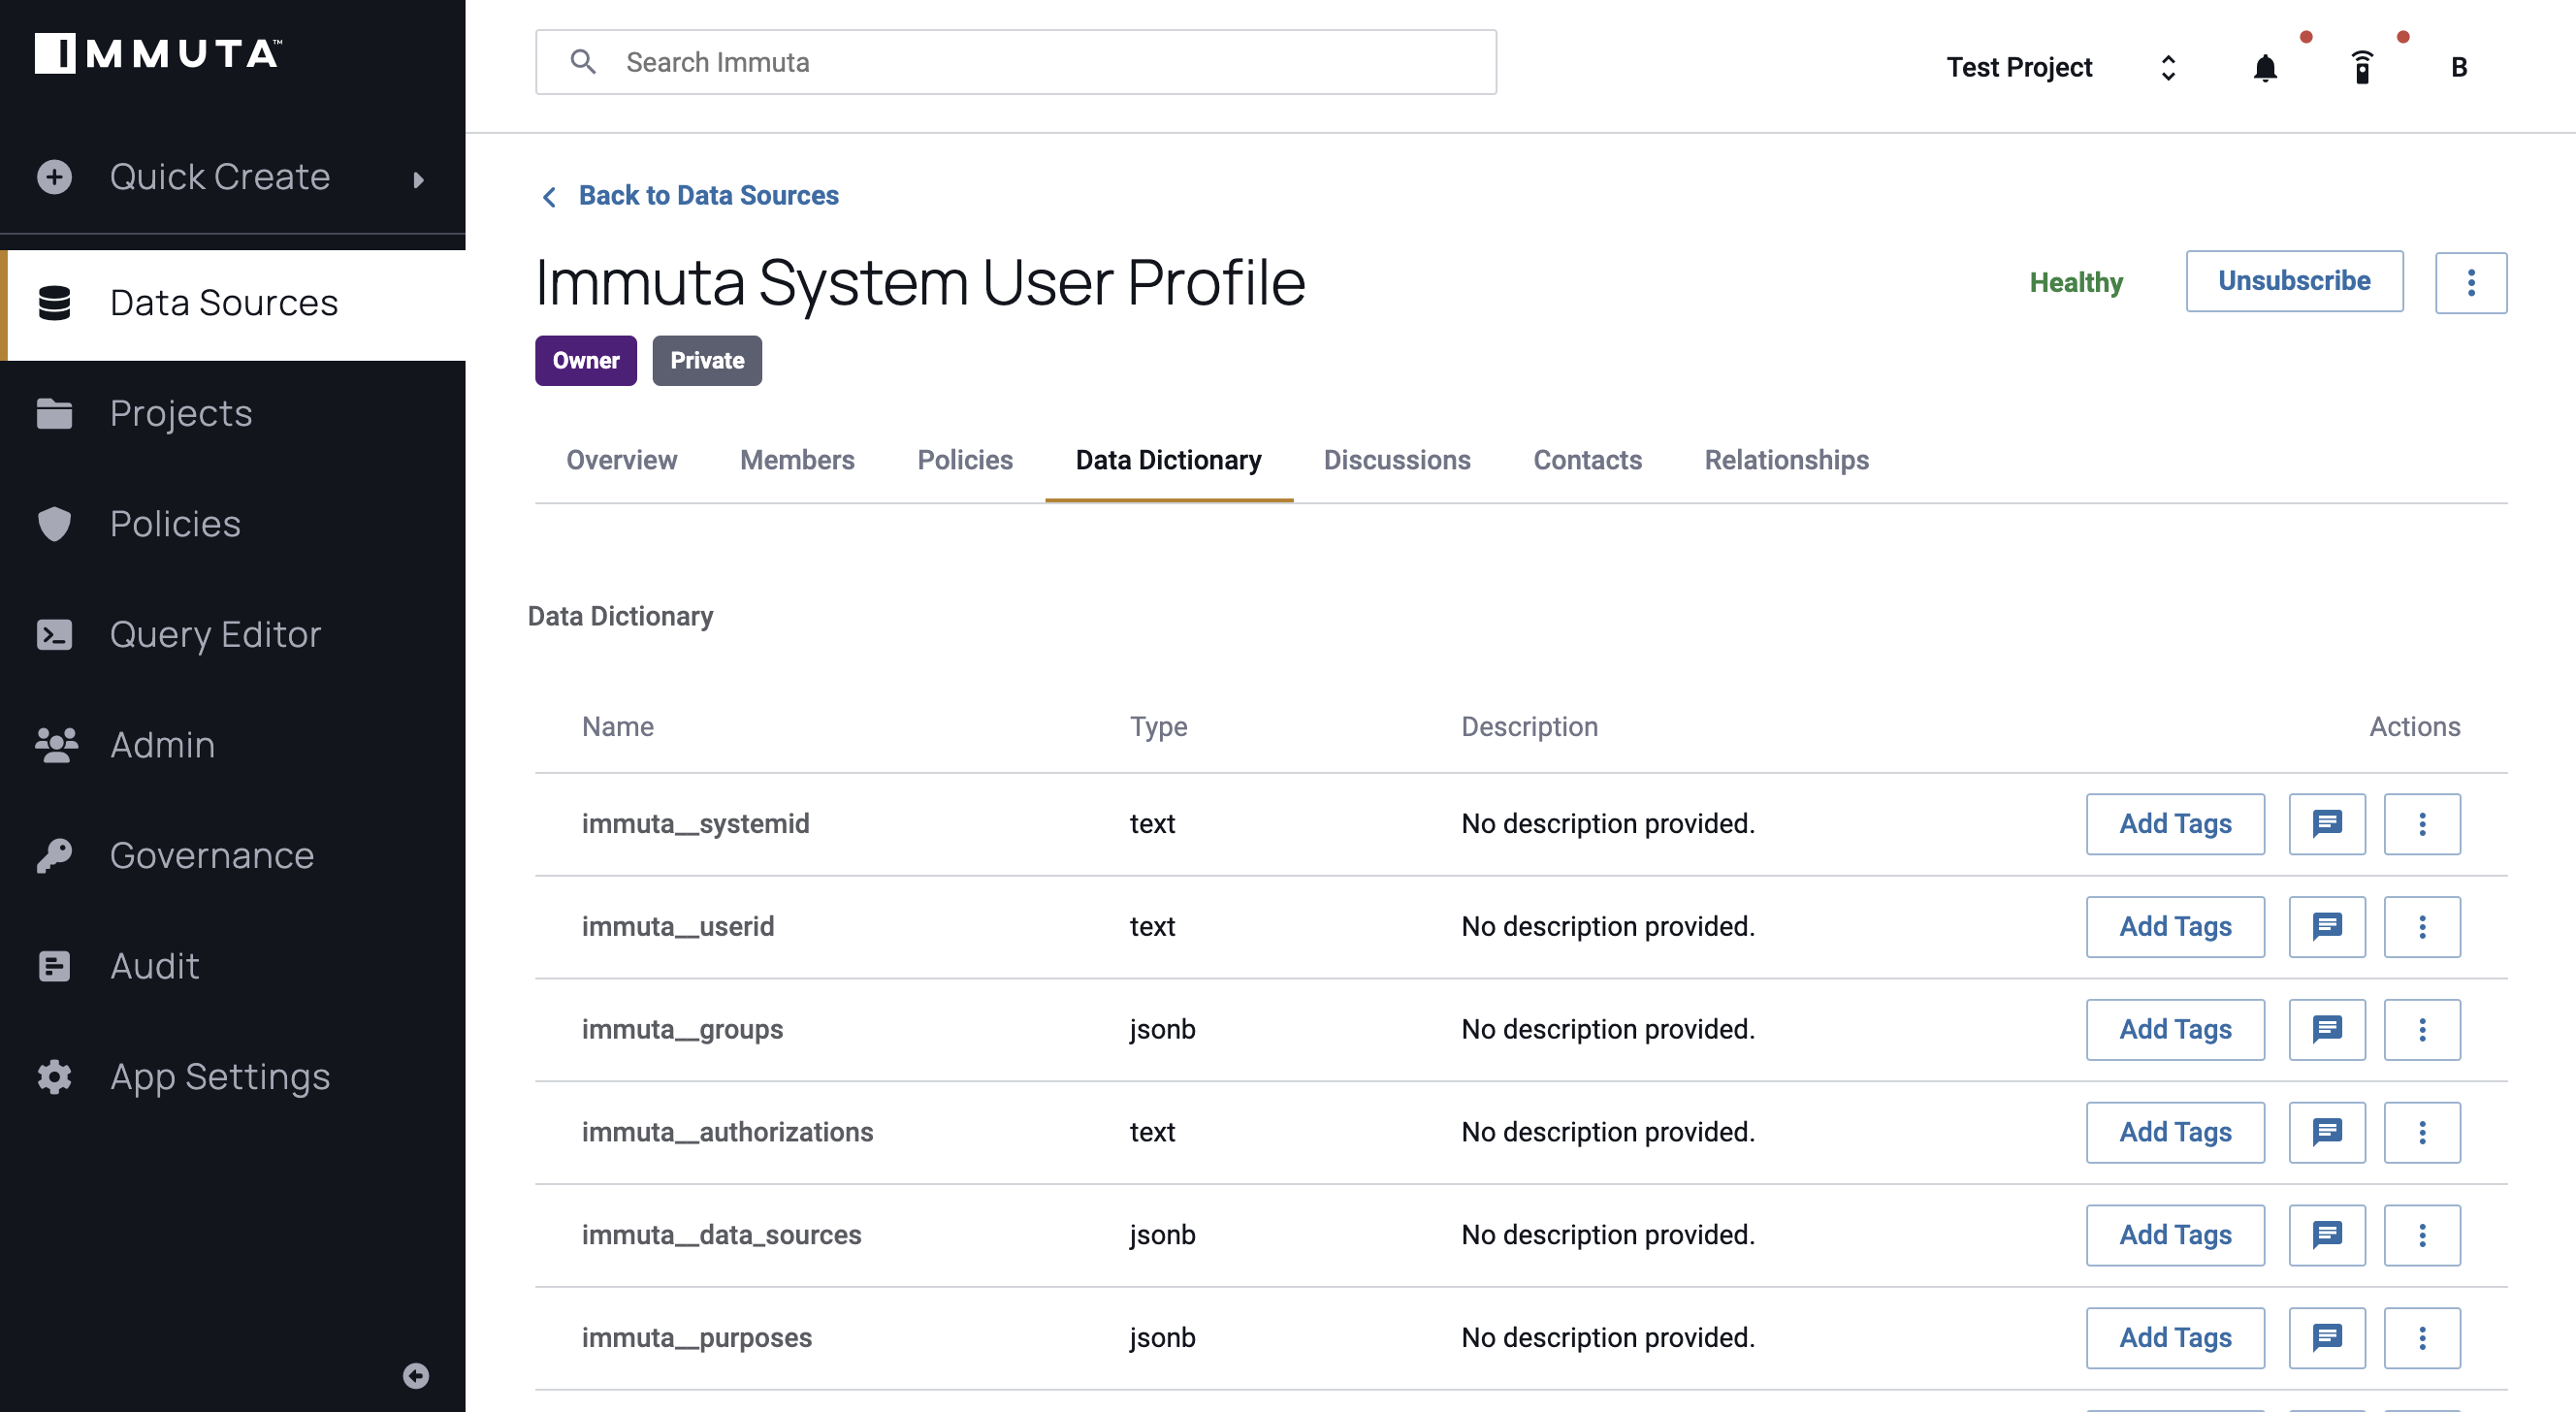
-
When provided, the Data Dictionary will display in the center pane and include the column’s name, type, and comments. Masked columns will display a symbol next to their names.
View and Comment on Data Source Discussions
Data Users have the ability to comment on or ask questions about the Data Dictionary columns and definitions, public queries, and the data source in general.
Comment on General Data Source Discussions
To comment on general data source discussions,
-
Navigate to the Discussions tab.
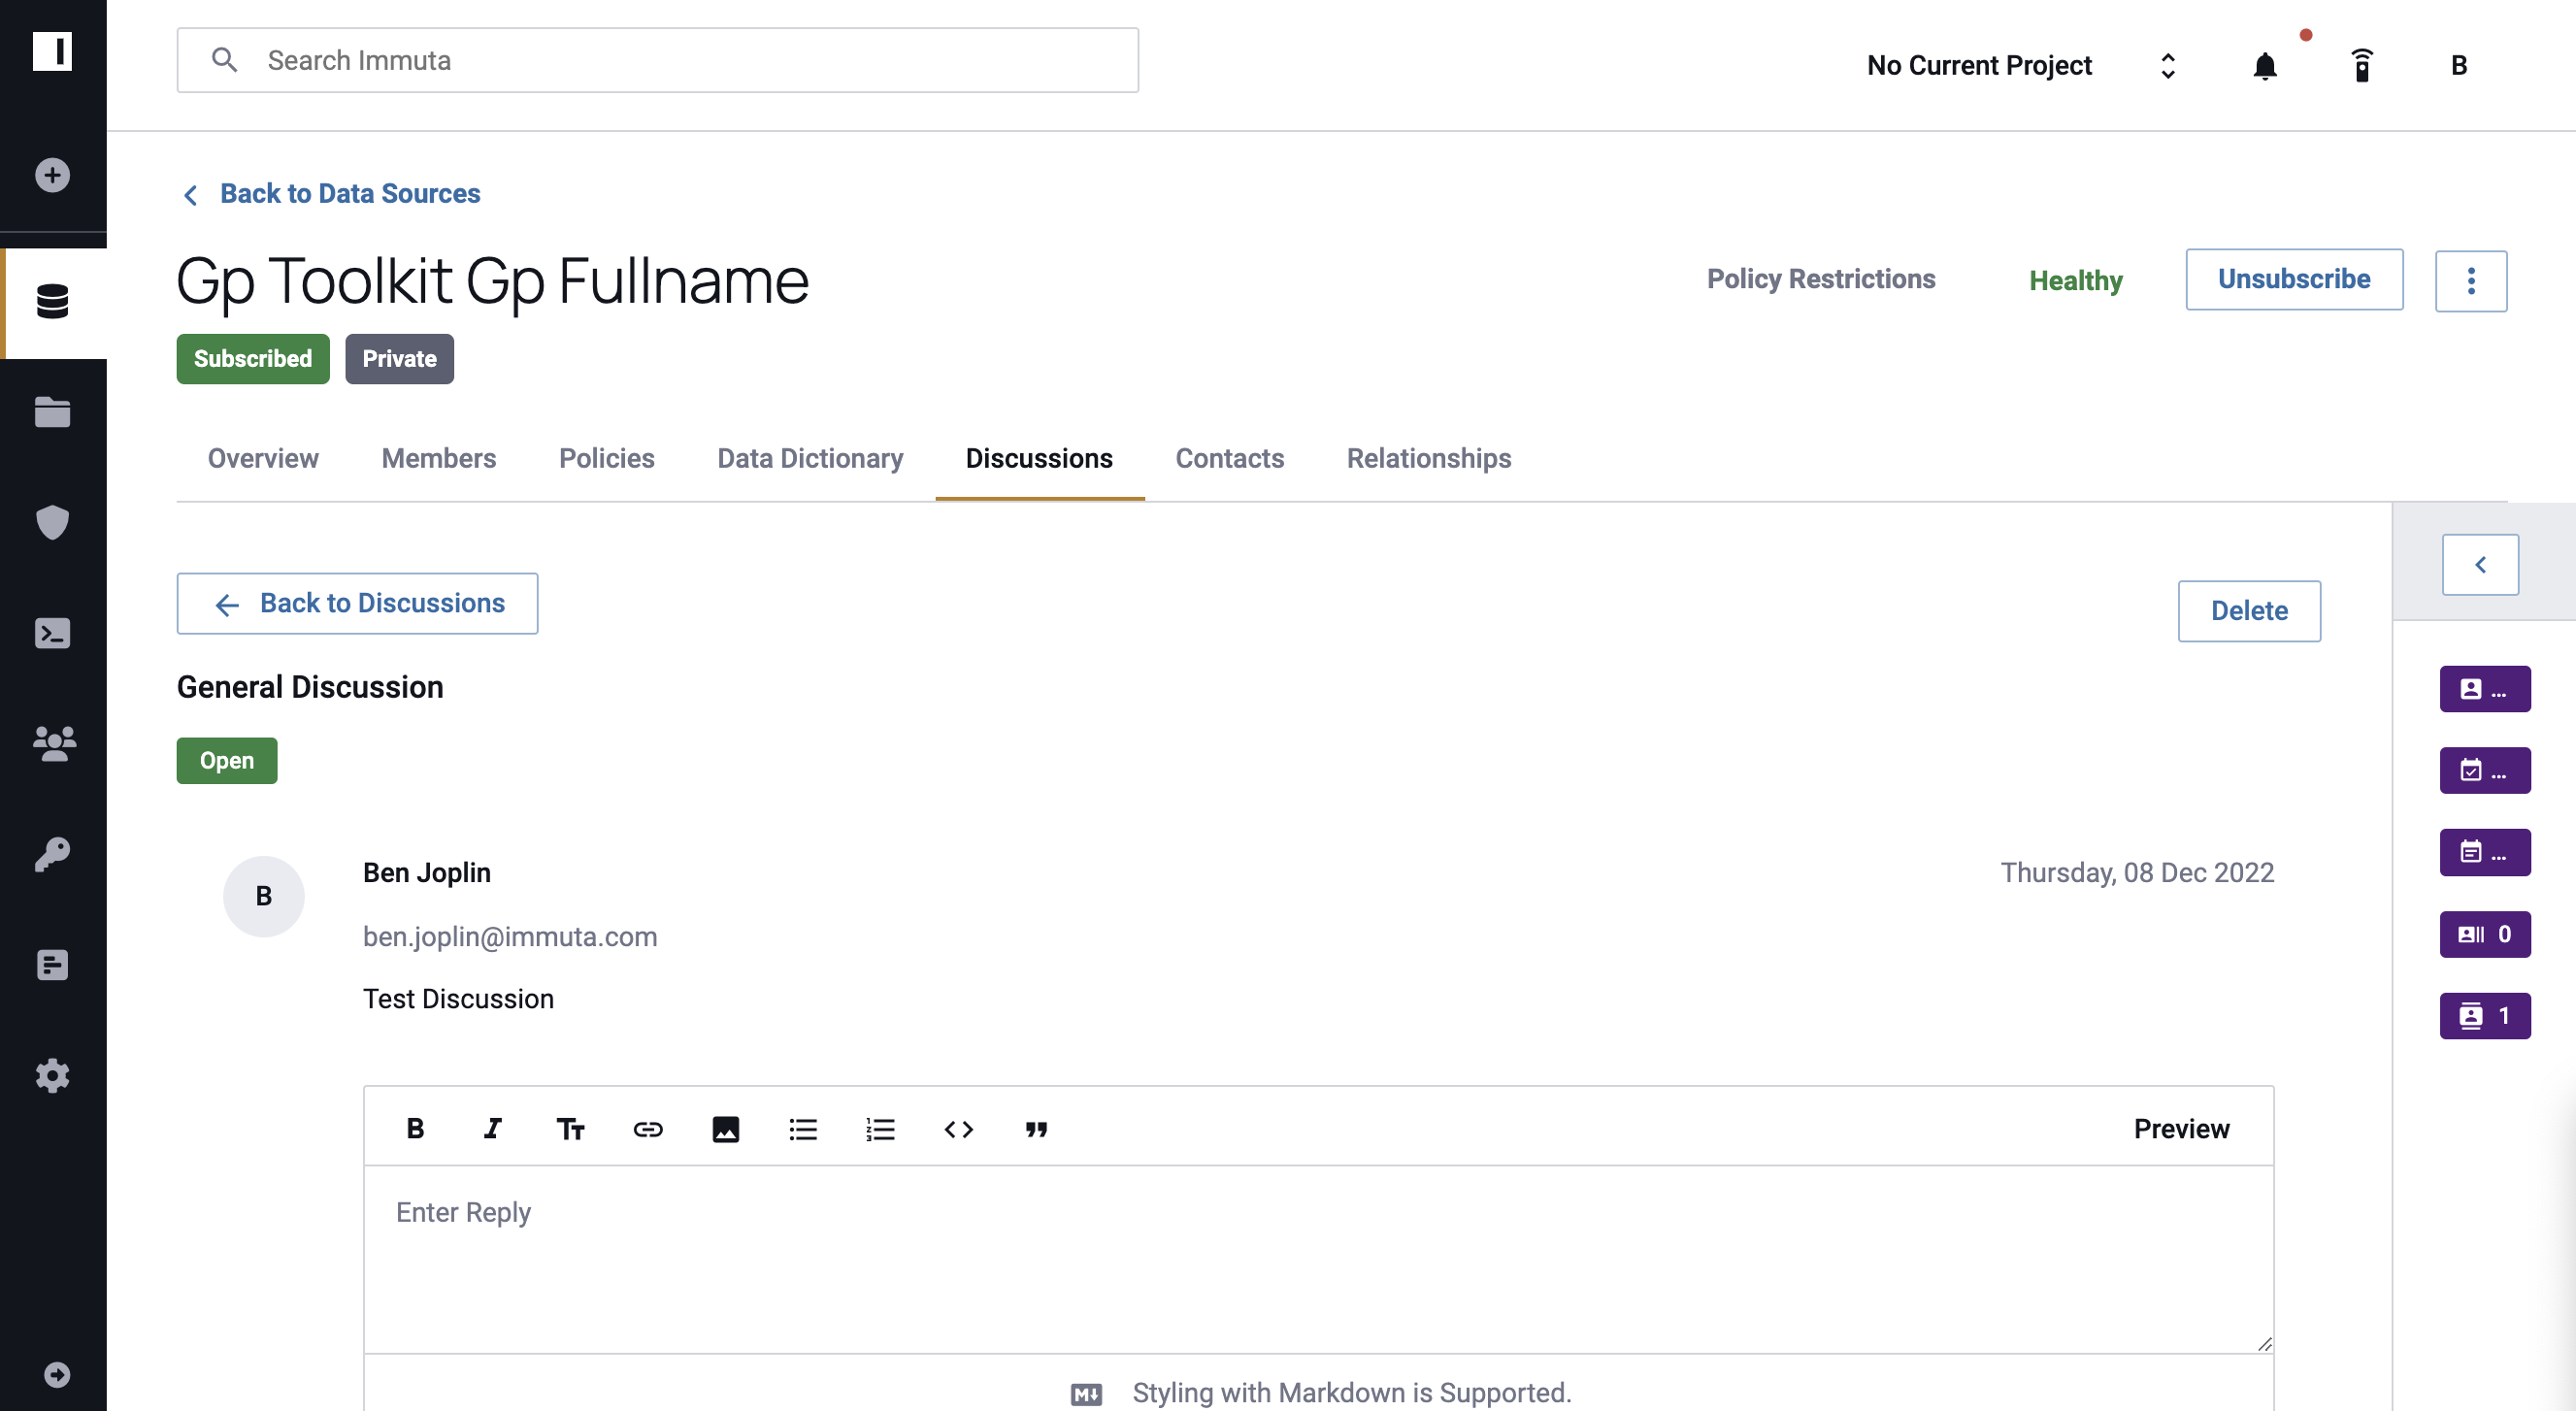
-
Click Open to review open discussions or Resolved to review resolved discussions.
- Click a discussion to view comments.
- Click New Discussion to create a new discussion.
- Type in your comment or question and click Save.
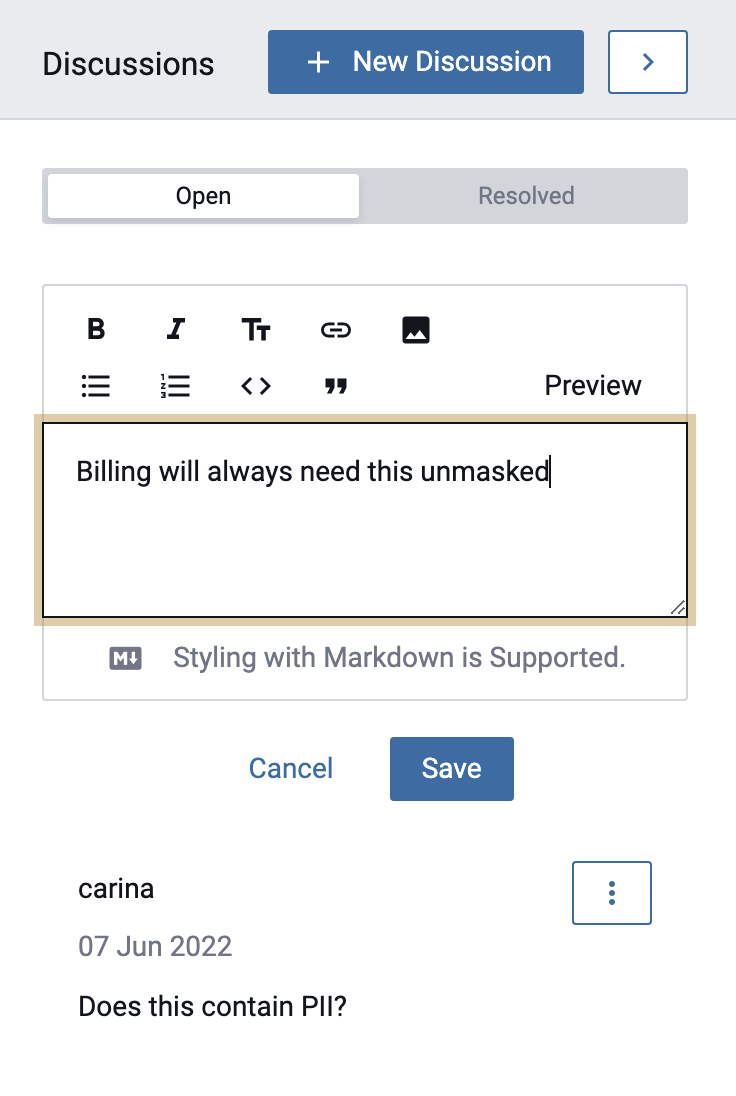
Comment on Dictionary Discussions
To comment on Data Dictionary discussions,
- Navigate to the Data Dictionary tab.
-
Click the talk bubble icon to the right of the definition.

-
View discussions on the far right side of the Data Dictionary page.
- Click Resolved to review any resolved threads or Open to review all open threads.
- To reply to an existing thread, click on the comment, type in a reply, and then click the Save button.
-
To start a new discussion, click New Discussion, type a new comment or question, and click the Save button.
-
A notification will be sent to all subscribers of the data source, including the Data Owner and Experts so that they can review the thread and reply.
- Once created, Data Dictionary discussions can be continued under the Discussions tab.
View Data Source Contact Information
Contact information for Data Owners is provided for each data source, which allows other users to ask them questions about accessibility and attributes required for viewing the data.
To view this contact information, click the Contacts tab.

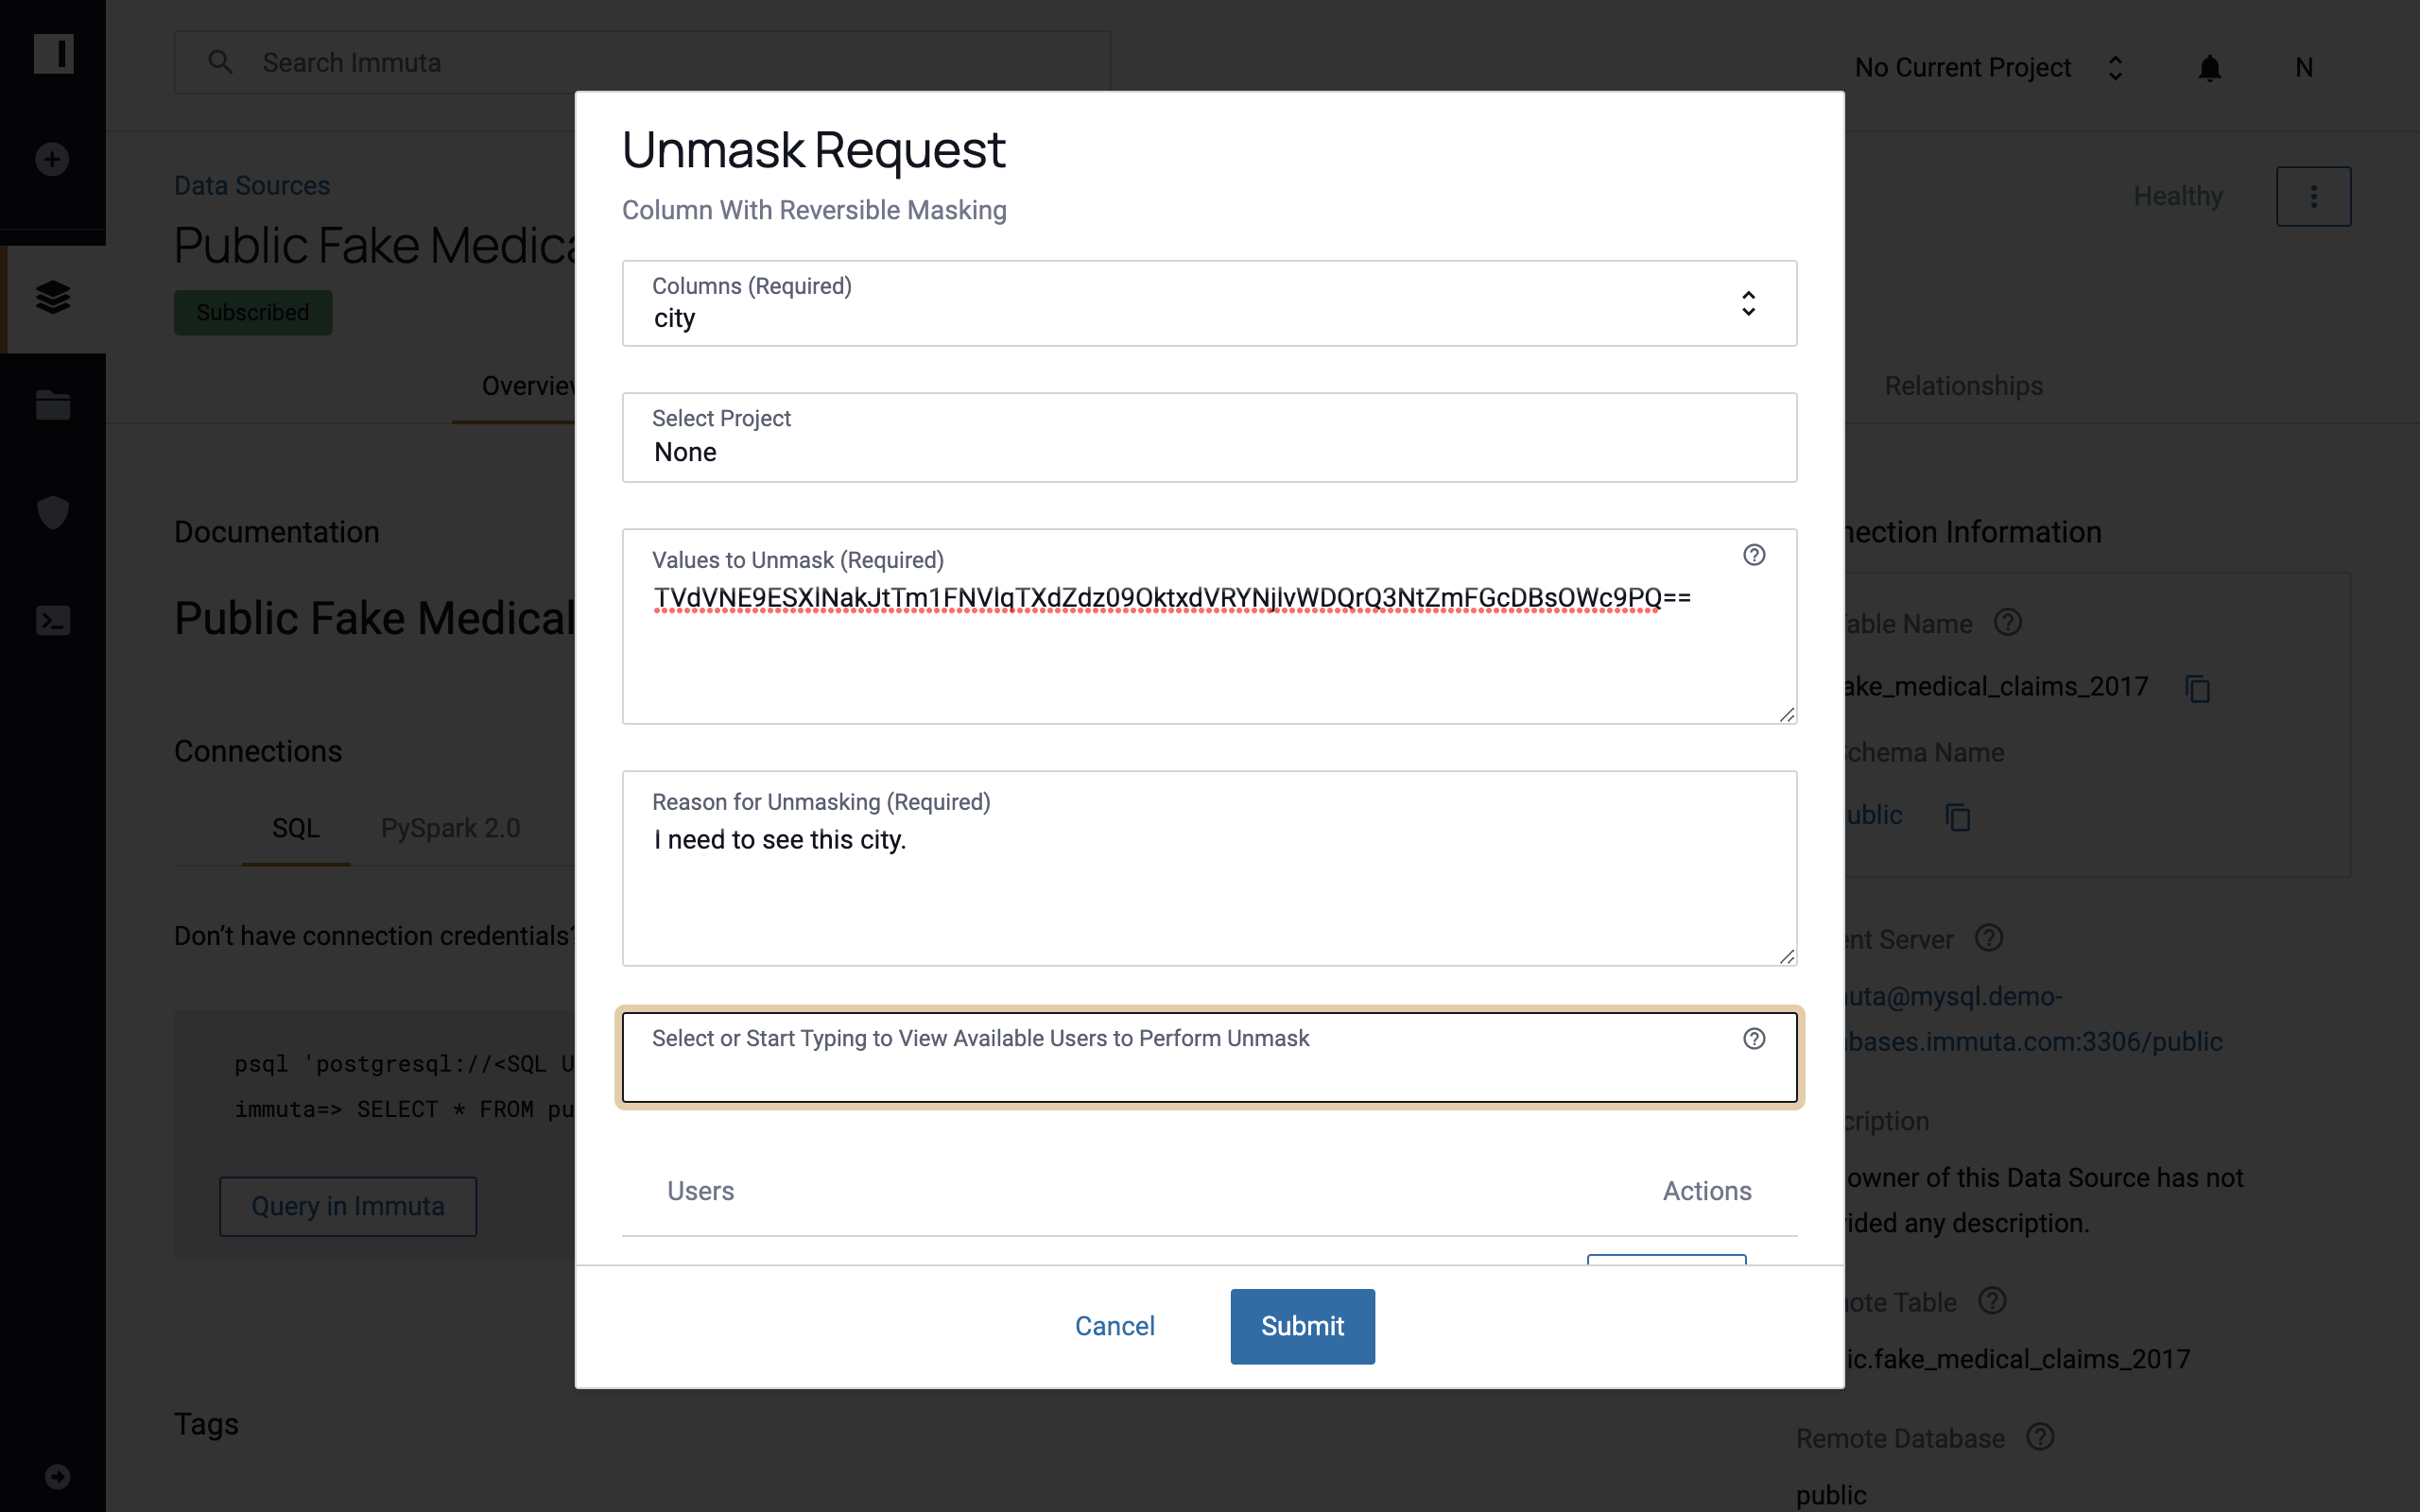
Make an Unmasking Request
To request to unmask a value in a data source,
-
Navigate to the Data Source Overview tab, click the dropdown menu in the top right corner, and select Make Unmasking Request.
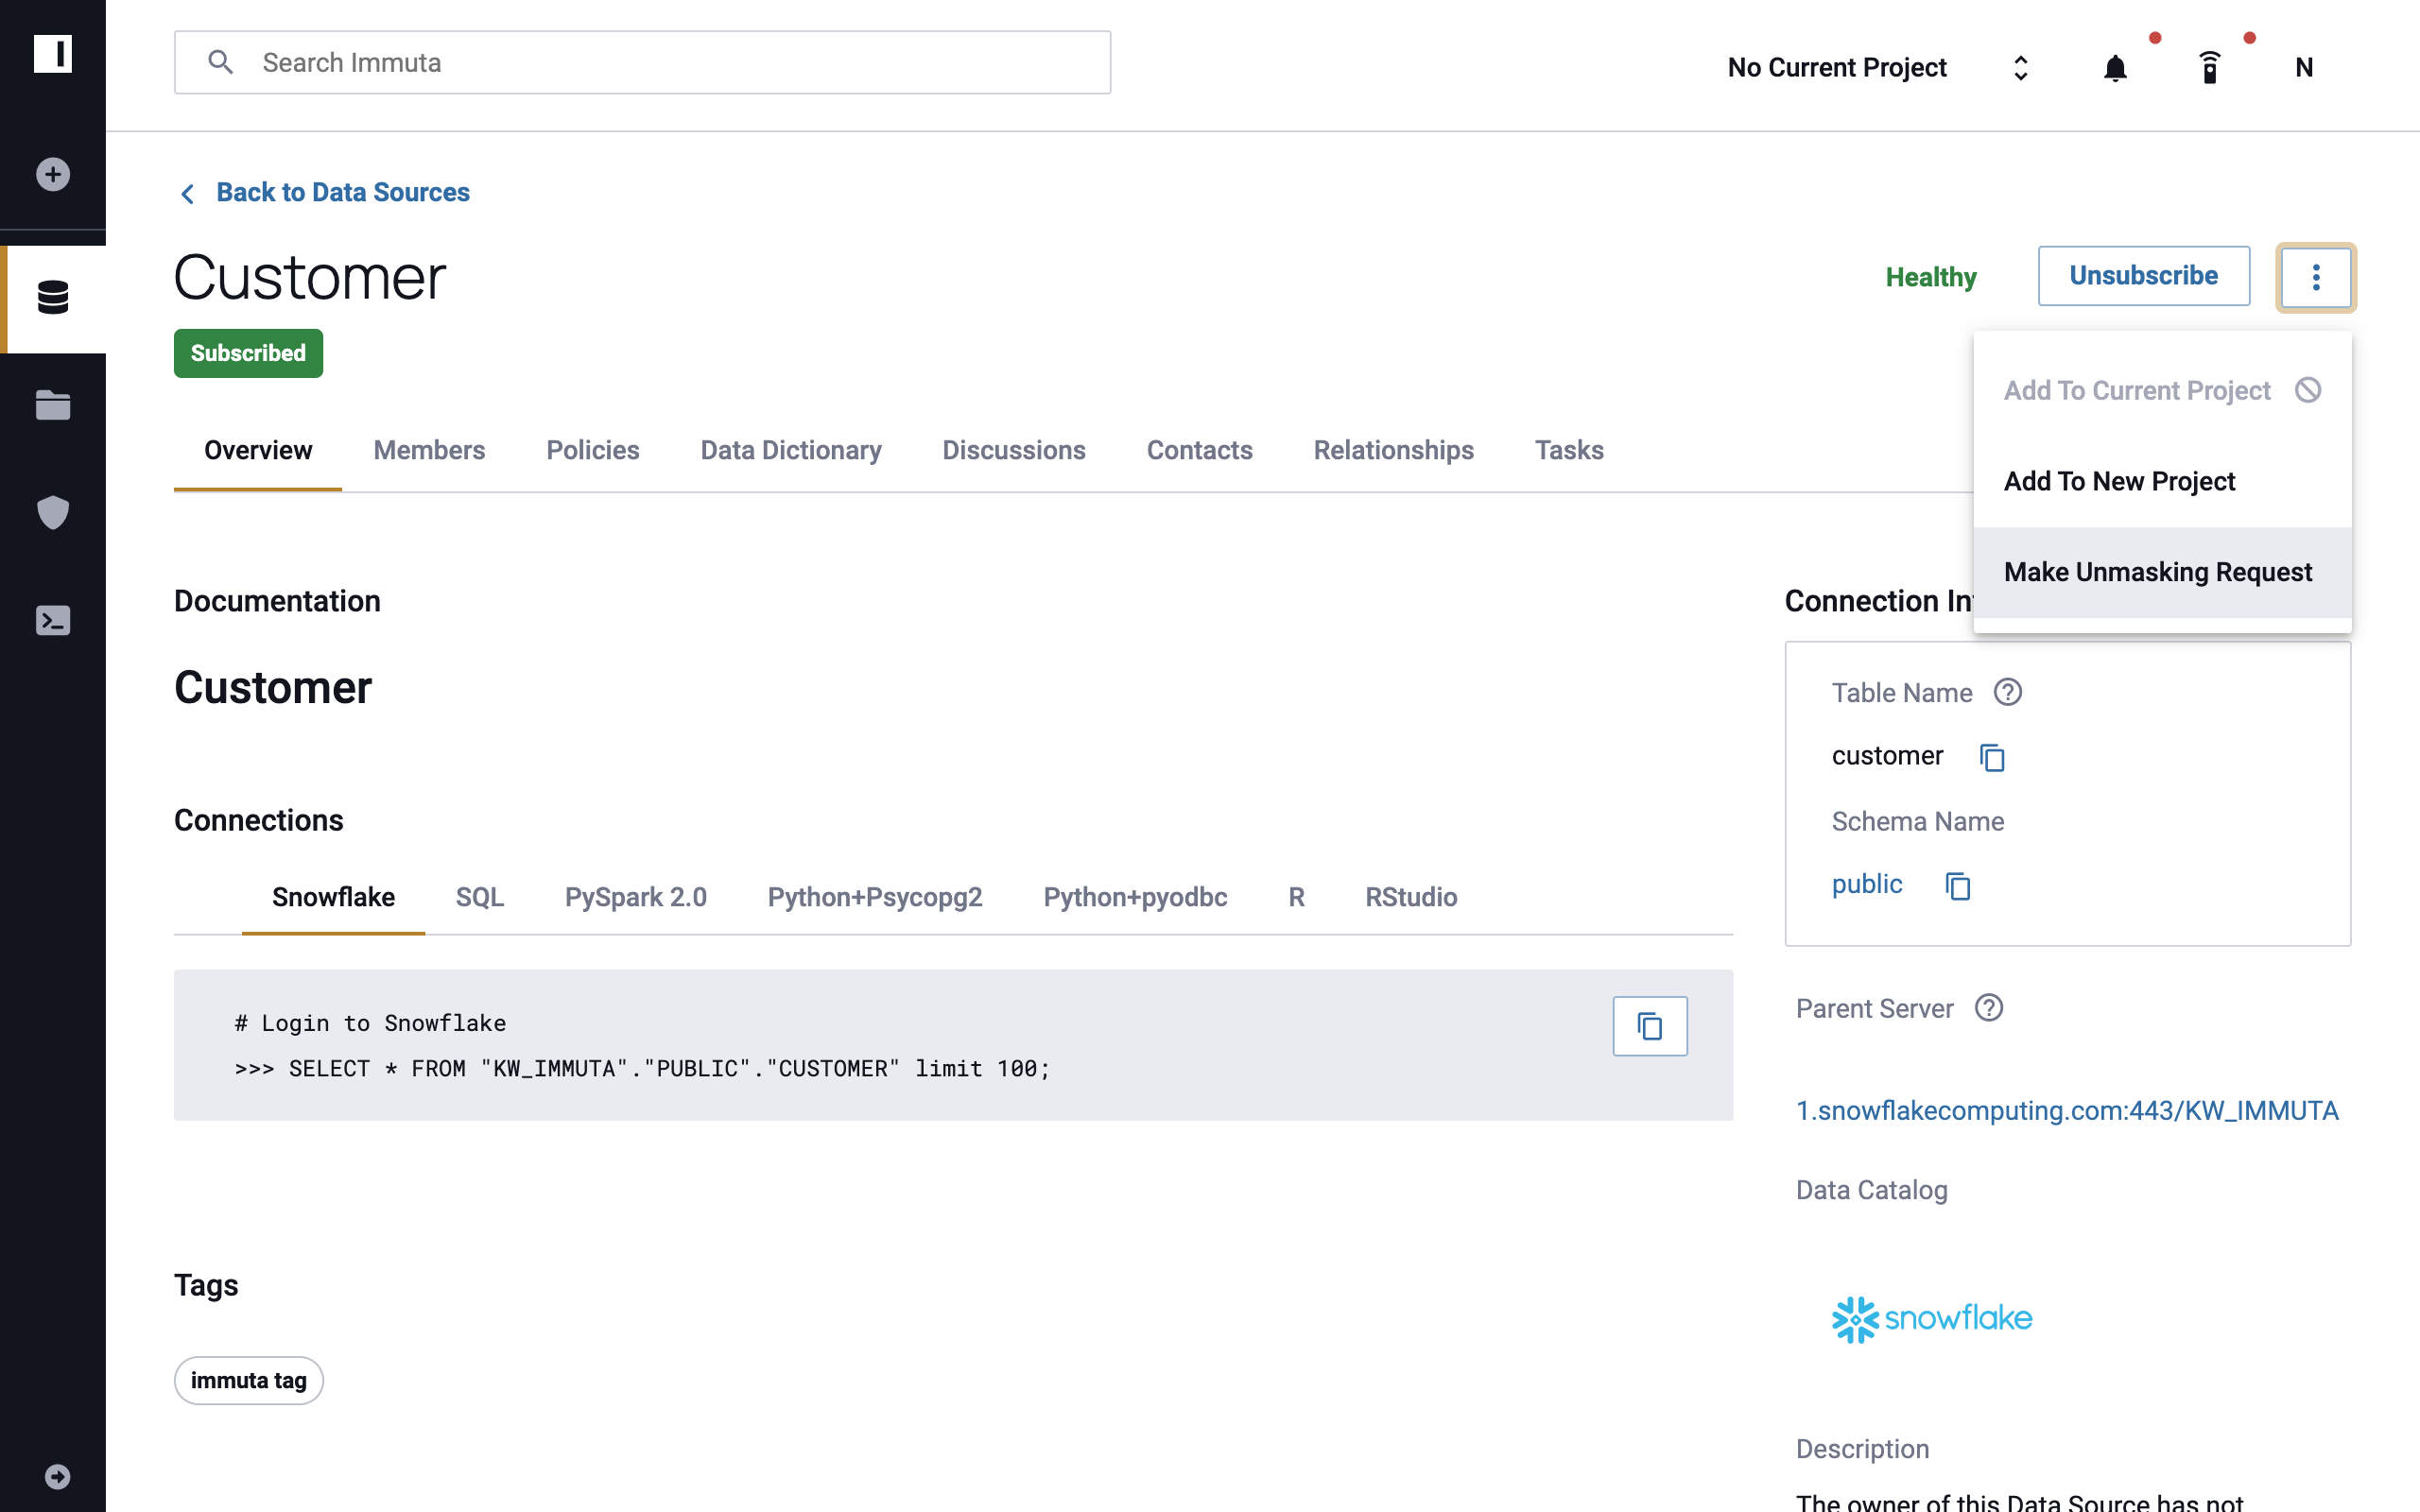
-
In the modal that appears, select the column from the first dropdown menu, and then complete the Values to Unmask and the Reason for Unmasking fields.
-
Select the user to unmask the value from the final dropdown menu, and then click Submit.
A Tasks tab will then appear for your data source that details the task type and the status of your request. You may also view task information or delete the task from this page.
View and Manage Tasks
After sending an Unmask request, a Tasks tab will appear on the Data Source Overview page listing the target and requesting users, the task type, and the state of the task.
To view information about a task,
- Navigate to the Tasks tab from the Data Source Overview page.
-
Click the Task Info icon in the Actions column of the relevant task.
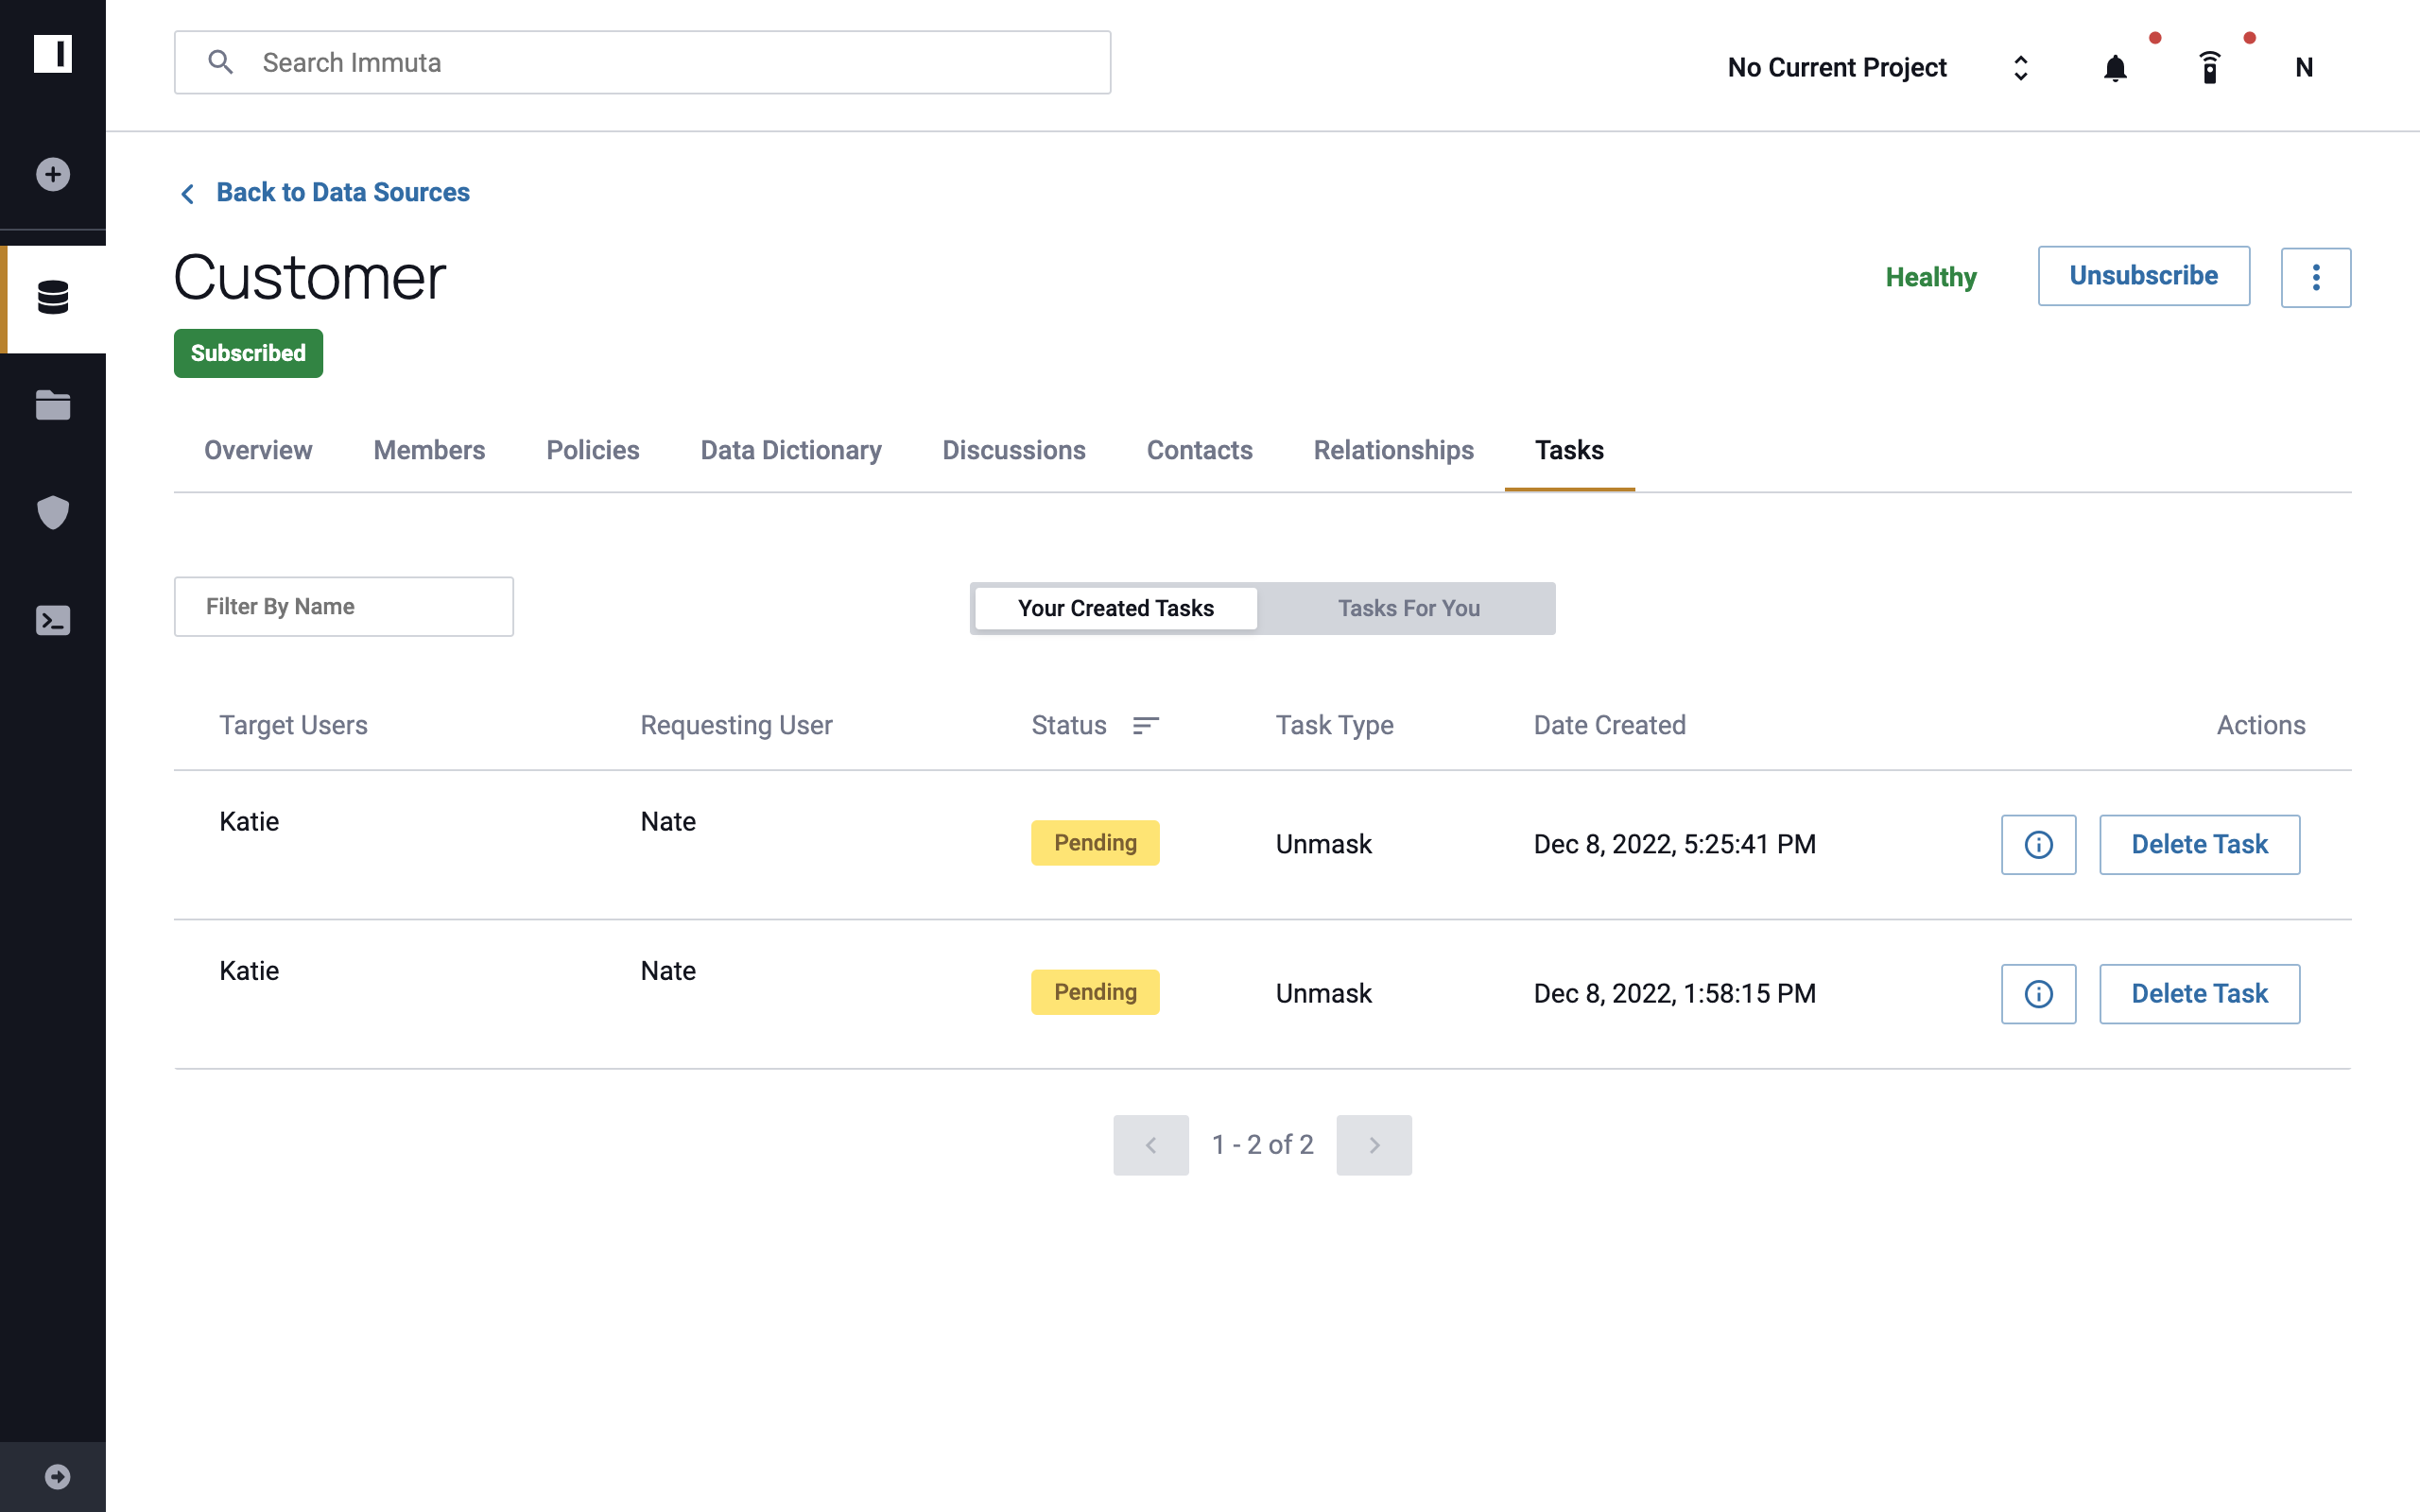
To delete a task,
- Navigate to the Tasks tab from the Data Source Overview page.
- Click Delete Task.