Manage Attributes and Groups
Audience: System Administrators
Content Summary: System Administrators are responsible for managing users and their permissions, attributes, and groups. This page contains tutorials on managing groups and attributes in Immuta.
Additional Tutorials Contents:
- Remove User from Group
- Remove Group
- Remove User or Group Attribute
Use Case Context
Use Case
Compliance Requirement: Users can only interact with Dev data.
For this requirement, the System Administrator needs to create groups for Dev, Test, and Prod teams. Then the System Administrator needs to add the corresponding Environment attribute to each group to be used in future policies. This process allows Administrators to add attributes to multiple users at one time.
Note: Administrators could alternatively just use Dev, Test, and Prod groups to manage access to data, but using attributes in Immuta allows more flexibility and granularity.
1 - Create Group
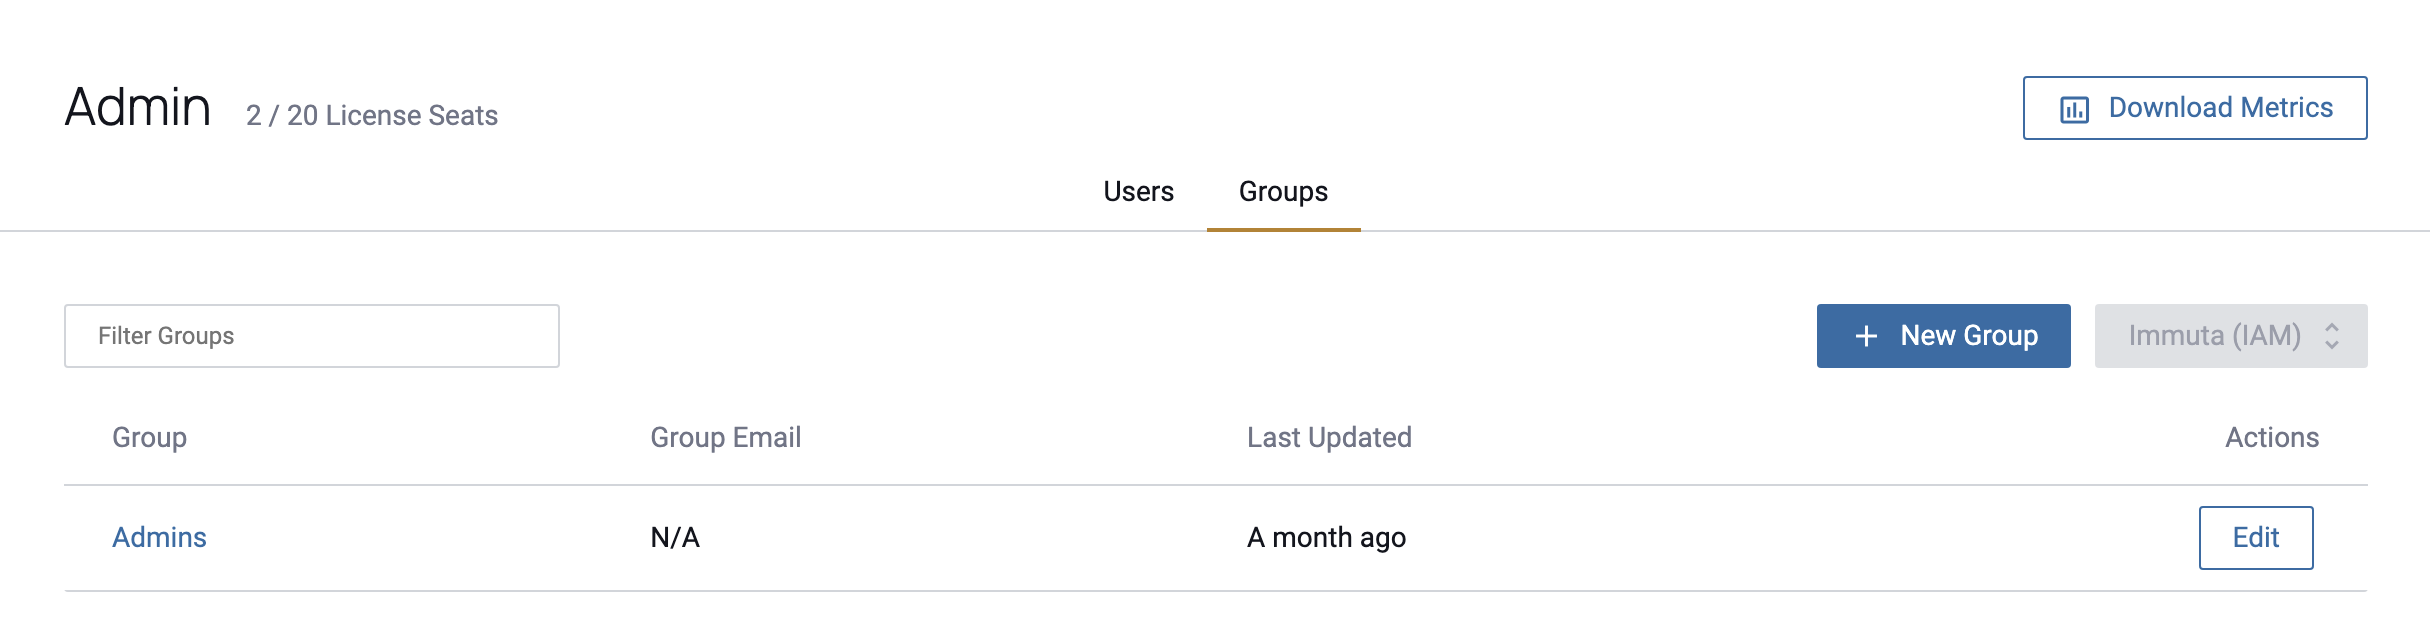
- Click the Admin icon in the left sidebar, and then select the Groups tab.
-
Click the New Group button in the top right of the page.
Alternatively,
-
Click the plus button in the top left of the Immuta console.
-
Select the New Group icon.
-
In the dialog, enter Dev. You have the option to enter a description of and email address for the new group.
-
Click Save.
Repeat these steps for groups Test and Prod.
2 - Add User to Group
-
Click the Admin icon in the left sidebar, and select the group from the Groups panel.
-
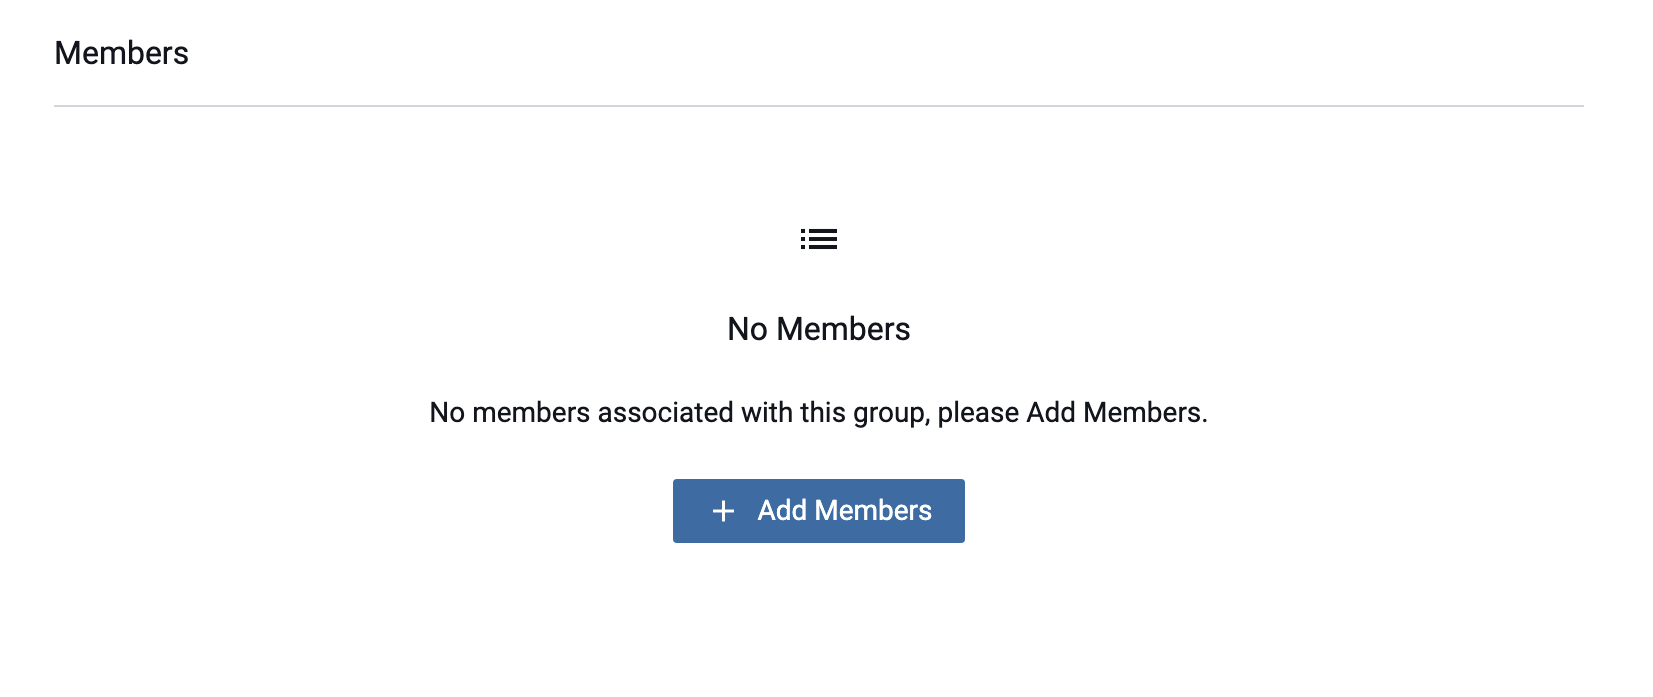
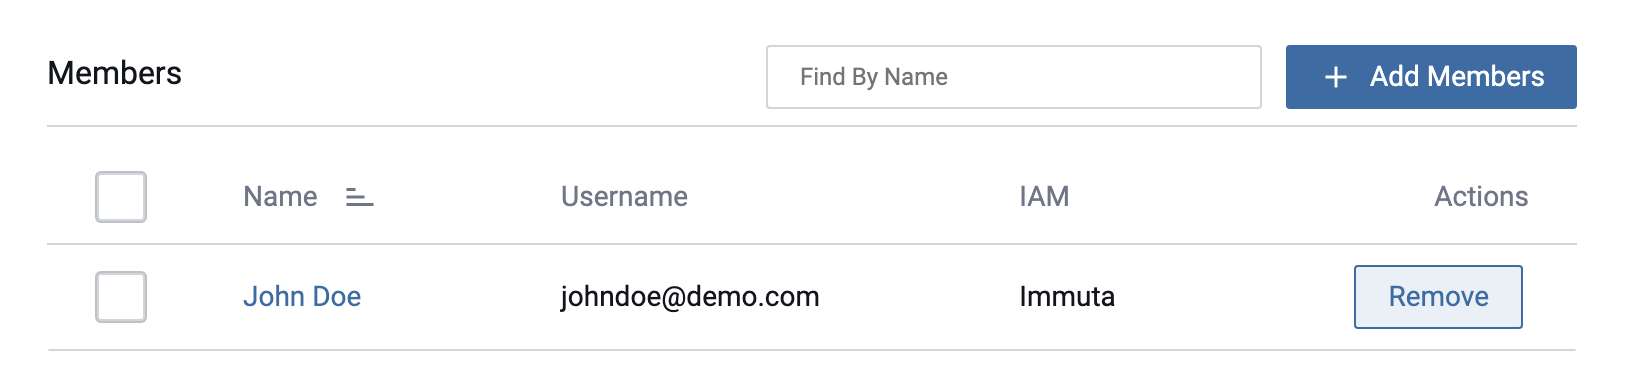
Scroll to the Members section, and click the Add Members button.
-
Begin typing in the Search by Name or Email text box.
-
Click on the name from the dropdown list to add this user to the group, and then click Close.
Alternatively,
-
Click the Admin icon in the left sidebar, and select the user from the Users tab.
-
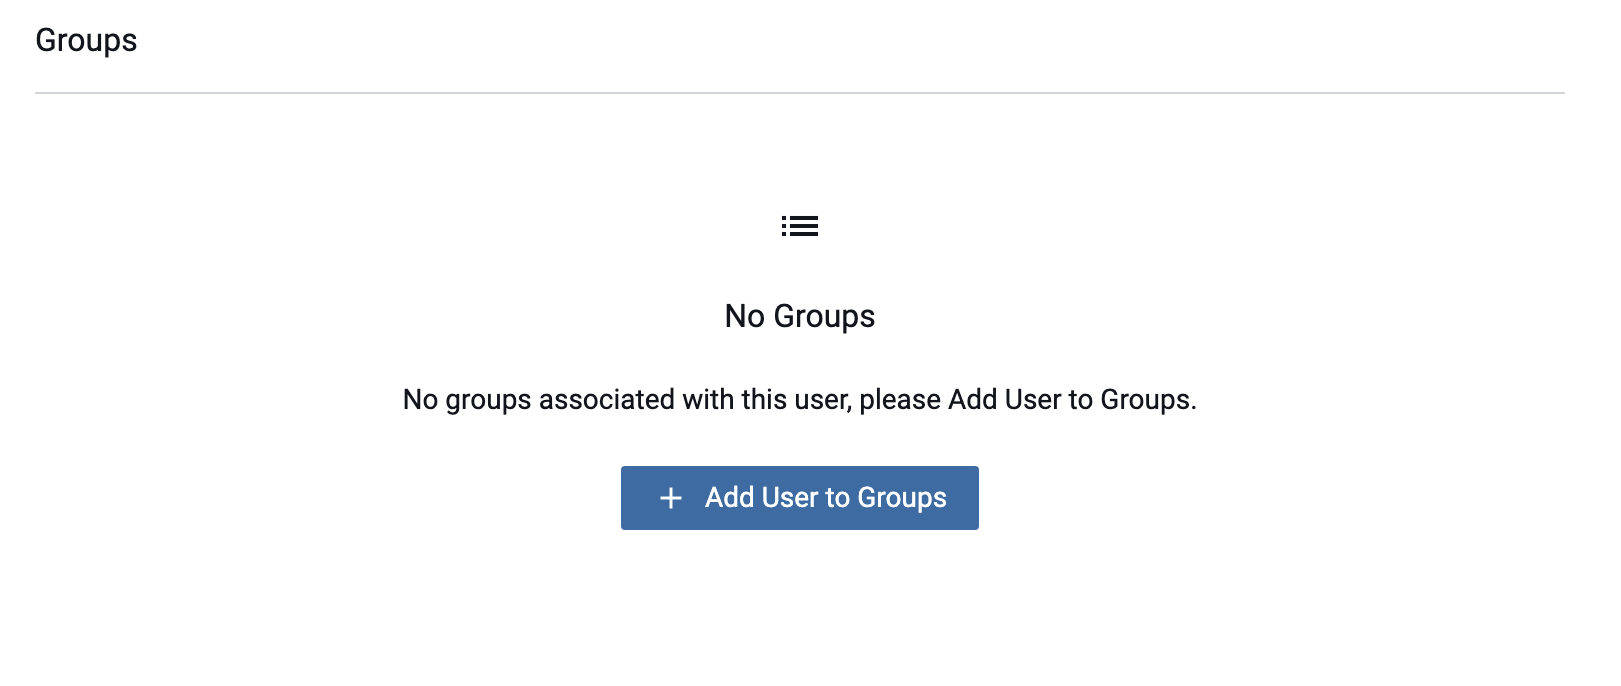
Scroll to the Groups section, and click the Add User to Groups button.
-
Begin typing in the Group Name text box, and select the group from the dropdown list that appears.
-
Click Close.
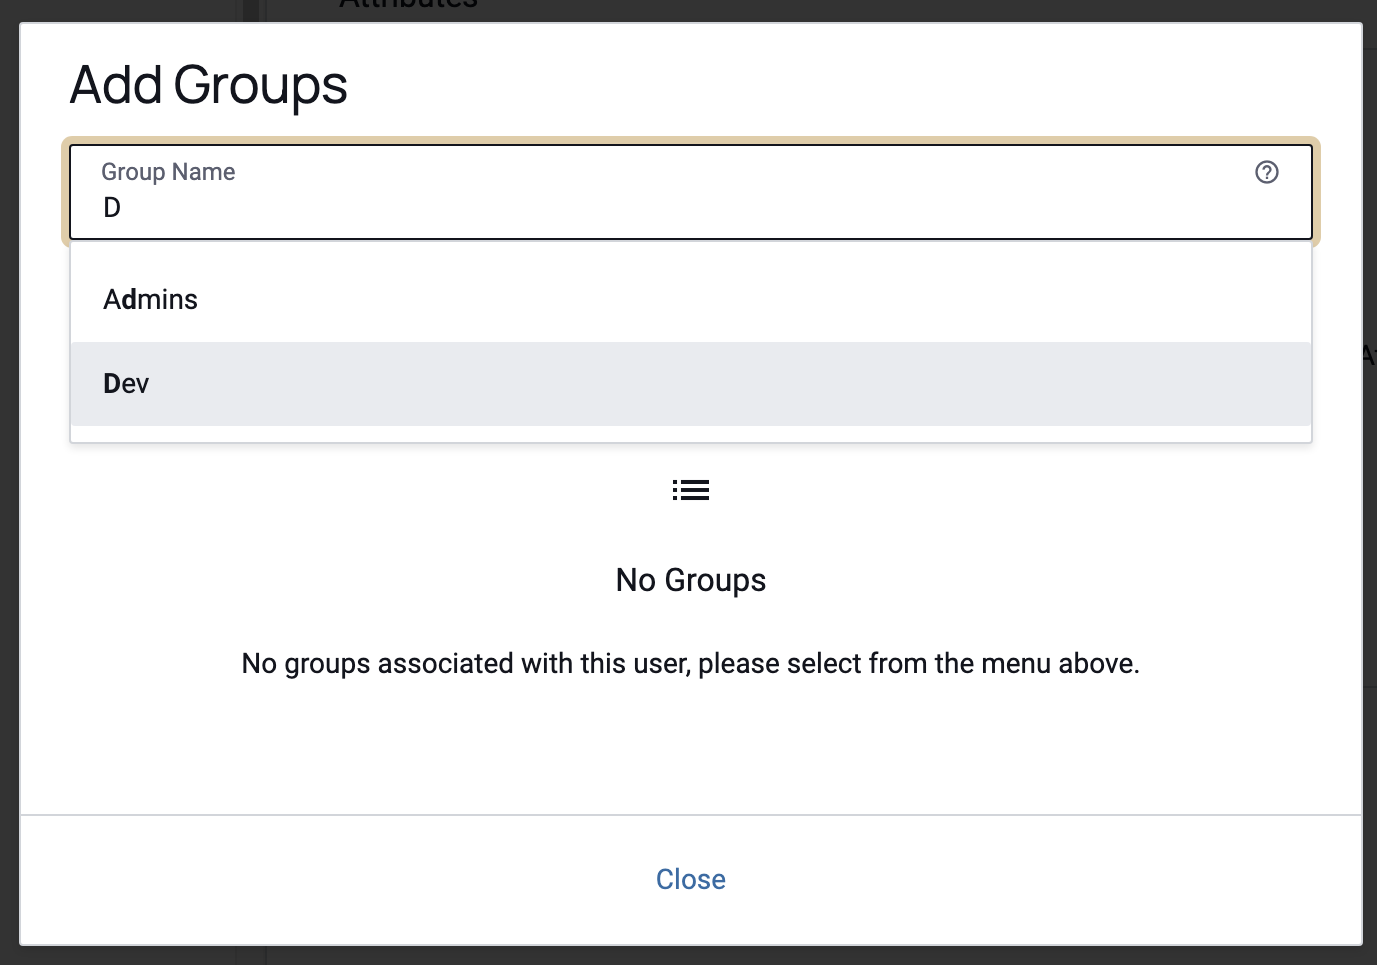
Note: If no groups match, the dropdown will be empty.
3 - Add Group or User Attribute
Best Practice: Use External and Internal IAM
Use an external IAM for authentication and Immuta's internal IAM to manage attributes.
- Click the Admin icon in the left sidebar, and click the Groups tab at the top of the page.
- Select the Dev group.
-
Click Add Attributes.

-
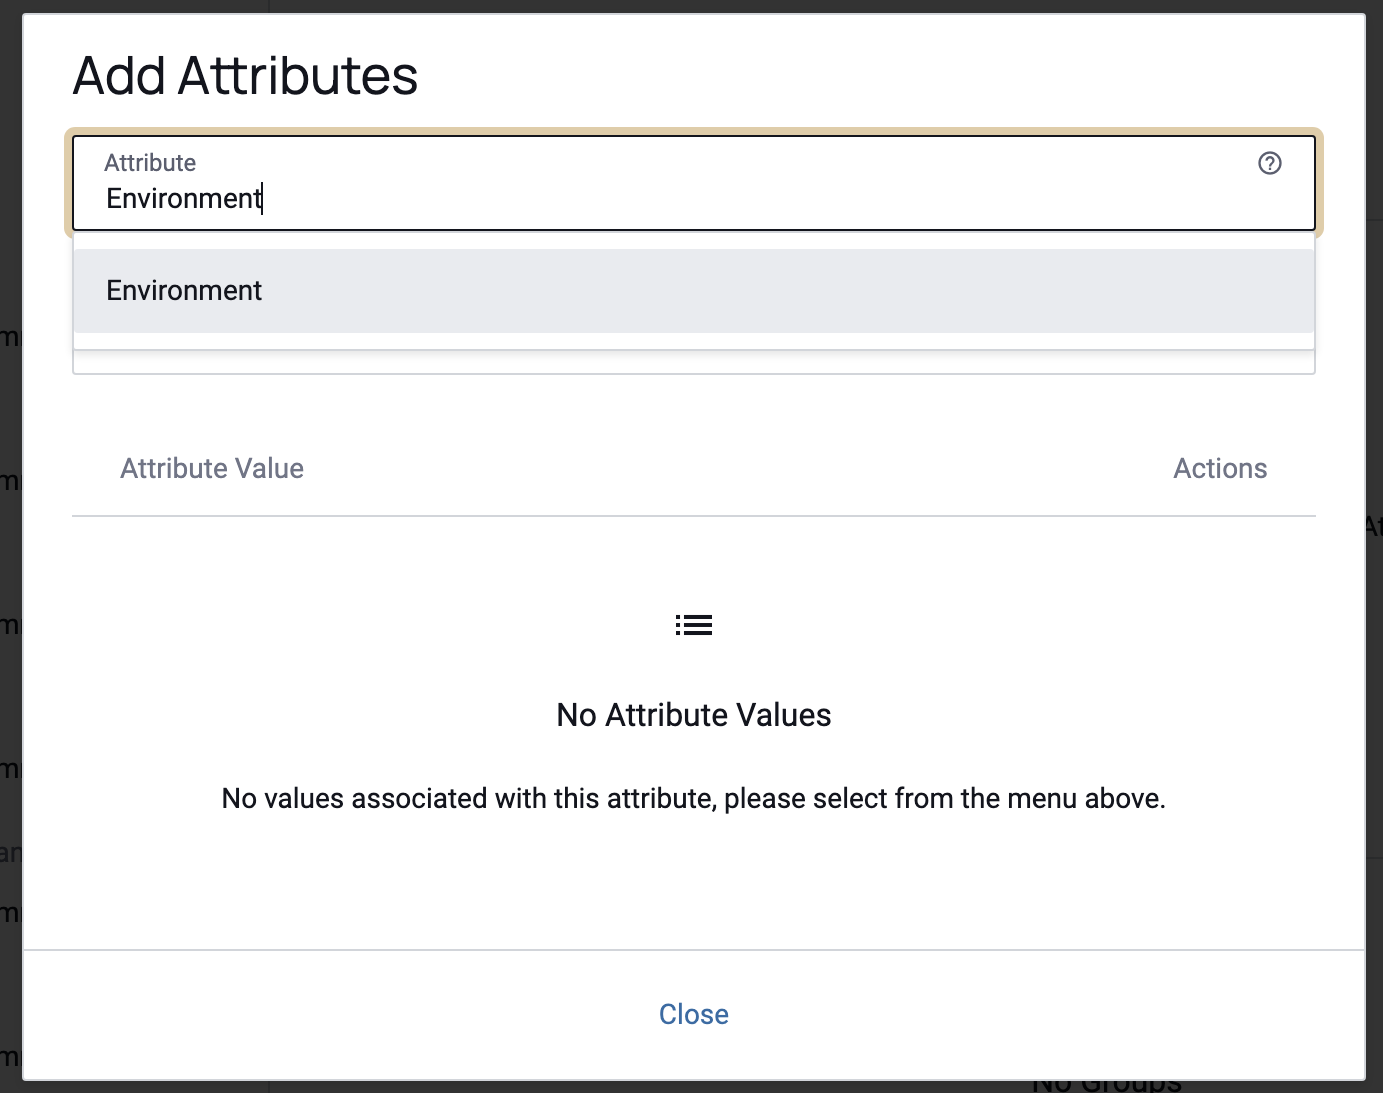
Begin typing Environment in the Enter Attribute text box.
-
If the attribute already exists, select Environment from the dropdown list.
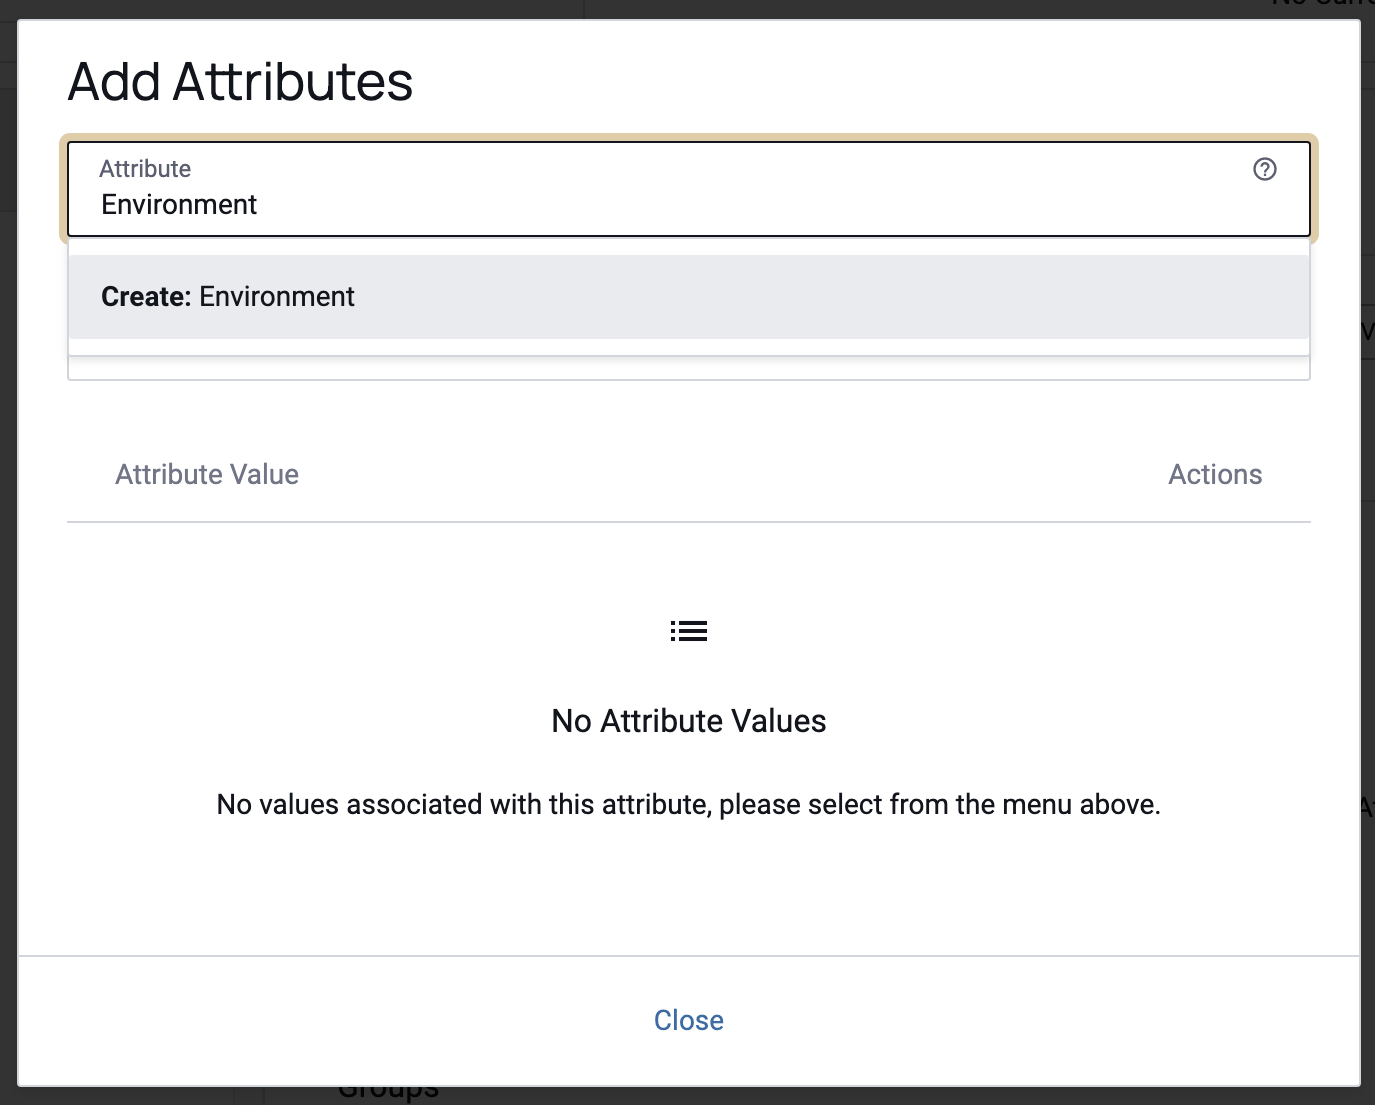
-
If the attribute does not exist yet, enter Environment for the attribute, and then select it from the dropdown.
-
-
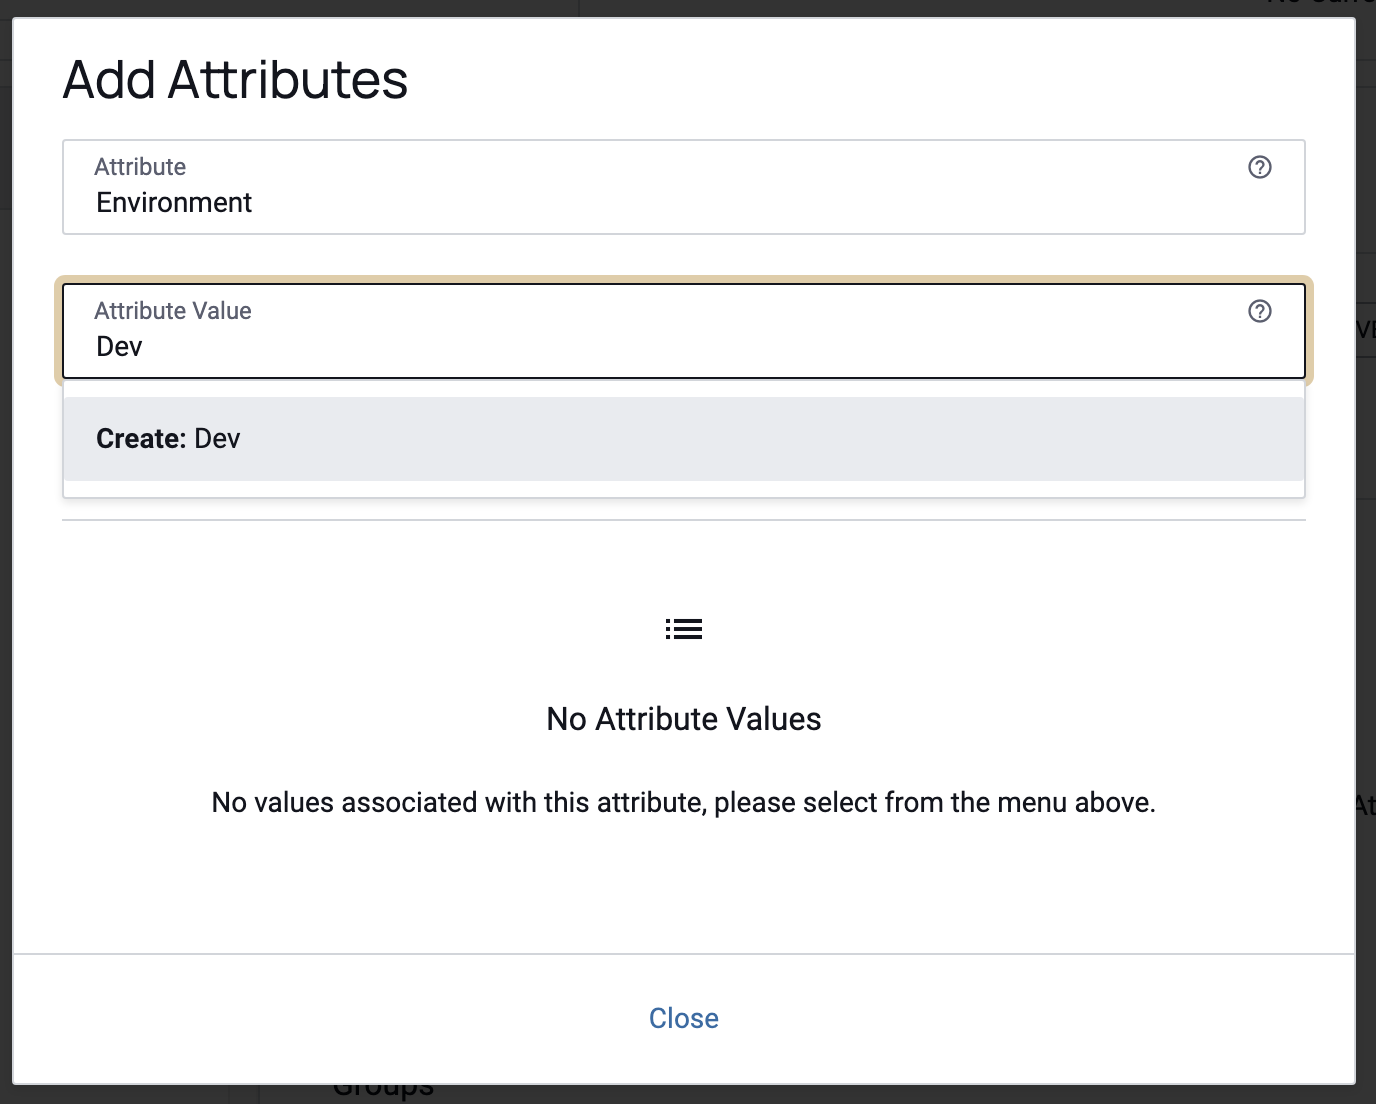
In the Attribute Value text box, enter Dev.
-
If the value already exists, select the Dev from the dropdown list.
-
If the value does not exist, enter Dev, and then select it from the dropdown.
-
-
Click Close.
Repeat these steps for Test and Prod groups, using Test and Prod as the attribute value.
Alternatively,
-
Click the Admin icon in the left sidebar, and click the Users tab at the top of the page.
-
Select the name of the user you want to add the attribute to.
-
Scroll to the Attributes section, and click Add Attributes.
-
Begin typing Environment in the Enter Attribute text box.
-
If the attribute already exists, select Environment from the dropdown list.
-
If the attribute does not exist yet, enter Environment for the attribute, and then select it from the dropdown.
-
-
In the Attribute Value text box, enter Dev.
-
If the value already exists, select the Dev from the dropdown list.
-
If the value does not exist, enter Dev, and then select it from the dropdown.
-
-
Click Close.
Additional Tutorials
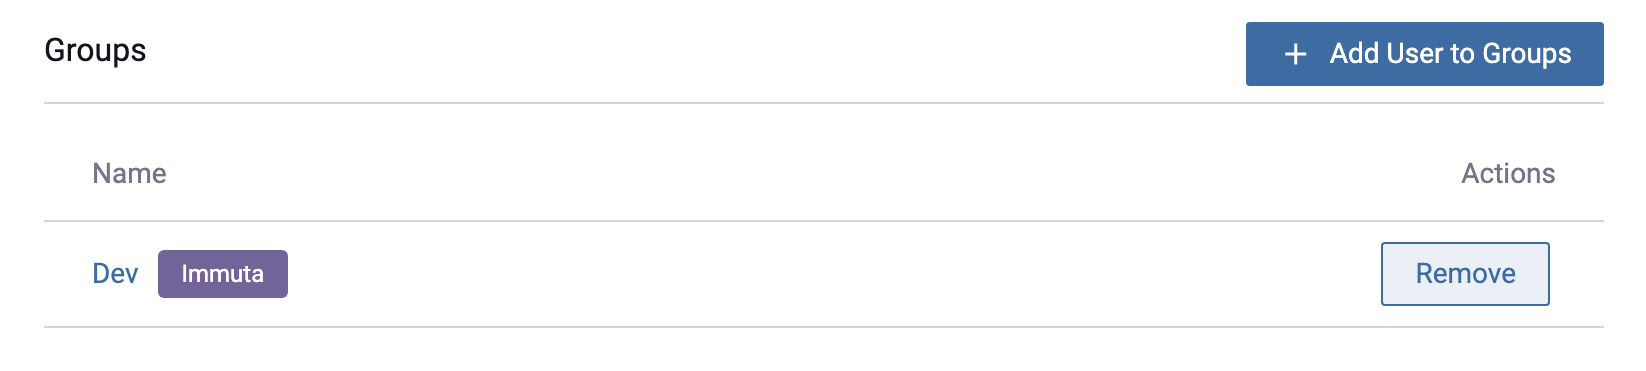
Remove User from Group
-
Select the group from the Groups tab.
-
In the Members section, click Remove to the right of the member you want to remove.
-
Click Delete to confirm.
Alternatively,
-
Click the Admin icon in the left sidebar, and select the user from the Users panel.
-
Scroll to the Groups section, and click delete to the right of the group you want to remove.
-
Click Delete in the confirmation window that appears.
Remove Group
-
Select the group from the Groups panel.
-
Click the dropdown menu in the top right of the group details, and select Delete.
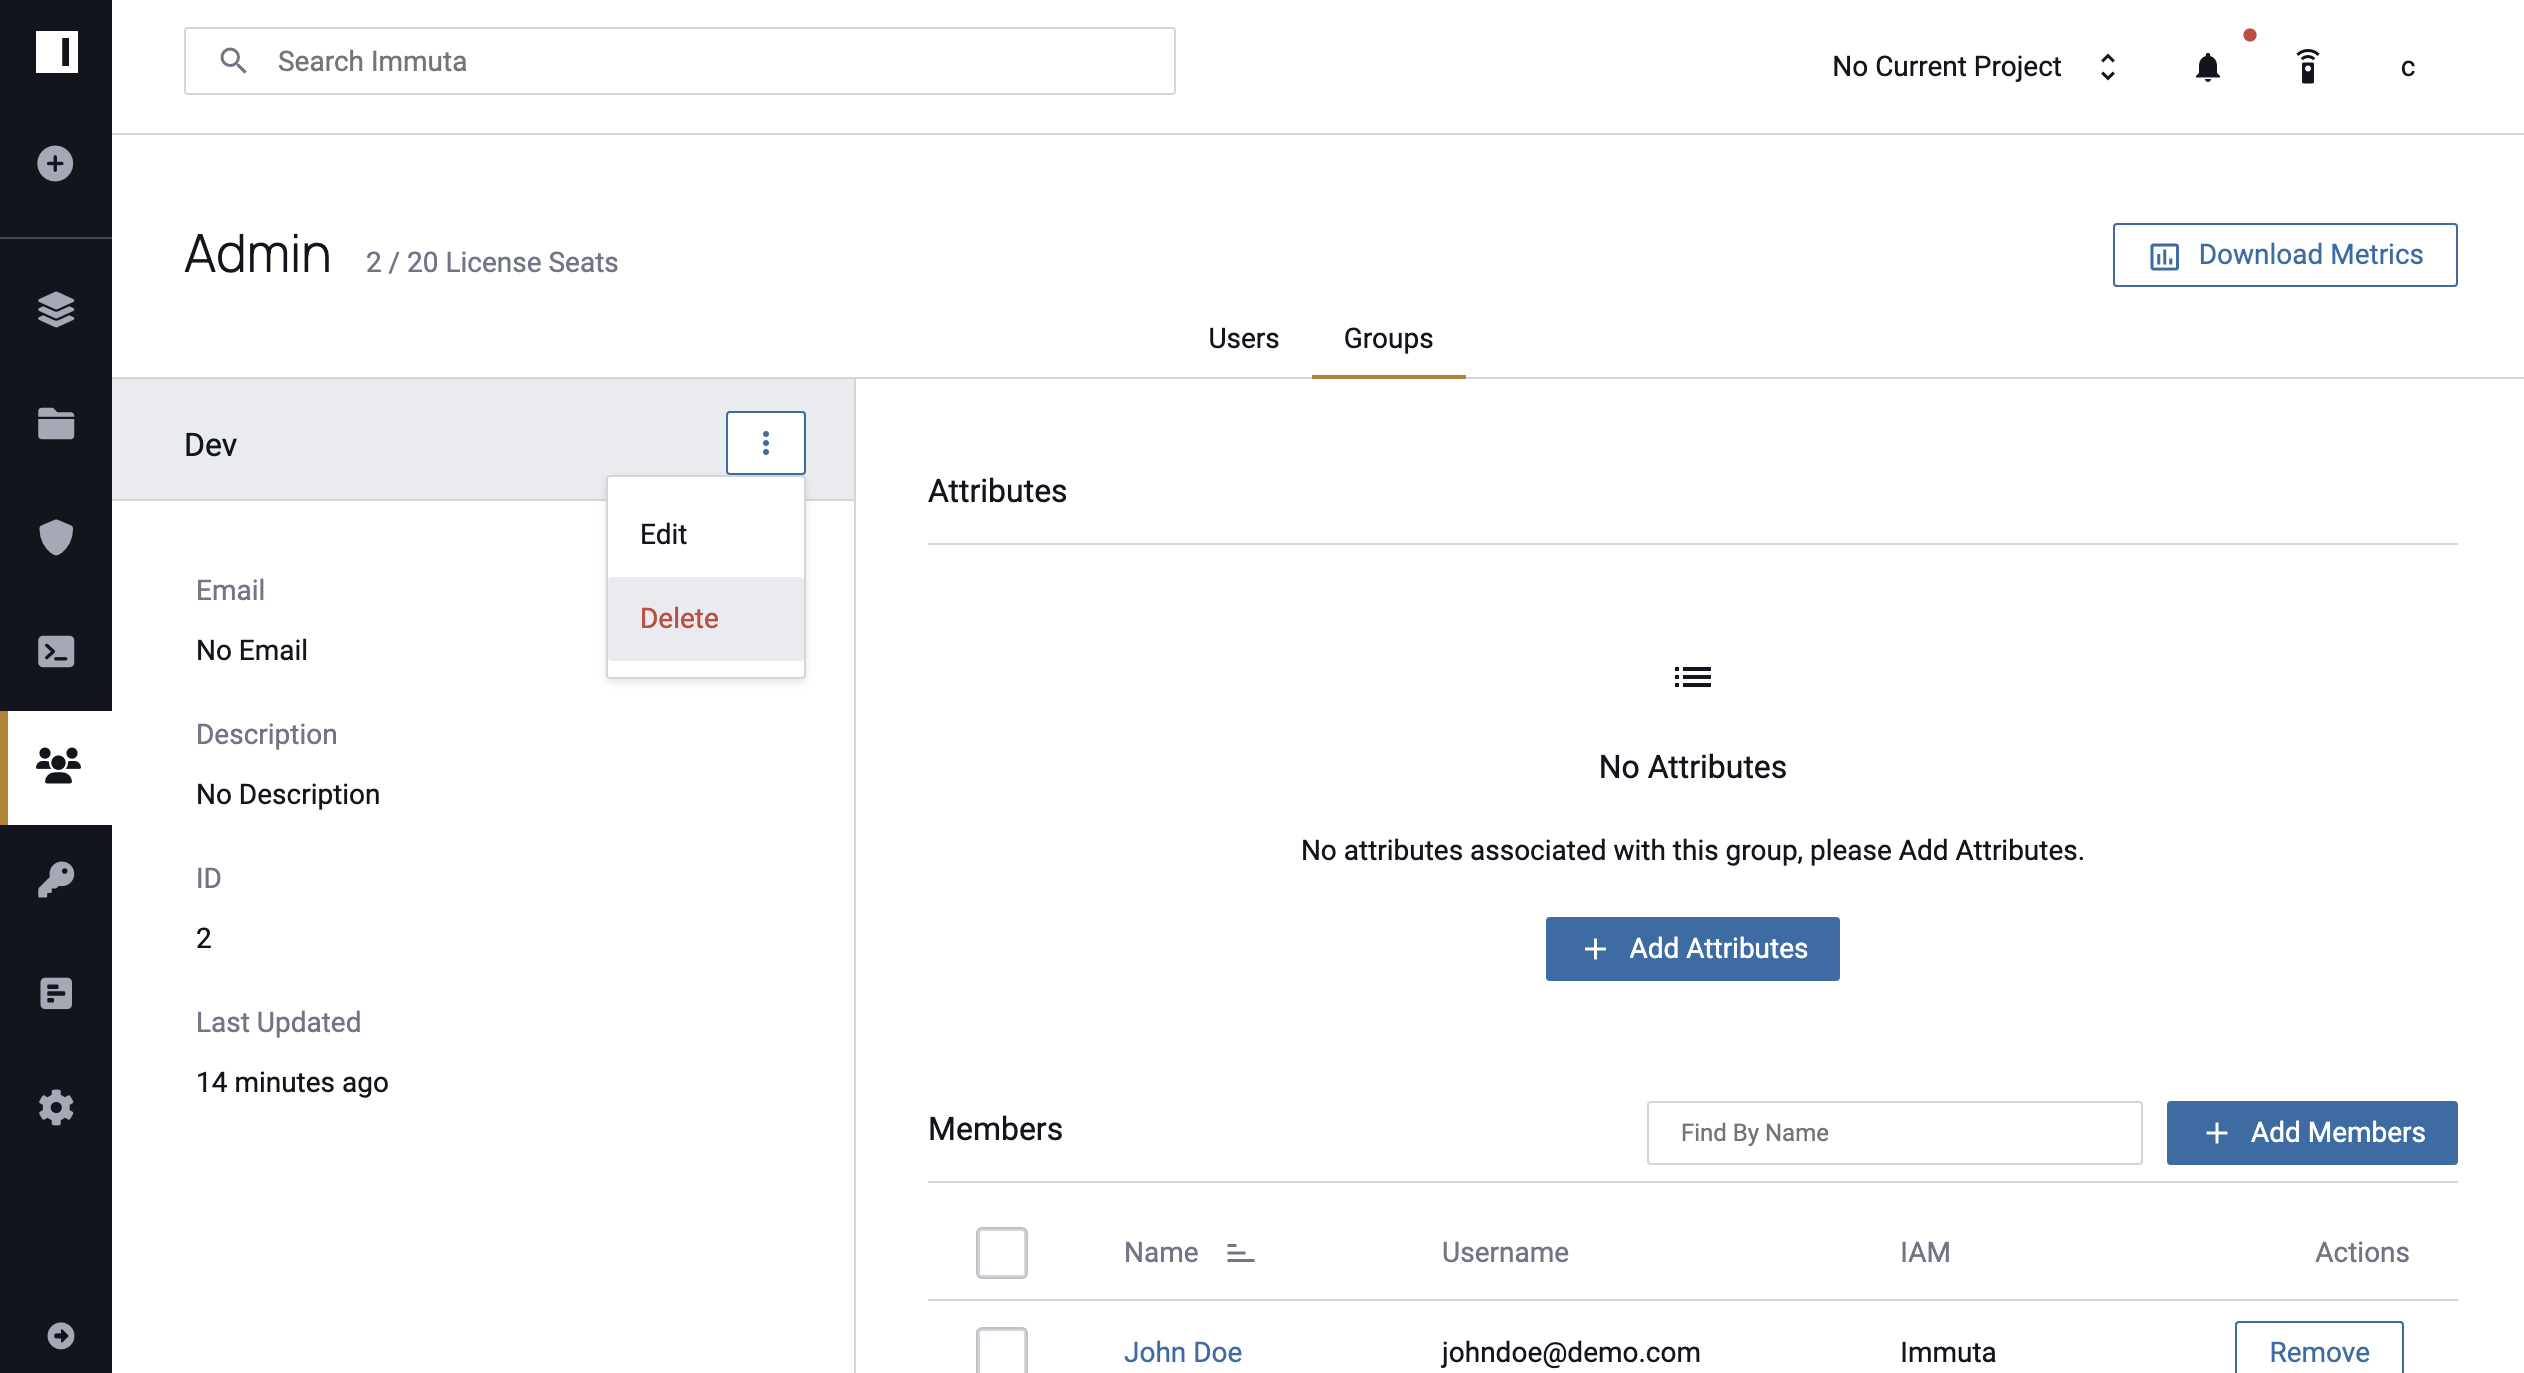
-
Click Delete to confirm.
Remove User or Group Attribute
-
Click the Admin icon in the left sidebar, and select the Users or Groups tab.
-
Select the user or group you would like to manage.
-
Scroll to the Attributes section, and click Delete to the right of the attribute you would like to remove. Note: This action will remove the attribute and all of its values.

-
Click Confirm.
Remove Attribute Value
-
Click the Admin icon in the left sidebar, and select the Users or Groups tab.
-
Select the user or group you would like to manage.
-
Scroll to the Attributes section, click the menu icon in the Actions column, and click Remove on the attribute value you want to remove.
-
Click Confirm.