Manage Your Snowflake Integration
Audience: System Administrators
Content Summary: This page details how to manage the Snowflake integration.
To install the Snowflake integration, see Snowflake Installation Introduction.
Migrate from not Using Snowflake Governance Features to Using Snowflake Governance Features
Migration Troubleshooting
- If multiple Snowflake integrations are enabled, they will all migrate together. If one fails, they will all revert to the Snowflake Standard integration.
- If an error occurs during migration and the integration cannot be reverted, the integration must be disabled and re-enabled.
- Click the App Settings icon in the left sidebar.
- Click Native Integrations in the left panel.
- Scroll to the Snowflake Governance Features modal under Native Integration Settings and check the checkbox.
- Using the credentials entered to enable the Snowflake integration, fill out the Username and Password or Key Pair.
- Click Save.
- Click Confirm.
Migrate Back from Using Snowflake Governance Features to not Using Snowflake Governance Features
Please consult your Immuta professional.
Migration back to using the Snowflake integration without governance features is only intended to resolve any issues that occur during migration and regain utility of Immuta. Please consult your Immuta professional.
Access must be revoked.
Access to the Snowflake tables must be revoked when migrating back to using the Snowflake integration without governance features to prevent users from having access to the raw tables.
- Click the App Settings icon in the left sidebar.
- Click Native Integrations in the left panel.
- Scroll to the Snowflake Governance Features modal under Native Integration Settings and uncheck the checkbox.
- Using the credentials entered to enable the Snowflake integration, fill out the Username and Password or Username and Key Pair.
- Click Save.
- Click Confirm.
Edit a Snowflake Integration
Immuta requires temporary, one-time use of credentials with specific permissions.
When performing edits to an integration, Immuta requires temporary, one-time use of credentials with the following permissions:
- CREATE DATABASE ON ACCOUNT WITH GRANT OPTION
- CREATE ROLE ON ACCOUNT WITH GRANT OPTION
- CREATE USER ON ACCOUNT WITH GRANT OPTION
- MANAGE GRANTS ON ACCOUNT WITH GRANT OPTION
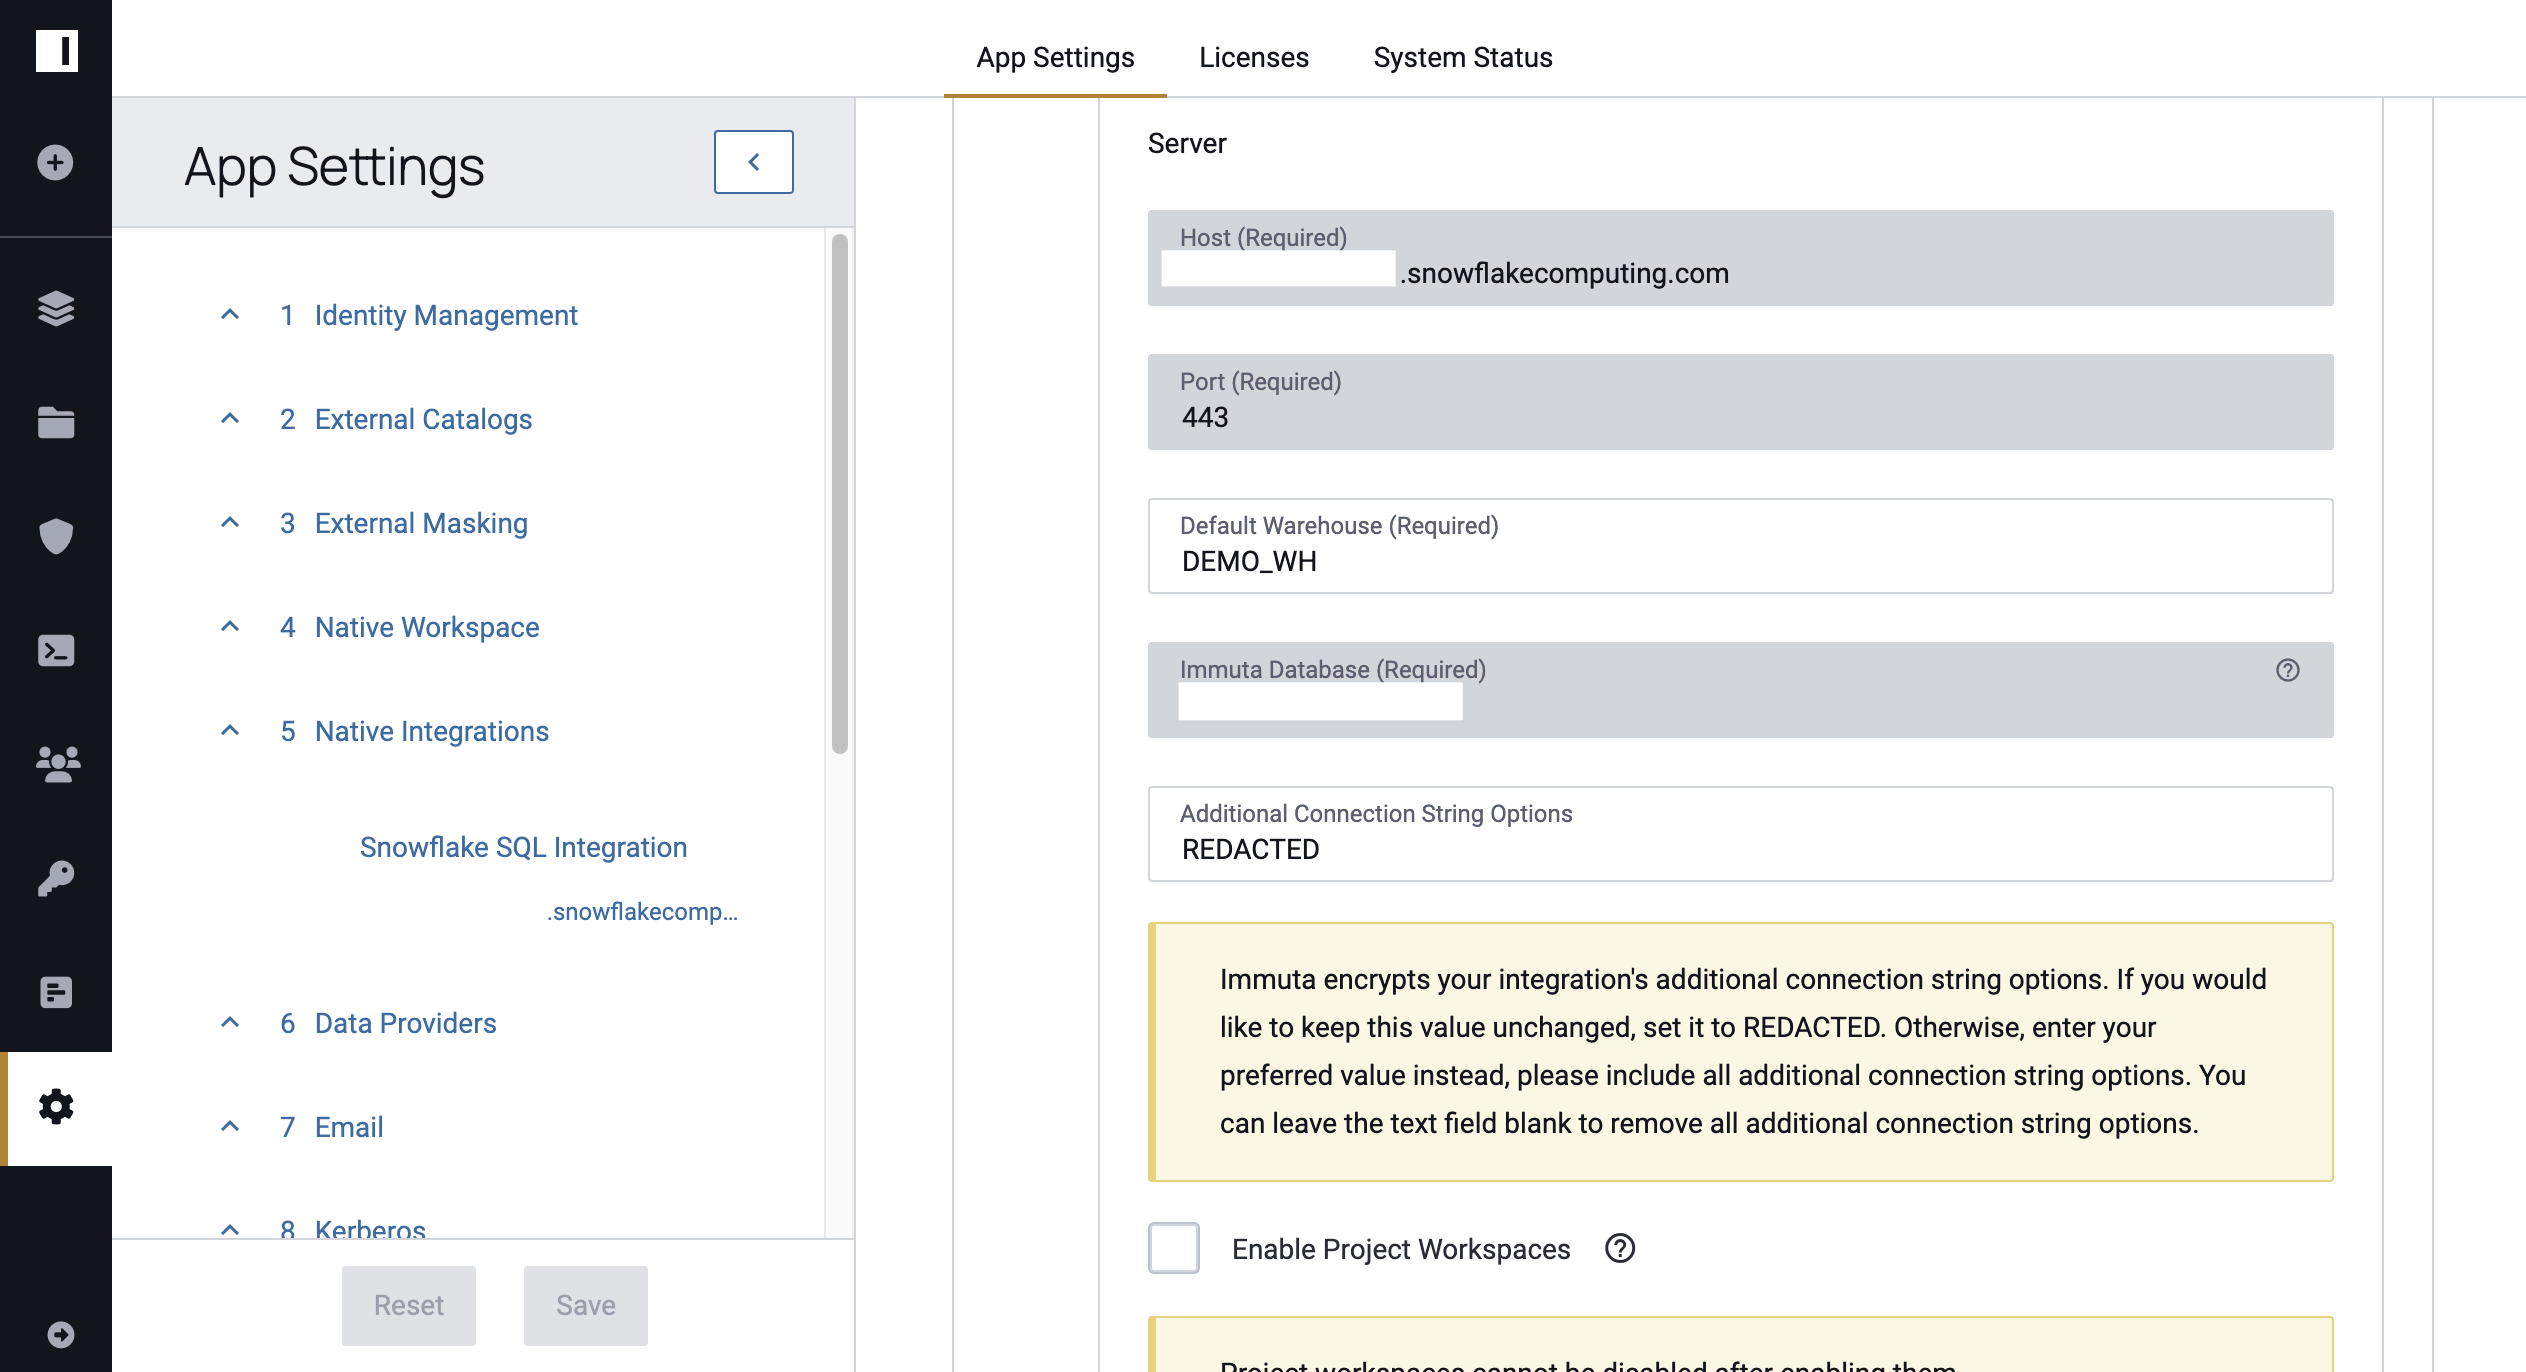
- Click the App Settings icon in the left sidebar.
- Navigate to the Native Integrations section and click the down arrow next to the Snowflake Integration.
-
Edit the field you want to change or check a checkbox of a feature you would like to enable. Note any field shadowed is not editable, and the integration must be disabled and re-installed to change it.
-
From the Select Authentication Method Dropdown, select either Username and Password or Key Pair Authentication:
-
Username and Password option: Complete the Username, Password, and Role fields.
-
Key Pair Authentication option:
- Complete the Username field.
- Click Key Pair (Required), and upload a Snowflake key pair file.
- Complete the Role field.
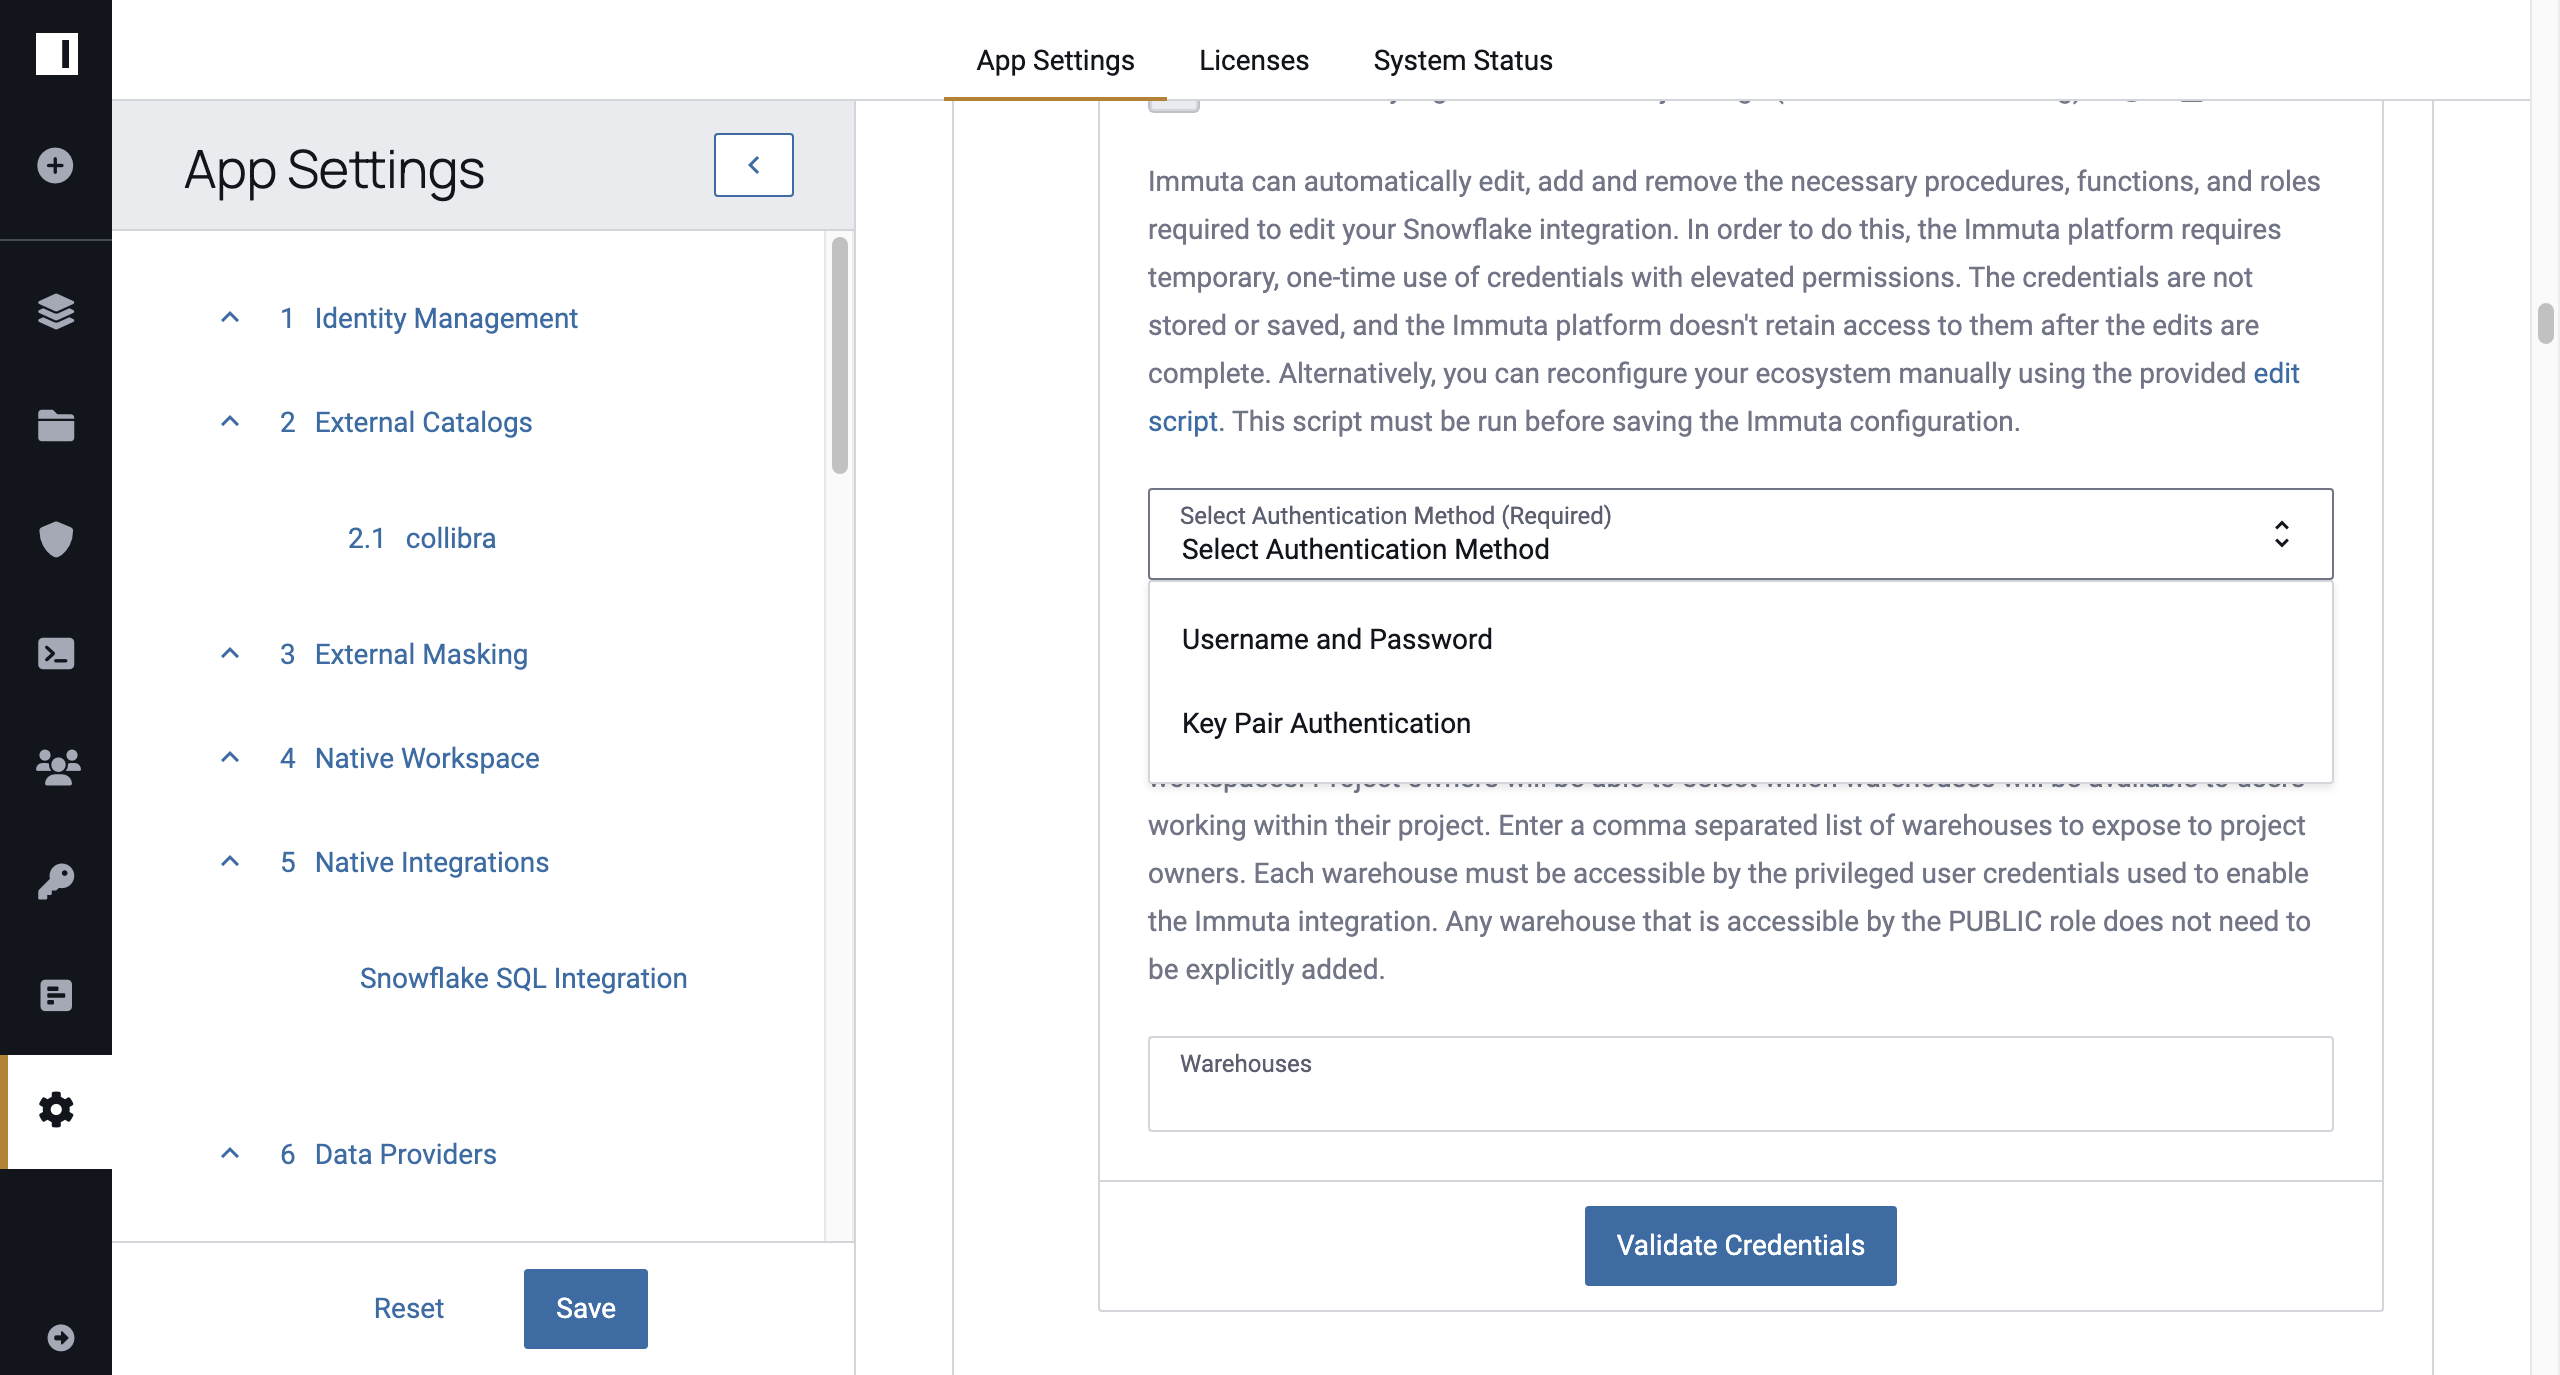
Alternatively, you can download the Edit Script and run it in Snowflake.
-
-
Click Validate Credentials.
- Click Save.
- Click Confirm.
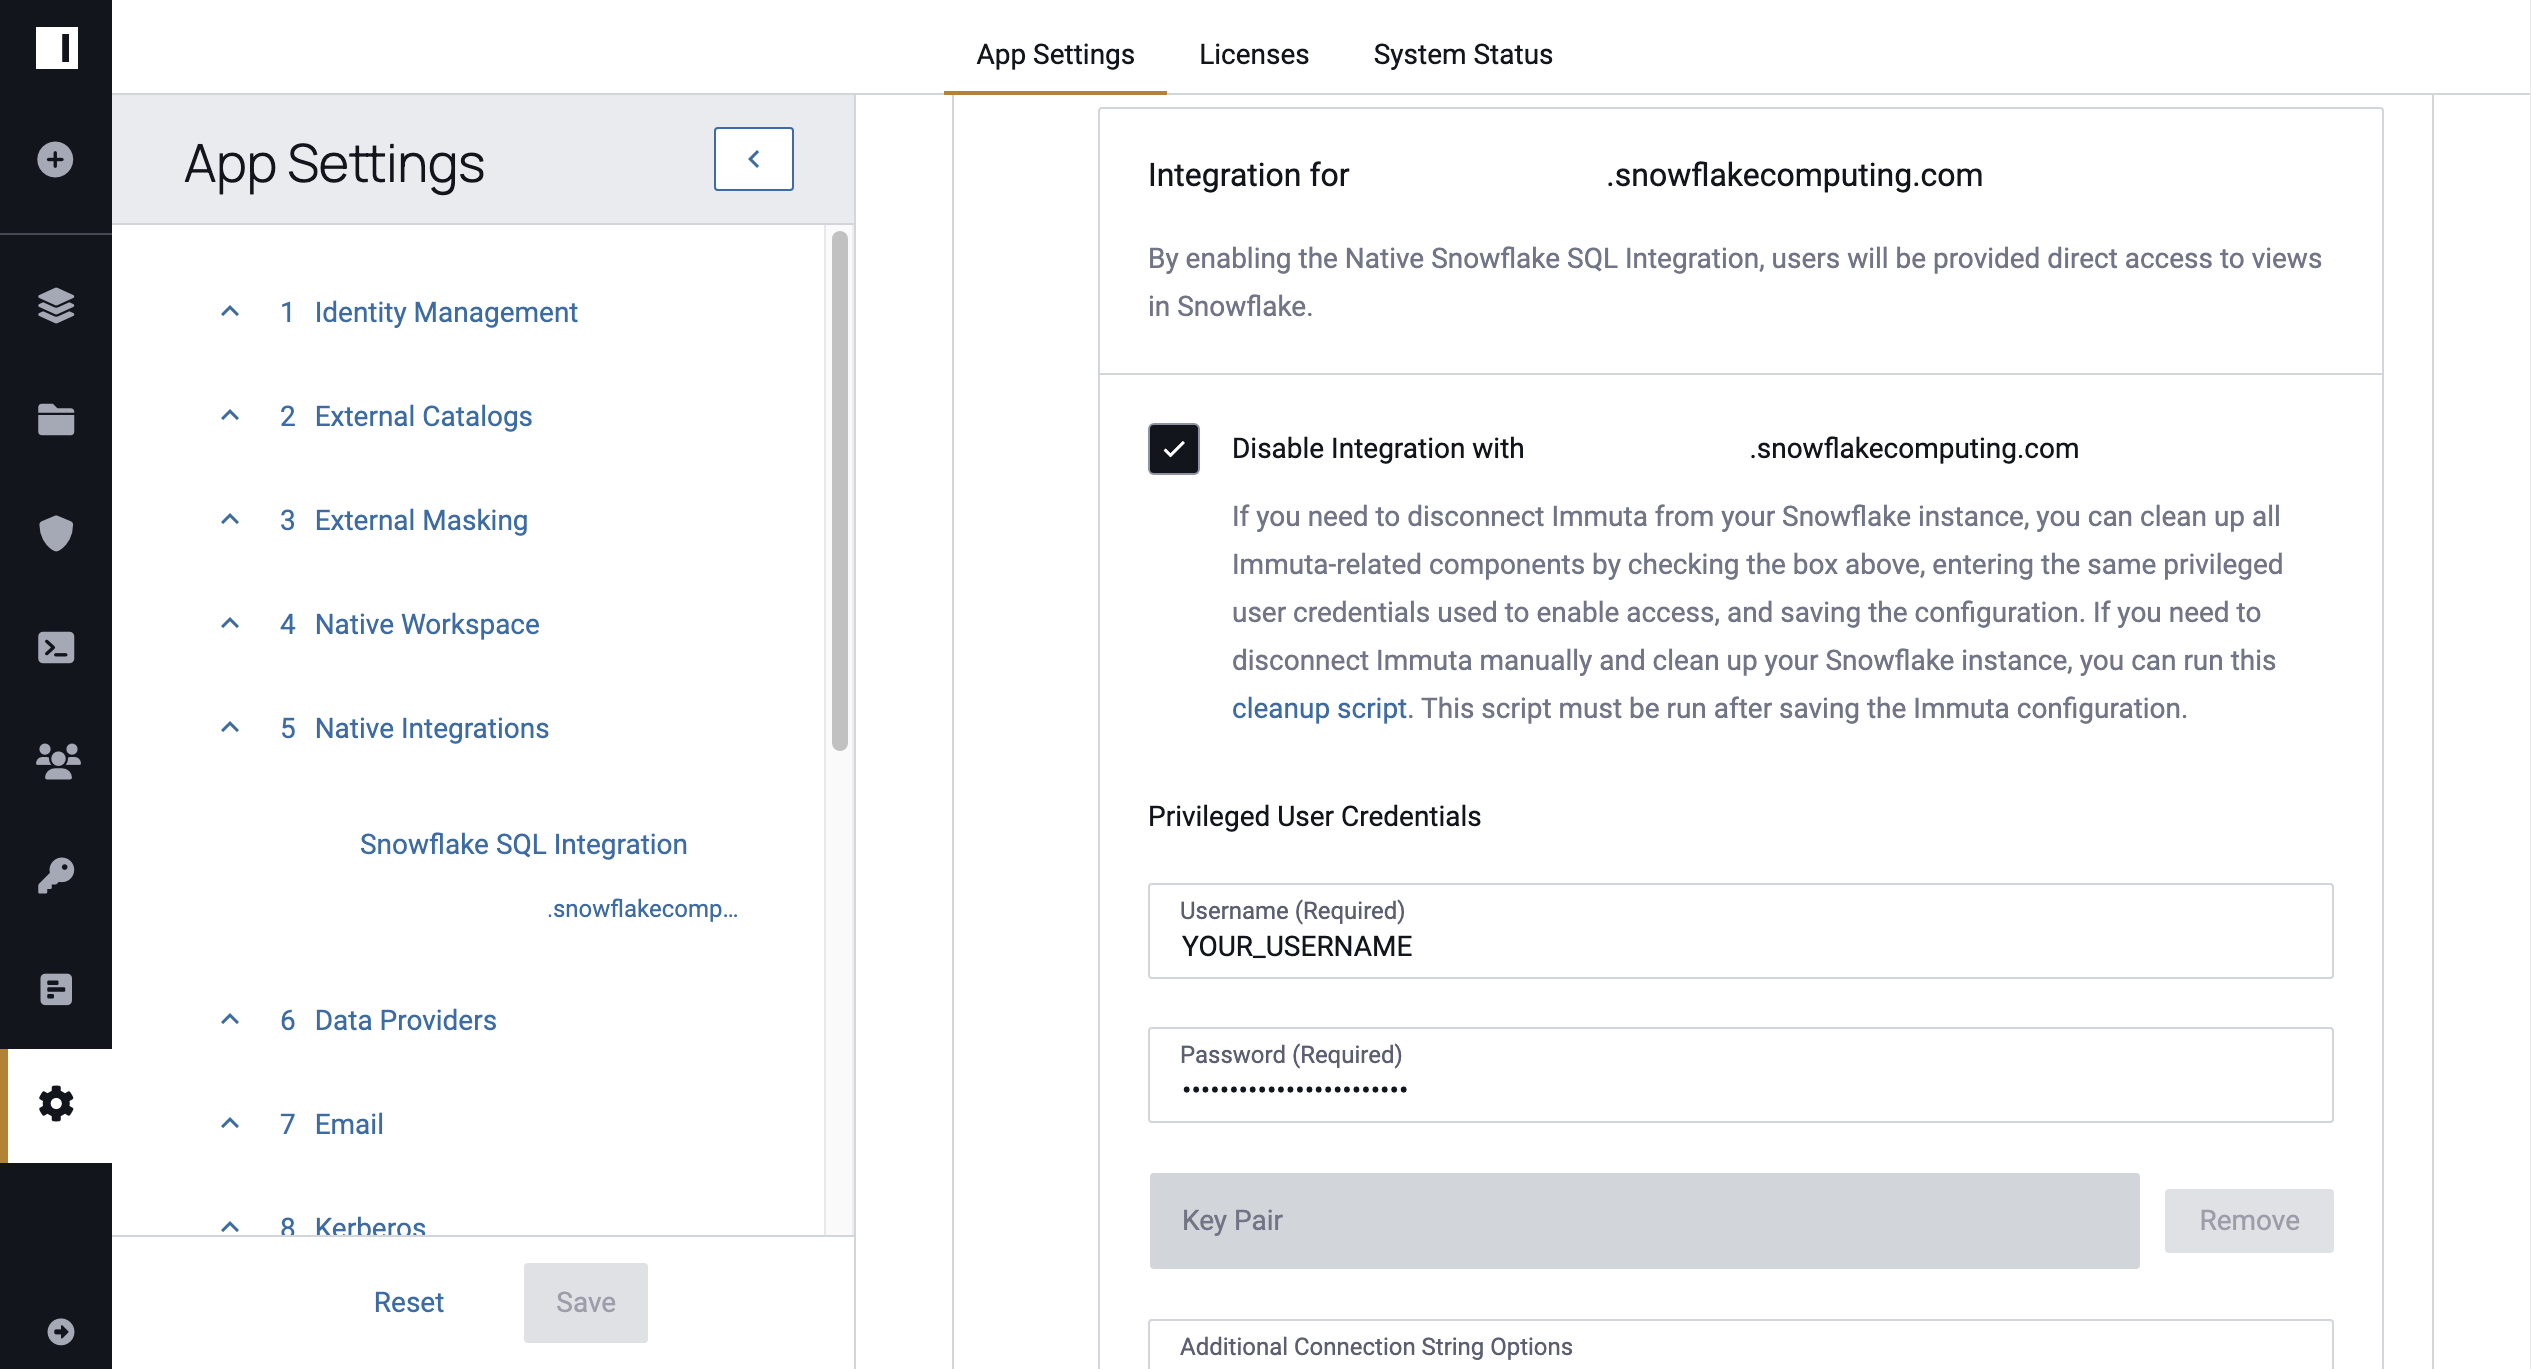
Remove a Snowflake Integration
- Click the App Settings icon in the left sidebar.
- Navigate to the Native Integrations section and click the down arrow next to the Snowflake Integration.
-
Click the checkbox to disable the integration.
-
Enter Username, Password, and Role that was entered when the integration was installed.
Alternatively, you can download the Cleanup Script and run it in Snowflake.
-
Click Validate Credentials.
- Click Save.
- Click Confirm.